
FileRun on Linode

You may want to set up a file server like FileRun for any number of reasons. The main reason, I would think, would be so you can have your own Google Drive alternative that is under your control instead of Google's.
FileRun claims to be "Probably the best File Manager in the world with desktop Sync and File Sharing," but I think you'll have to be the judge of that for yourself.
Just to be completely transparent here, I like FileRun, but there is a shortcoming that I hope they will eventually fix. That shortcoming is that there are some, in my opinion, very important settings that are locked away behind an Enterprise License requirement.
That aside, I really like the ease-of-use and flexibility of FileRun. So let's take a look at it.
Prerequisites for FileRun in Docker
First things first, you’ll need a Docker server set up. Linode has made that process very simple and you can set one up for just a few bucks a month and can add a private IP address (for free) and backups for just a couple bucks more per month.
Another thing you’ll need is a domain name, which you can buy from almost anywhere online for a wide range of prices depending on where you make your purchase. Be sure to point the domain's DNS settings to point to Linode. You can find more information about that here: https://www.linode.com/docs/guides/dns-manager/
You’ll also want a reverse proxy set up on your Docker Server so that you can do things like route traffic and manage SSLs on your server. I made a video about the process of setting up a Docker server with Portainer and a reverse proxy called Nginx Proxy Manager that you can check out here: https://www.youtube.com/watch?v=7oUjfsaR0NU
Once you’ve got your Docker server set up, you can begin the process of setting up your VaultWarden password manager on that server.
There are 2 primary ways you can do this:
- In the command line via SSH.
- In Portainer via the Portainer dashboard.
We're going to take a look at how to do this in Portainer so that we can have a user interface to work with.
Head over to http://your-server-ip-address:9000 and get logged into Portainer with the credentials we set up in our previous post/video.
On the left side of the screen, we're going to click the "Stacks" link and then, on the next page, click the "+ Add stack" button.
This will bring up a page where you'll enter the name of the stack. Below that that you can then copy and paste the following:
version: "2"<br></br>services:<br></br> db:<br></br> image: mariadb:10.1<br></br> environment:<br></br> MYSQL_ROOT_PASSWORD: uAWNCGKSwor7fi<br></br> MYSQL_USER: linodefilerunuser<br></br> MYSQL_PASSWORD: fEpwC92osi3FTW<br></br> MYSQL_DATABASE: linodefilerundatabase<br></br> volumes:<br></br> - /home/docker/filerun/db:/var/lib/mysql<br></br> networks:<br></br> nginxproxymanager_default:<br></br><br></br> web:<br></br> image: filerun/filerun<br></br> environment:<br></br> FR_DB_HOST: db<br></br> FR_DB_PORT: 3306<br></br> FR_DB_NAME: linodefilerundatabase<br></br> FR_DB_USER: linodefilerunuser<br></br> FR_DB_PASS: fEpwC92osi3FTW<br></br> APACHE_RUN_USER: www-data<br></br> APACHE_RUN_USER_ID: 33<br></br> APACHE_RUN_GROUP: www-data<br></br> APACHE_RUN_GROUP_ID: 33<br></br> depends_on:<br></br> - db<br></br> links:<br></br> - db:db<br></br> ports:<br></br> - "8200:80"<br></br> volumes:<br></br> - /home/docker/filerun/html:/var/www/html<br></br> - /home/docker/filerun/user-files:/user-files<br></br> networks:<br></br> nginxproxymanager_default:<br></br><br></br>networks:<br></br> nginxproxymanager_default:<br></br> external: true
This Docker compose file / stack tells the system to download the latest filerun/filerun image to the Docker server, attach it to the "nginxproxymanager_default" network, mount it to the directory "home/docker/filerun", and make it available on the docker server's port 8200. The same general principle applies to the mariadb container that we'll use as the database, just with different files and volumes.
You can change the path of where you'd like to store the filerun data if you'd like. Just make sure that the folder has the correct permissions to be written to.
Once you're happy with the settings here, we can deploy the container by clicking the button that says "Deploy the stack".
This will start the process of downloading and deploying FileRun on your server. You'll know that the container has been deployed once the page reloads and you see all your running containers.
Now you can go to http://your-server-ip-address:8200 and you should be able to see the setup screen for FileRun.
STOP.
In order for you to actually be able to use FileRun effectively, it needs a domain name and SSL.
Setting up a domain and SSL
Head back over to your Linode dashboard and go to "Domains". Then find the domain that you added to your account. Click it and then look for the CNAME section of the domain management.
Add a CNAME to your domain by entering a hostname entry for what you'd like your subdomain to be. In the example video, I entered "pw" (without the quotes). Below that, I entered the @ symbol in the "Alias to" box and then clicked "Save".
Now that you have that done, we can head over to Nginx Proxy Manager and setup our SSL and domain.
Now you can go to http://your-server-ip-address:81 and you should be able to see the login screen for Nginx Proxy Manager.
The default credentials for Nginx Proxy Manager are:
Email:    admin@example.com
Password: changeme
Enter those credentials (or yours if you've updated them) to login to your Nginx Proxy Manager instance.
Click on the tab at the top of the page that says "SSL Certificates" and then click on the "Add SSL Certificate" button near the top right of the page.
Next, click the "Let's Encrypt" option.
On the pop-up window that appears, enter the full URL of the domain you'd like to secure and press the "Enter" key on your keyboard. In this example, you would enter https://files.yourdomain.com.
Once you've entered your URL, click the "Test Server Reachability" button right below that. If you get an error message, be sure to correct the issue and try again. If no errors are returned, make sure the email address on the page is correct, then read and agree to the Let's Encrypt Terms of Service and click the "Save" button.
It may take a minute or two for the system to generate and install the key, but when it's done, the page will reload and you'll be able to see all of the available SSLs in Nginx Proxy Manager.
Now that we have our SSL set up on our system, we can click the "Hosts" tab across the top of the page. Then click the "Proxy Hosts" option that shows up in the sub-menu.
Locate the "Add Proxy Host" button near the top right of the page and click it.
A new window will pop up and we're going to fill in some options to configure our domain.
Enter the domain or subdomain you just created the SSL for.
Leave the Scheme as http.
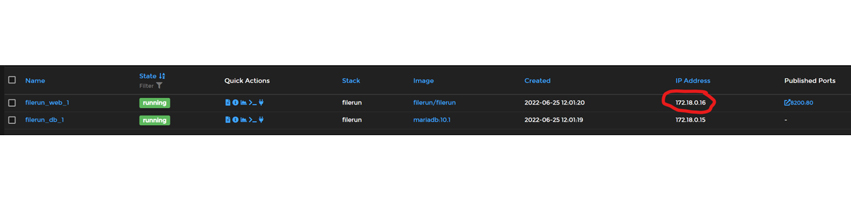
Enter the IP address of your container. This can be found in Portainer:
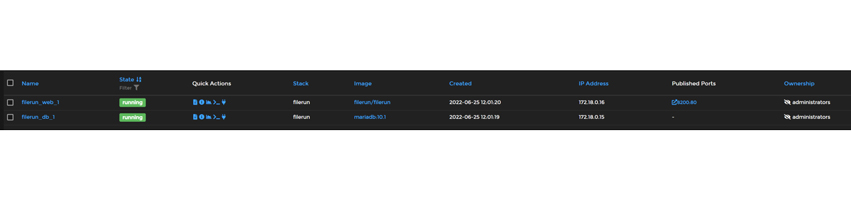
For the "Forward Port" textbox, enter the container port. In this case it's 80. The 8200 that we see in the "Published Ports" section of the image above is what we'll call the Docker port. We want the port on the container side of things so we'll use the number on the right side of the semicolon.
Click the options for "Cache Assets," "Block Common Exploits," and "Websocket Support."
Now click the "SSL" tab on the top of the pop up window.
You'll see a dropdown that says "SSL Certificate" and, below that, "None."
Click "None" and then select the SSL you created in the previous steps.
Now check the 4 options that are below that, then read and agree to the Let's Encrypt TOS and then click Save.
After a moment, the page will reload and you should see your new entry in the Proxy Hosts page of Nginx Proxy Manager.
Configuring FileRun
Now you should be able to go to https://files.yourdomain.com and you should see the same set up prompt that we saw earlier. The process is simple enough as you'll just need to click through each screen and make sure that all the settings look the same as what you set up in your docker-compose/stack earlier.
Once you've gone through all the steps you'll be given a username and password. Store those for later so we can use them to login. Don't worry, though. You can change the default credentials once you've logged in.
You can now create users and upload files and do (almost) all the stuff you would expect to do with your own semi-self-hosted file server solution.
You can watch the tutorial here:
Recent Articles


