
New Projects - Fresh from the Labs
Starting off this month we have Bombono: a simplistic DVD authoring program that doesn't have the steep learning curve of many others in its field. According to the Web site: “Bombono DVD is a DVD authoring program for Linux. It is easy to use and has nice and clean GUI (Gtk).”
Also from the Web site, the main features of Bombono DVD are:
Excellent MPEG viewer: timeline and monitor.
Real WYSIWYG menu editor with live thumbnails.
Comfortable drag-and-drop support.
You can author to folder, make ISO images or burn directly to DVD.
Reauthoring: you can import video from DVD discs.
Bombono DVD lets you author DVDs with ease, particularly with these easy-to-make menus that (actually) work.
I found that making chapter points in a video is actually really easy, and these chapters also can be linked to in your DVD menus.

Bombono already has reached the stage of maturity where it can make images and burn them to disc on the fly.
Installation
Binaries are available for Ubuntu, SUSE, ALT Linux and Arch Linux, along with the usual source tarball. For those compiling from source, there are some pretty stringent library requirements. The documentation lists the following:
gtk+ >= 2.8 (www.gtk.org)
gtkmm >= 2.4 (www.gtkmm.org)
SCons >= 0.96.1 (www.scons.org)
GraphicsMagick >= 1.1.7 (www.graphicsmagick.org)
mjpegtools >= 1.8.0 (mjpeg.sourceforge.net)
libdvdread (www.dtek.chalmers.se/groups/dvd)
dvdauthor (dvdauthor.sourceforge.net)
dvd+rw-tools (fy.chalmers.se/~appro/linux/DVD+RW)
toolame (sourceforge.net/projects/toolame)
libxml++ (libxmlplusplus.sourceforge.net)
In terms of packages I needed to install on my own Kubuntu system (obviously some were already in place), I needed: scons, libglibmm-2.4-dev, libxml++2.6-dev, libmjpegtools-dev, graphicsmagick, libgraphicsmagick1, libgraphicsmagick++1, libgraphicsmagick++1-dev and libgtkmm-2.4-dev.
Head to the Web site, grab the latest tarball, extract it and open a terminal in the new folder. Enter:
$ scons
If your distribution uses sudo, enter:
$ sudo scons install
If not, enter:
$ su
# scons install
Once the compilation has finished, you will find it in your menu, or you can start Bombono with the command:
$ bombono-dvd
Usage
A quick note before we jump in: you can use only MPEG-2 .vob files. It's a bummer, I know, so if you have files such as some DivXes you want to include, you're going to have to convert them first. Hopefully, future releases will support DivX, Xvid, MPEG-4 and so on, but for now, you'll have to make do with just .vob support.
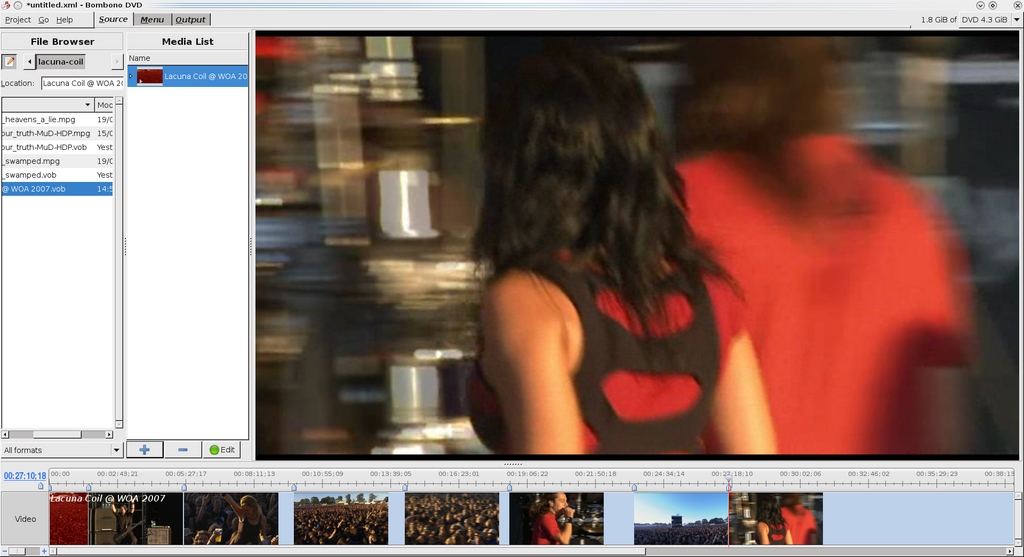
Once you have some .vob files available, start the program, click on the Source tab, and look at the file browser on your left. Locate the files you're going to use, and either drag them across into the Media List pane or click the blue + sign. While we're in the source section, clicking the Edit button when a video is highlighted lets you split the file into chapters using the timeline below (more on that later).
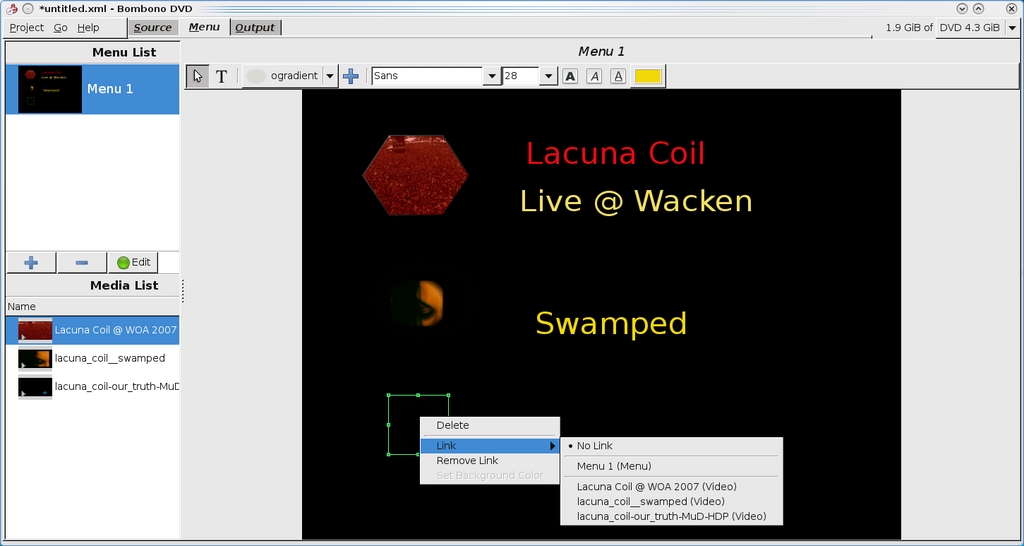
For now, let's move on to the menu tab. Click the + sign in the Menu List pane to create a new menu. Then, you can add a menu object to link to a video along with some accompanying text. To add a menu object, choose the shape of the object you want to add and click the + sign next to it. Once the object has been made, you can move it around the screen or resize it. Now, let's make a link to the video you want to run from the menu object.
Right-click on the object and choose Link→(name of video). Note that if you've edited your videos to include chapters, these chapters can be linked to also, but I don't have the space to cover that here.
Now, let's add some text. You'll be in the standard mode for manipulating the menu objects as signified by the highlighted mouse pointer, but press the T button (as in T for text), and you'll be ready to go. Click next to an object and you'll see a blinking cursor, ready for you to start typing. If you don't like the font size or color, you can change them in the above menu.
With a menu out of the way, let's get back to editing—more specifically, making chapters. Return to the Source tab, and make your way back to the Media List pane. Select the file to which you want to add chapters, and click the green Edit button. Your file now will load up in the big timeline below.
It appears that when you're editing for chapters, if it's not evident where you are from the still image on-screen, you need to play the video in a separate player and take note of what time each point is, as the video does not seem to play in the window itself (although I could be wrong and missing something obvious). However, I found this wasn't really a Herculean task, so it shouldn't be much of a worry.
In the timeline section, the top slider is for browsing around inside the video, where the on-screen image will update depending on the position in time. If you look to the left, the strong blue digital readout will give you the exact time the slider is sitting on. To mark out a chapter, click the blue button underneath the time readout (I'll call it a Chapter Marker), and a Chapter Point will be made under the slider, marked with the same icon as the Chapter Marker. If you want to fine-tune this position at all, you also can slide around the Chapter Point, and if you've made one accidentally, you can right-click and choose Delete Chapter Point.
When you're happy with your soon-to-be DVD, head to the Output tab. Here, you can choose either to write a DVD Folder or make a disk image on hard drive, or you can just burn the project straight to DVD.
Of course, this project has some hurdles to overcome before it's truly ready for the mainstream. The most pressing issue is that you can use only .vob files for now. This is reasonable enough, but when given the often tricky task of converting files, most lazy people like myself are going to throw the whole job in the too-hard basket and go back to playing Half-Life. It'll be truly ready only when you can add almost any video file. This, of course, will require some probable structural changes to the design and coding—perhaps adding a video conversion stage prior to burning—but it still will be necessary.
Nevertheless, the authors have taken a good approach that I respect—keeping it tight and simple to begin with and working properly with the elements they do have, instead of creating an unstable mess with lots of features. This project is simplistic and highly satisfying, and it probably will become a distro mainstay once it reaches fruition. I'm looking forward to the finished product.
According to BuGLe's Web site: “BuGLe is a tool for OpenGL debugging, implemented as a wrapper library that sits between your program and OpenGL.” Although it's still in development, the Web site states that it already can do the following:
Dump a textual log of all GL calls made.
Take a screenshot or capture a video.
Call glGetError after each call to check for errors, and wrap glGetError so that this checking is transparent to your program.
Capture and display statistics (such as framerate).
Force a wireframe mode.
Recover a backtrace from segmentation faults inside the driver, even if the driver is compiled without symbols.
“In addition, there is a debugger (gldb-gui) that lets you set breakpoints and examine backtraces. It also lets you examine OpenGL state, shaders, textures, buffers and so on, and drop into gdb to see what is going wrong.”
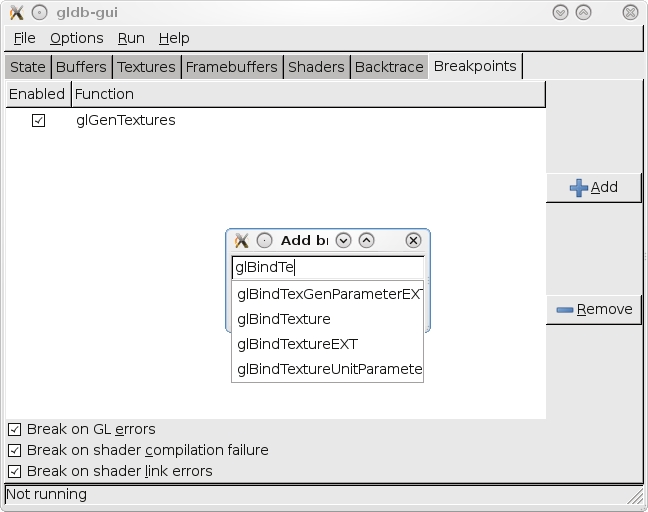
BuGLe is a powerful wrapping tool that can perform certain actions with a program when specified OpenGL functions are called.
A debugger also can be used while a program is running alongside.
Installation
BuGLe is available only as source for the moment, so head to the Web site and grab the latest tarball. As for requirements, the Web site says you'll need the following:
GCC 3.2 or later (4.0 is broken, but 4.1 works).
FFmpeg is needed for video capture.
GNU readline is recommended for history editing in gldb.
GTK+ is required for gldb-gui.
GtkGLExt and GLEW are highly recommended for gldb-gui (without them, the texture display will not work).
I found I also had to grab libgtkglext1-dev as well as libreadline5-dev to access some of the features that are pretty mandatory. I couldn't get my system to recognize libavcodec, which may have caused me some problems later on.
As for compilation, the documentation says you just have to run make to begin with, but I found I had to run the configure script first, or else make would return an error. If I'm right, then you'll need to run these commands:
$ ./configure
$ make
If your distro uses sudo:
$ sudo make install
If your distro doesn't use sudo:
$ su
# make install
I'll quote the documentation directly for the next part: “Next, you need to install some files for the user that will run bugle. Create a directory $HOME/.bugle, and copy doc/examples/filters and doc/examples/statistics into it.”
Usage
Okay, I have to level with you, I didn't get BuGLe to run the way I wanted it to (such as taking screenshots, video and so on). Maybe it was the configure script, maybe it was libavcodec not detecting, or perhaps I'm just dumb and missed something in the interface. I don't know. So why am I still highlighting this program? I see some great potential here, and what may be something very powerful in the future for anyone in the IT industry.
All I can really do is point you in BuGLe's direction and hope you have more luck than I did. I did get some functionality working, including some debugging, so I'll show you at least some basics that a puny mortal like myself managed to grasp.
To run BuGLe at the command line, use the following syntax:
$ LD_PRELOAD=libbugle.so your-program [plus any arguments]
To use the GUI version (much easier), use this syntax:
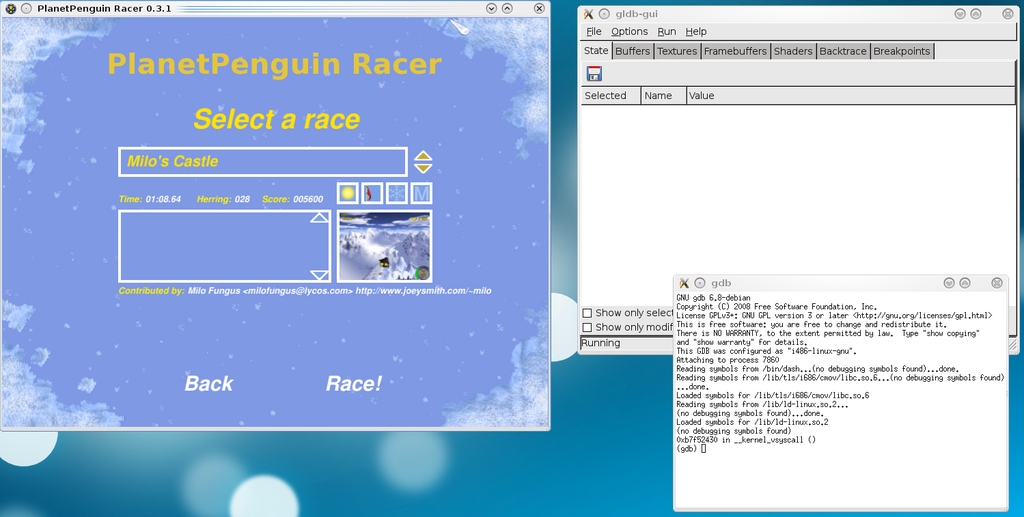
$ gldb-gui your-program [plus any arguments]
This last command starts BuGLe's GUI, but your program won't be running yet. Prior to running something, you can apply certain parameters, such as setting breakpoints on specified OpenGL functions. For information on this, check the Web site's documentation (although it seems to be geared more for other developers than users at this time of writing).
To actually run your program, it's as easy as clicking Run→Run. You can stop a program manually by clicking Run→Stop. The program can be continued with Run→Continue, or continued until the next OpenGL function call with Run→Step, and killed with Run→Kill. Also worth a look is the debugging console, under Run→Attach GDB, which has its own unique set of functions and commands.
And although I couldn't work out how to get these running myself, in the on-line documentation, I found the following instructions for using screenshot/video capture filter sets.
For straight screenshots:
filterset screenshot
{
    filename "screenshot.ppm"
    key_screenshot "C-A-S-S"
}
For captured video:
filterset screenshot C-V inactive
{
    video "yes"
    filename "video.avi"
    codec "mpeg4"
    bitrate "1000000"
    allframes "no"
}
I may not have had much luck with BuGLe's bigger functions, but this is software in its early stages. When this project matures, the coding and its resulting possibilities will no doubt be very powerful—whether you're a graphics developer testing the latest driver or just a journo like me looking to take a screenshot from within a program. And when that's happened, someone probably will come along with a second GUI to use its functions in an alternative way, such as home users taking videos of whatever program they're running. Either way, the potential uses for this project are huge.
Brewing something fresh, innovative or mind-bending? Send e-mail to newprojects@linuxjournal.com.
John Knight is a 25-year-old, drumming- and climbing-obsessed maniac from the world's most isolated city—Perth, Western Australia. He can usually be found either buried in an Audacity screen or thrashing a kick-drum beyond recognition.
