
Installing Ubuntu with Two Hard Drives
Many computers these days come with two hard drives, one SSD for fast boot speeds, and one that can be used for storage. My Dell G5 gaming laptop is a great example with a 128GB NAND SSD and a 1TB SSD. When building out a Linux installation I have a few options. Option 1: Follow the steps and install Ubuntu on one SSD hard drive for quick boot times and better speed performance when opening files or moving data. Then mounting the second drive and copying files to it when I want to backup files or need to move files off the first drive. Or, Option 2: install Ubuntu on an older hard drive with more storage but slower start up speeds and use the 128GB as a small mount point.
However, as most Linux users are aware, solid state drives are much faster, and files, folders, and drives on a Linux system all have mount points that can be setup with ease.
In this article we’ll go over how to install Ubuntu Linux with separate /root and /home directories on two separate drives – with root folder on the SSD and home folder on the 1TB hard drive. This allows me to leverage the boot times and speed of the 128GB SSD and still have plenty of space to install steam games or large applications.
This guide can also be used for other use cases as well. An example would be old or cheaper laptops that don't have hard drives with high RPM spinning SSDs. If your computer is a bit on the older side (and has an SD card slot) but you want to utilize faster boot times, you can go out and buy an SD card and install the /root partition onto that for quick boot times, and the /home partition on the main drive for storage. This guide, like Linux, can be used for many other use cases as well.
Prerequisites- Latest Ubuntu ISO Image
- Etcher USB imaging tool
- USB storage drive with at least 4GB
Making a bootable USB disk
In this guide we will start by downloading the latest version of Ubuntu Linux, our distro of choice. You can choose other distros, but the images and steps may vary. The Ubuntu version at the time of this guide is 20.04.1. Once you have the ISO file downloaded you can then download the Etcher USB imaging tool. I have found this to be the quickest and most straightforward easy-to-use tool for creating bootable USB images on any operating system.
Once Etcher is install you can quickly choose “Select Image” and find the Ubuntu ISO file you just downloaded and select it. Insert your USB drive and Etcher should auto detect if it its the only USB drive connected to your machine. From there you can just click “Flash” button and Etcher will handle the rest of the disk creation process. Once completed you can safely remove the usb and use this to install Ubuntu on your computer with dual hard drives.
Setting up BIOS, configuring the boot order
To boot into Ubuntu you’ll have to configure the BIOS on your computer. You may need to change the boot order to point to USB so that when you boot up your computer next time it boots into the Ubuntu live USB. To get into the BIOS, reboot with the USB in, and press the correct key (for Dell computers you can press F12). Find where the option is to enable booting from USB and enable it.
If your PC does not support booting from USB, burn the Ubuntu iso image to a DVD. and change the boot order to boot from CD/DVD first. Once we finish the installation you should change the boot order to boot into the SSD hard drive.
How to install Ubuntu with two hard drives
When Ubuntu first loads, the welcome screen appears with two options. Select the “Install Ubuntu” button.
![]()
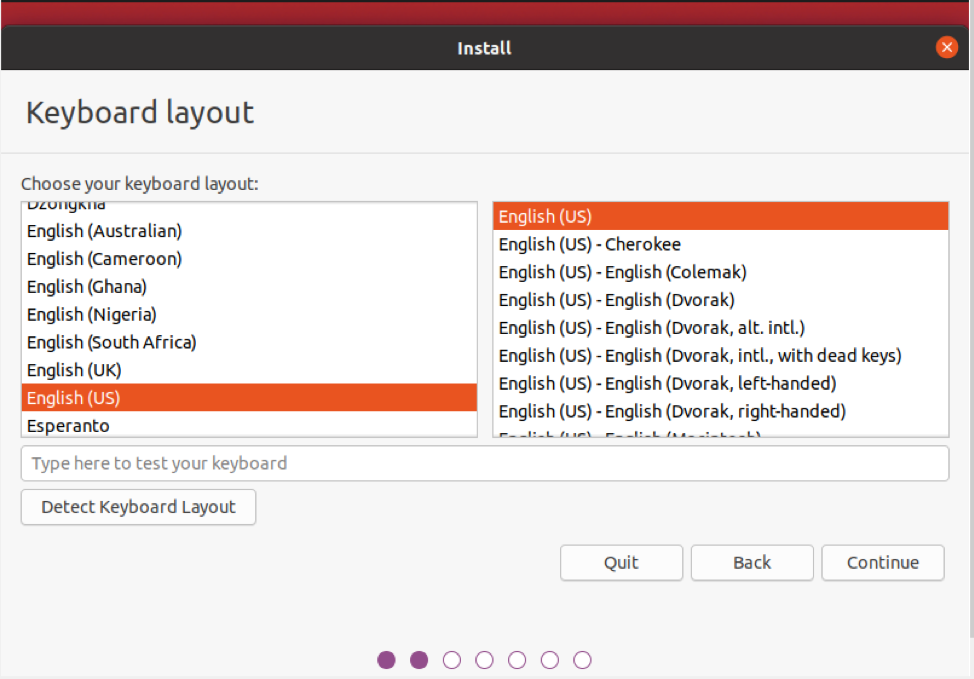
Then choose your language (English) to continue.
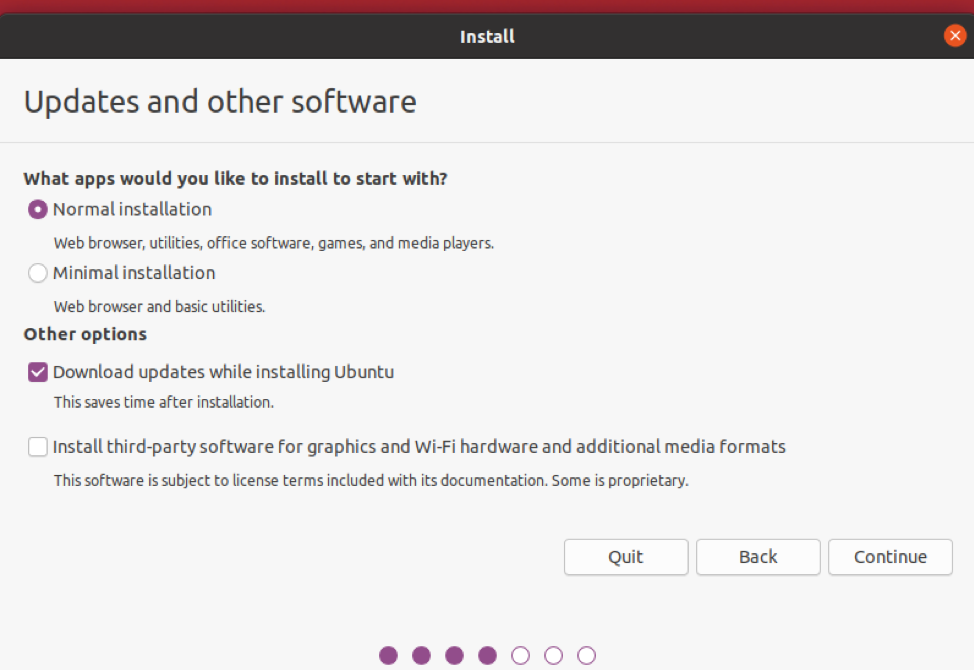
On the next page the installation will ask about updates and other software. These options can be skipped if need be. They don't affect the this guide but can be helpful with specific audio codecs and drivers needed for your machine.
After choosing or selecting both boxes on the “Preparing to install Ubuntu” page, it will be time to select the installation type. There are many. However, with this tutorial the option required is the custom one. To get to the custom installation page, select the “something else” box, then click continue.
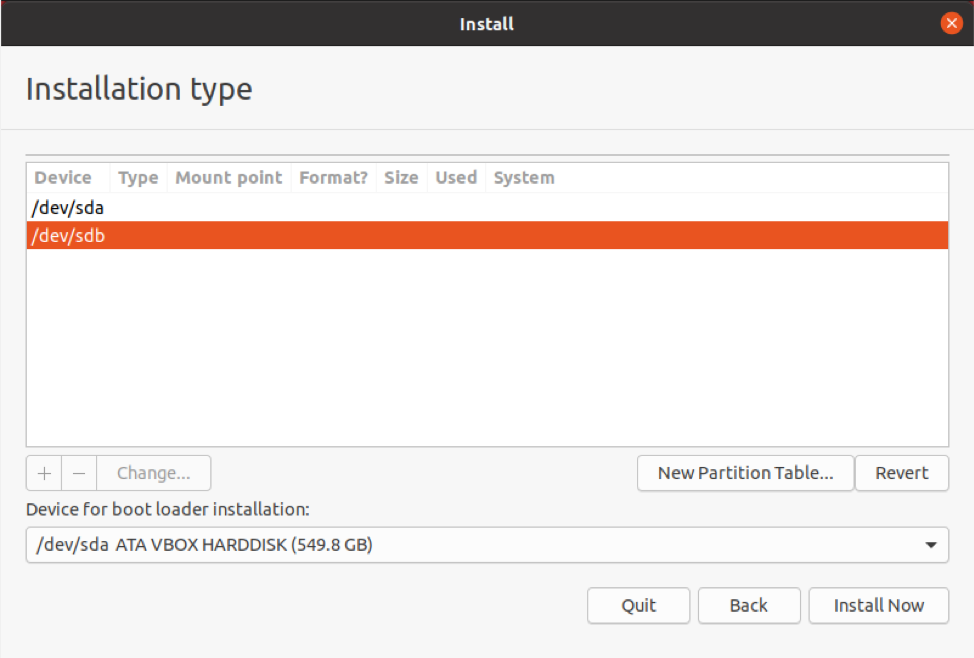
This next step will point you to the Installation type option.

It will show any and all disks that can install Ubuntu. If two hard drives are available, they will show up here. If an SD card is plugged in, it will also show up.
Partition Setup for Root / dir
Select the hard drive that you plan to use for the root file system, in this example it will be the 128GB SSD. If there is already a partition table on it, the editor will show partitions. Delete all of them, using the tool. If the drive isn’t formatted and has no partitions, select the drive, then click “new partition table.” Do this for all drives so that they both have partition tables. These steps have options for formatting the hard drives as well, which should be done.
Now that both drives have partition tables (and partitions deleted), the configuration can begin. Select the free space under drive one, then click the plus sign button to create a new partition. This will bring up the “Create partition window.”
Boot Drive UEFI setup
With my Dell G5-5587 laptop I am using UEFI mode so with this root drive I will be creating a boot drive and select “/boot” as the mount point for this partition as well.
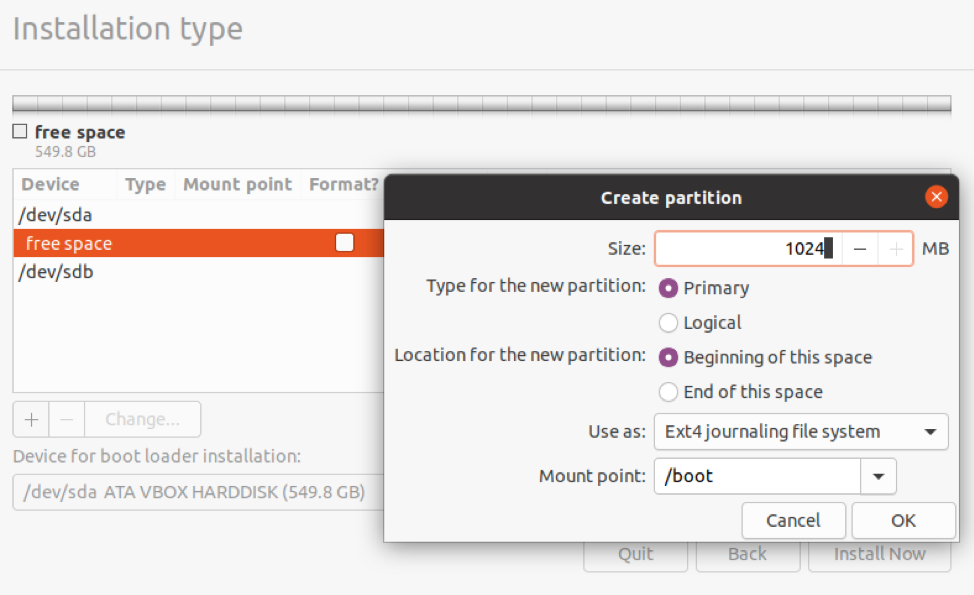
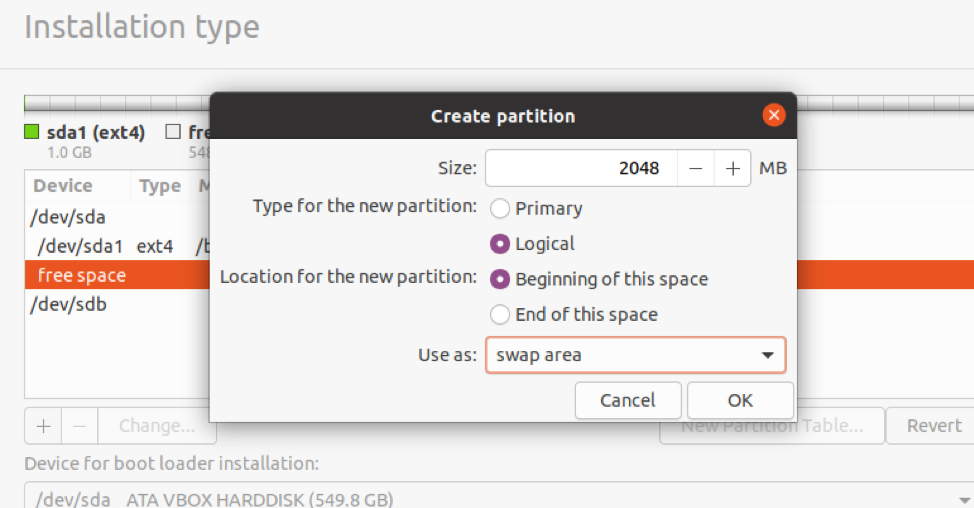
If you require Swap storage, create another partition on the drive before making the partition used for root “/”. This can be done by clicking the “+” (plus) button, entering the desired size (1024 for 1GB, 2048 for 2GB), and selecting “swap area” in the drop-down.
Root Drive setup
Once you have those selections setup (swap drive is optional) you can use the rest of the drive for the root partition. Go to the “Mount Point” drop-down menu. Select / as the mount point, then the OK button to confirm the settings.
Partition Setup for Home /home dir
For the second drive select /home as the mount point. This will allows your home folder to be set on the 1TB hard drive. You will be able to install Steam and download games, or download files and documents from the internet and have it go to your downloads folder without having to worry about setting up different drive or pointing to a new folder. You have 1TB of space to play around with.
Create the home partition using the same steps as above. Use all the available free space left for the home partition size. The partition settings should look like this:
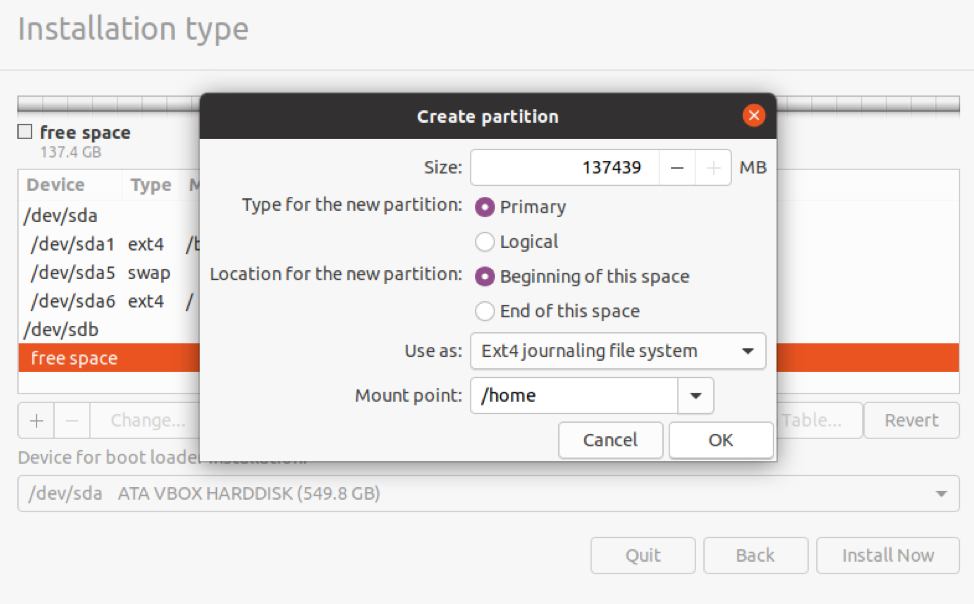
- Size = All remaining free space
- Type for the new partition = Primary
- Location for the new partition = Beginning
- Use as = EXT4 journaling file system
- Mount point = /home
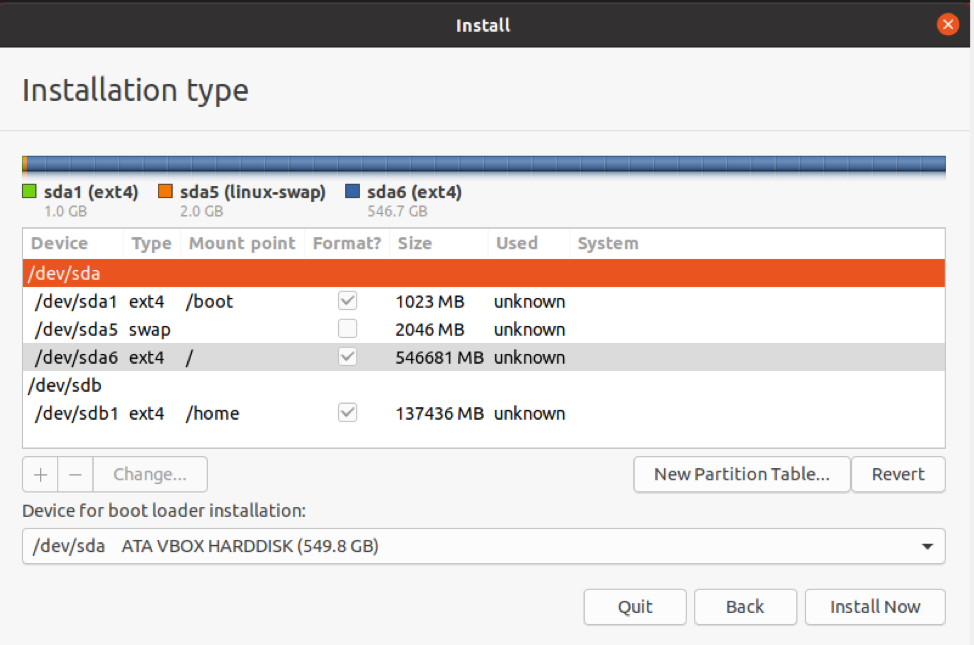
With both drives set up, select the correct drive the boot loader will go to, then click the “install now” button to start the installation process.
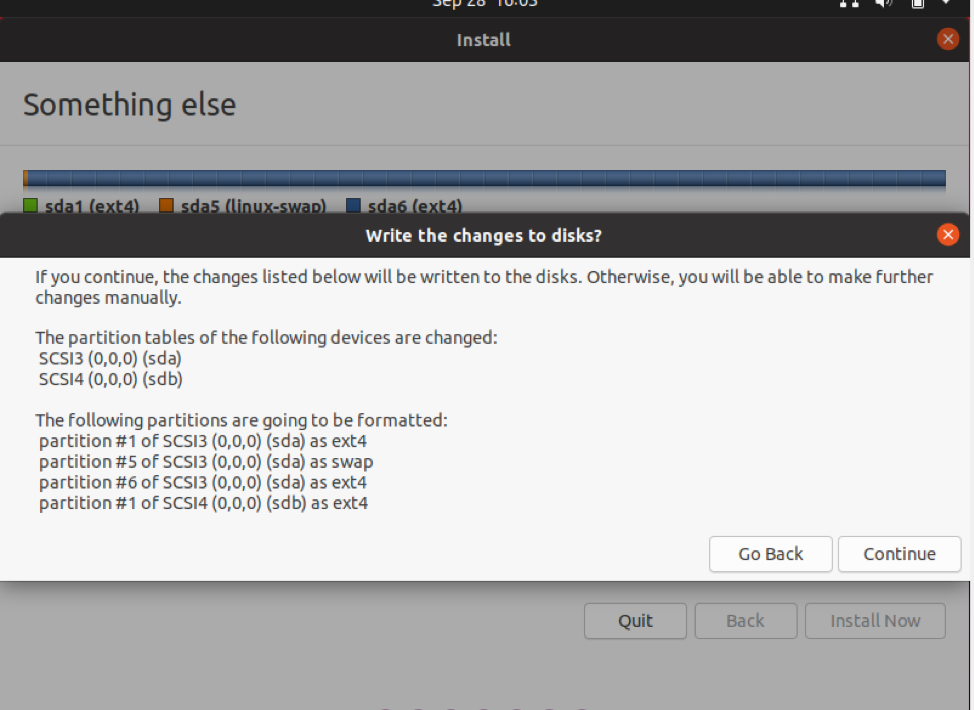
The installation process from here is the standard installation. Select a time zone, create a username, computer host name, create a password. Once completed, you're all set. You can remove the USB thumb drive and reboot your machine when prompted.
Conclusion
The best thing about Linux is its versatility and how configurable it is. Most operating systems don't give you all the options that Linux does. Whether you're reading to learn how to install Ubuntu or just want to learn something about Linux, I’m hoping this did both of those for you.

Tedley is a certified Linux Engineer who takes pride in advocating open source approaches to business. If he is not arguing with friends about switching to Linux, his time is mostly spent playing DnD, board games, fighting games, or contributing to open source by means of blogs, educational plans, and applications. You can find him on LinkedIn or Twitter.

Recent Articles


