
New Projects - Fresh from the Labs
Developed by Australian PhD student Shekhar Chandra at Monash University, Discrete Geometry Viewer (DGV) is an intriguing piece of software. As a general package, DGV, along with its various extensions, is a quantum mechanical toolkit and 3-D viewer for C++. It allows data visualisation via images, surface and volume plots using OpenGL, as well as rapidly developed Quantum Mechanical Simulations. It uses the Blitz++, VTK visualisation and open-source Qt libraries.
Breaking all that down, DGV allows you to do some really cool things with images, whether your interest is scientific or purely artistic. The program started out as a theoretical physics project under the moniker Quantum Mechanical Simulator, and Shekhar's main issue was in viewing the actual data, so he wrote DGV to fill the gap. As time goes on, Shekhar will be adding more of his PhD research work into DGV.
Quoting Shekhar, future advancements will include:
Pixel values within viewer.
Saving animations.
Python shell rather than simple console output. See my project called QPythonShell, which allows one to embed a Python shell into Qt applications.
More file formats.
More transforms, like the Number Theoretic Transforms (via my new Number Theoretic Transform C library).
Installation
Click on the Download link at the main Web site, and you'll be taken to a SourceForge page of hosted files. Under the Discrete Geometry Viewer heading, grab the latest package according to your system. Provided are x86 binary tarballs for Linux and Windows, as well as a source tarball. I went with the binary, which didn't have any dependency issues on my system and ran straight off the bat.
You can compile from source if you really want to—especially if you don't have an Intel-based machine—but the list of requirements is fairly stringent and may be a little obscure for many systems (see the project's Web site for more details).
Download and extract the tarball, and open a terminal in the new folder. To run the program, enter:
$ ./dgv
Usage
First, you need to import a picture. Any picture will do, but in terms of number crunching, something with a smaller resolution (say 800x600) and common aspect ratio (such as 4x3 or 16x9) will make things easier, as both you and the computer will end up doing a fair bit of mathematical work. Open whichever image you like with File→Open, and the image will come up on-screen. The image that appears probably will be in grayscale depending on the release version, but don't fret, it isn't necessarily going to stay that way.
Now, let's go straight to the program's coolest ability. Right-click on the image and choose Surface Plot with Image from the drop-down box. Then, wait a while. There's a lot of math to be crunched, but it will be a quick process if you're lucky. A new 3-D landscape now will be on-screen (and back in color), which can be moved and rotated in real time and viewed at any angle.
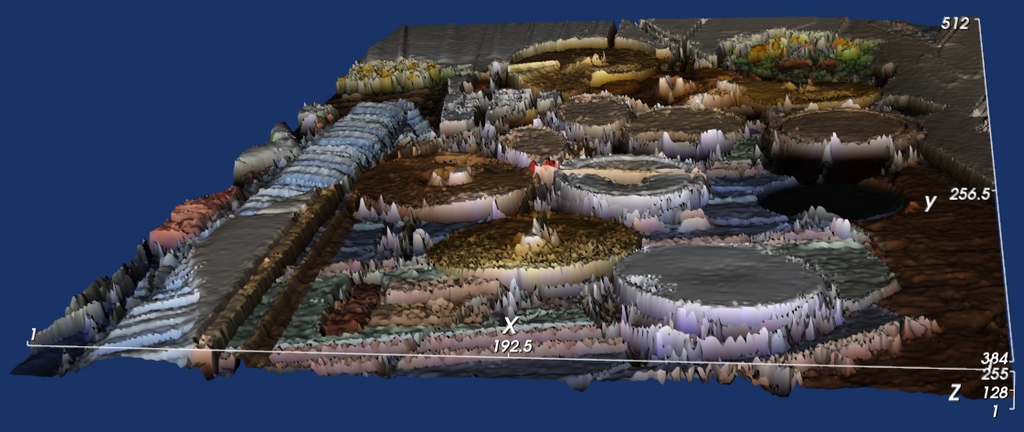
DGV Creating a 3-D Texture from a Photo of My Old Drumkit

My Old Drumkit
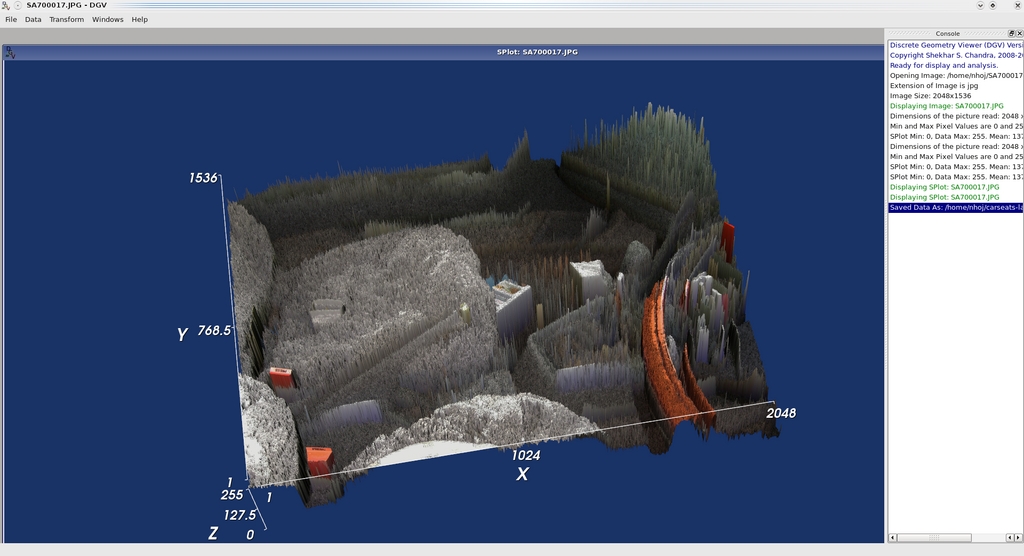
DGV made this amazing 3-D landscape from a picture inside my car!
Left-click and move the mouse forward and backward, and the world tilts accordingly. Move the mouse right or left, and the world spins in that direction. Hold Ctrl while moving the mouse, and the image rotates in front of you as if it were on a 2-D plane, clockwise or anti-clockwise. Hold Shift or your middle mouse button, then move the mouse, and you can physically drag the object horizontally or vertically within your screen.
If you find the default values and the landscape they spawn a little crude (or even a little subtle), right-click on the image and choose Scale Factor. Decrease the given value, and the resulting terrain becomes smaller and closer to the original image. This can be used to apply some very subtle image enhancements to great effect. Increase the given value, and the bumpiness of the terrain becomes larger and more exaggerated.
This by itself, however, is more of a gimmick to show off to your mates. At the heart of this project is its mathematics and plotting abilities, combined with techniques to manipulate images, that can result in some stunning outcomes.
Let's see this in action with something a little more traditional. Close any working project windows and start again from scratch with a basic 2-D image. With the file open, right-click on the image itself and choose Data from the drop-down box. A table of data will be made, and it's this table that is especially important.
Each cell of numbers contains information that affects any geometry or effects you generate from this table. To put it in English, if you know what you're doing, you can control the way the final image ends up manually. Let's use Fast Fourier Transformation as a working example. (For the purposes of space, we'll run with my working filename, which is whole-kit.jpg. Substitute your own file in place of it.)
Right-click on the table and choose Transform→Fourier→FFT. After a moment, a dotted grayscale picture will come on-screen in a separate window above the original image. Now, combine these two into a final image. Click Data→Operate from the above menu. In the new dialog window, choose Multiply under Operation, whole-kit.jpg under Data Source 1 and Image: FFT-whole-kit.jpg under Data Source 2. And, there's a spiffing new image! The original image will be combined with the grainy FFT image to make a look that is unique to each picture.
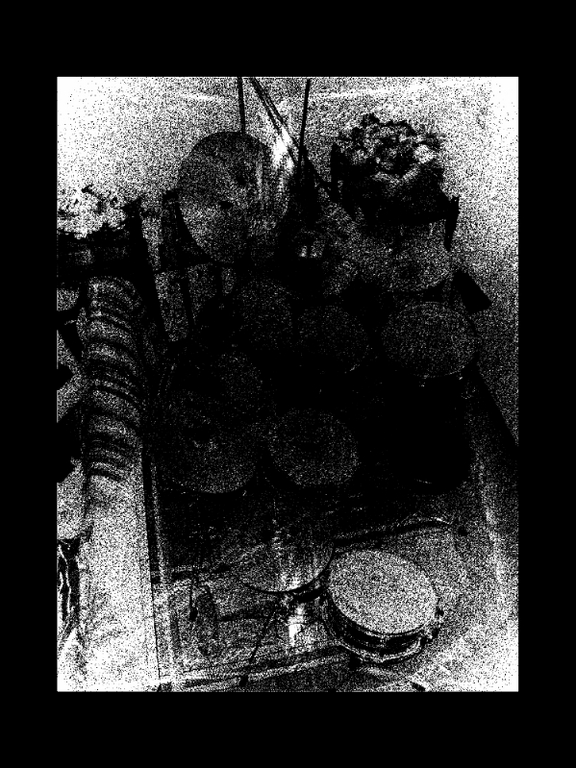
Example FFT Image
We've barely scratched the surface here, so it's well worth checking out Shekhar's tutorial (code.google.com/p/discrete-geometry-viewer/wiki/Home) and blog (l3mmings.blogspot.com) to understand what this program really is capable of doing (and apologies to Shekhar for any inaccuracies there may be in this article). For anyone looking to explore this very different area of image processing, DGV definitely is worth a look.
According to the project's Web site:
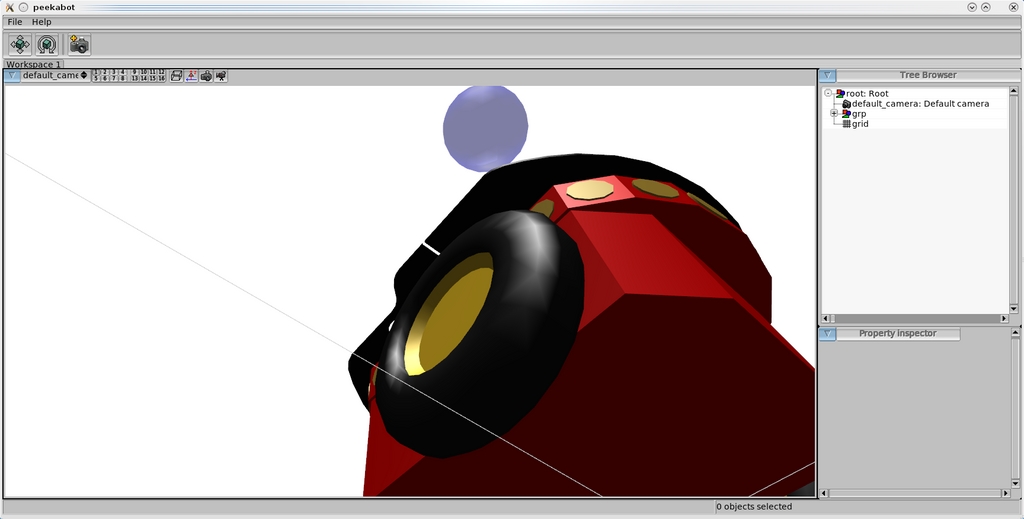
peekabot is a distributed real-time 3-D visualization tool for robotics researchers and developers, written in C++. Its purpose is to simplify the visualization needs faced by a roboticist daily—using visualization as a debugging aid or making fancy slides for a presentation, for example.
Our goal is to provide a flexible tool that will cater to the vast majority of a roboticist's visualization needs, yet is easy to use. Typical scenarios include visualization of simulations, data display from real robots and monitoring of remotely deployed robots.
...to enable remote data visualization, peekabot uses a distributed client-server architecture. All the gory details of networking is handled by the client library, used by your programs.
peekabot's low-level control of actions allows for some very advanced scripting, such as the object pathing shown here.
A number of Blender-created models allow for some snazzy active objects, available freely on the Web.
Installation
Head to the Web site, and grab the latest tarball. In terms of library requirements, the documentation helpfully states the following (note, in the list below: *not required when building only the client API; **needed only if building the unit tests, which are disabled by default):
A decently recent version of GCC.
Boost 1.34.0+ (Boost.Thread, Boost.DateTime, Boost.Filesystem*, Boost.ProgramOptions* and Boost.Test**).
Xerces-C++ 2.7.0+*.
FLTK 1.1.6+*.
OpenGL*.
GLU*.
libpng*.
I also had to grab these development files: libxerces-c2-dev and libfltk1.1-dev. Once you download the tarball, open a terminal wherever it's saved and enter the following:
$ tar xvzpf peekabot-x.y.z.tar.gz
$ cd peekabot-x.y.z
$ ./configure --prefix=/usr
$ make
$ sudo make install
Assuming all went well, when the compilation has finished, you can run the program with the command:
$ peekabot
Before we jump in, I have to warn you that we've covered only half the equation. peekabot is made of two key parts: the server and its clients. After the initial building process, you will have the server by itself. The server is the main GUI screen where you'll be testing and interacting with your client programs. The clients generally will be standalone programs that communicate with the peekabot server while following their own coding structure. Although this may be daunting for new users (me included), it does make the system very open, powerful and flexible.
Okay, I'll assume you have the server window open and are ready to take peekabot for a spin. Let's take a look at a working example program and explore the GUI while it's running.
Open another terminal in the peekabot source directory, and look under the examples folder. Here you will see the folders bo-slam, results and skeleton. Enter any of these folders, and run the command make. After make has compiled each example's code, a new program will be available in the same directory. To use bo-slam as an example, here's the terminal commands to enter (we'll assume you have a folder open in the peekabot main folder):
$ cd examples
$ cd bo-slam
$ make
$ ./bo-slam
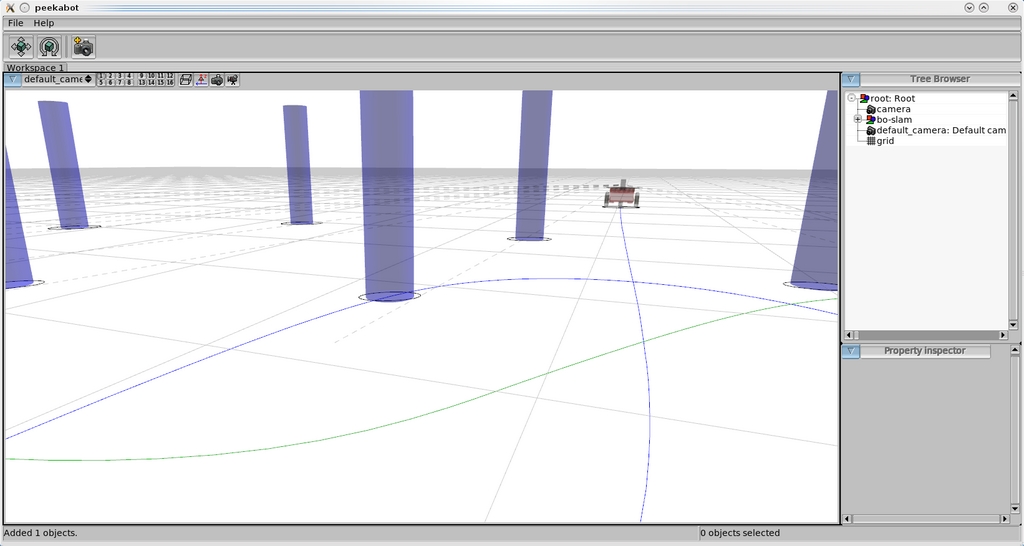
Run by itself, nothing will happen, and you will get a bunch of error messages in the console. However, when started with the peekabot server running alongside, a robot and a bunch of pylons will appear, with the pylons moving themselves around the world into position and the robot making its way around each pylon on a preprogrammed path. Okay, now that we have something running, let's explore the GUI.
The main window contains the scene you'll be working with, along with a camera whose point of view is adjustable. The left mouse button will pan the camera, and the right button will rotate it. To zoom in and out, use either the middle mouse button or the mouse wheel. If you need the camera controls to be more or less sensitive, the Shift and Ctrl keys will modulate the sensitivity accordingly (useful in extreme close-ups or when looking from very far away, for example).
On the right is the Tree Browser, which contains all the active objects, scenery elements and so on. You can select objects in view by left-clicking, and multiple objects can be combined selectively like any file manager, using Ctrl to toggle select and Shift to add to the selection.
I've covered only the basic operations of this program here, because you'll need to do some actual coding to get into the nitty-gritty of this program. And quite frankly, I'm rubbish at coding! If you're interested in learning more, check out the basic documentation (manual: www.peekabot.org/doc/latest/manual_the_basics.html; models: sourceforge.net/apps/mediawiki/peekabot/index.php?title=Model_repository). There you will find the coding to get you started, along with its structure and so on.
Ultimately this looks to be a powerful project for robotic visualization, albeit a rather intimidating one. Despite the relatively difficult learning streak from its mostly coding-based interface, it's probably this same kind of interaction that will bring it longevity. Not having the restrictions of GUI design to hold back the mechanics surely will be a godsend to those who want to approach their mechanical design at a low level without the restrictions that accommodating to beginners so often imposes.
Project at a Glance
Danger from the Deep (dangerdeep.sourceforge.net)
Danger from the Deep is a free, open-source, WW2 German submarine simulator. The Web site says, “This game is planned as tactical simulation and will be as realistic as our time and knowledge of physics allows”. I've had a brief chance to play it, and so far, I've seen a game full of polish and passion. I'm looking forward to covering this more next month.
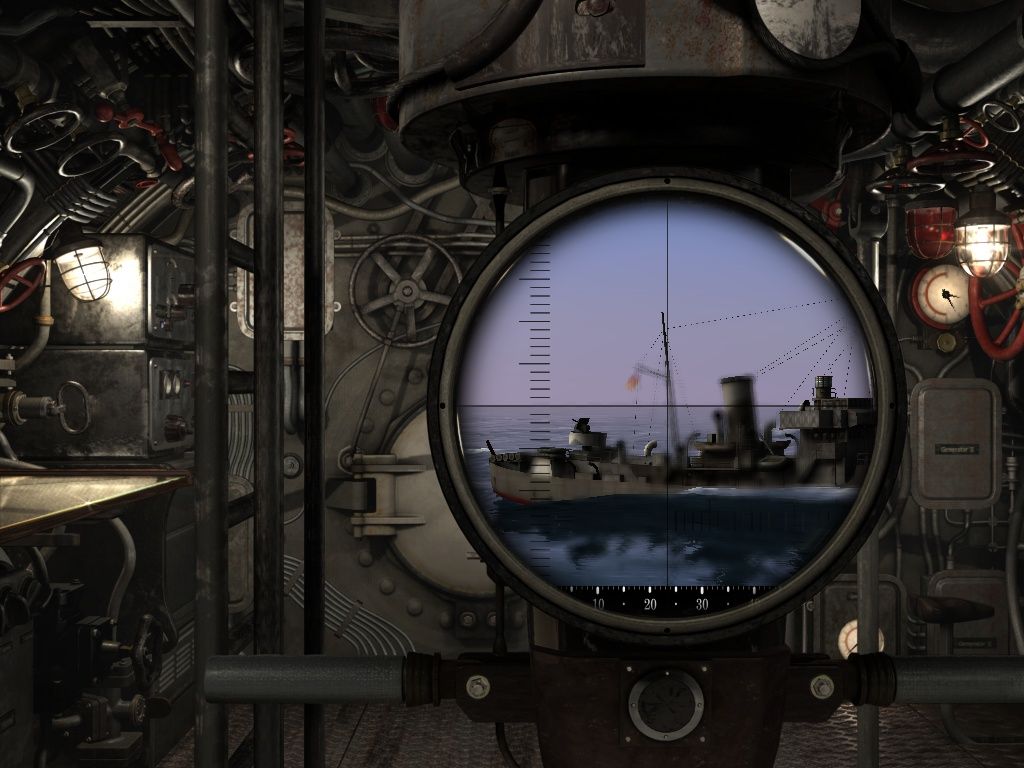
Danger from the Deep
Brewing something fresh, innovative or mind-bending? Send e-mail to newprojects@linuxjournal.com.
John Knight is a 25-year-old, drumming- and climbing-obsessed maniac from the world's most isolated city—Perth, Western Australia. He can usually be found either buried in an Audacity screen or thrashing a kick-drum beyond recognition.
