
A Video Card Upgrade HOWTO
It might be nice to claim that Linux fans are a purely serious crowd, using our machines purely for tasks such as Web serving, Web surfing, writing or sorting out real-world problems. The truth is, there comes a time when it is nice to put the real world to one side and use our machines to relax. In other words, play games. That can mean pretending to be a pilot with the Flight Gear simulator, a penguin going after herring in Tux Racer or a marine chasing demons in Doom 3. Although other platforms, such as the dedicated game consoles, have a greater range of choices available to them, some great games are available for Linux.
The problem with many of the best games available for Linux is they challenge your video card like almost nothing else. That was the problem I found in mid-2005. My CPU was fast enough to take on almost anything, as described in "A Motherboard Upgrade HOWTO", but my TNT 2 video card with 32MB of RAM was not cutting it. Some games would run, but not well, and one game would not run at all.
So, the question is, how to go about upgrading a video card?
One of the ways computer builders always have sought to improve the performance is to split tasks between as many CPUs as possible. This is clearly seen with current video cards. They are, in essence, computers unto themselves with a graphics processor unit (GPU), which is a CPU designed to perform 3-D math, memory and input/output connections.
Given the many dozens of video cards on the market, how to choose? The first step is to take a look at your motherboard manual to answer the question "what video cards could my computer support?" All other things being equal, you want the fastest data transfer between the computer and the video card. The upper limit as to how fast data can transfer from the computer to the video card is the bus connector between the card and the motherboard. In decreasing order of performance, the video card bus arrangements are PCIexpress, AGP 8x, AGP 4x, AGP 2x, AGP and PCI. Most motherboards support more than one standard; PCIexpress and PCI or AGP 8x and PCI are common combinations. Pick the fastest.
Next is a question of chipsets. The 3-D graphics field has two major camps, ATI and NVIDIA. Both ATI and NVIDIA make a range of GPUs and support chips that they sell to other manufactures to be used in their graphic cards. What can get slightly confusing is that some firms, such as Asus, build both ATI and NVIDIA-based video cards. Unlike NVIDIA, ATI manufactures and sells some video cards under their own names. The question is which is better for a Linux user. As of this writing, ATI cards have a reputation for uneven Linux video driver quality, so, at present I prefer NVIDIA-based cards. Although there are issues associated with installing NVIDIA drivers, which this article will get to, the cards are well supported under Linux.
The last key question is cost. It is not hard to find video cards with prices anywhere from under $50 to well over $500. You must determine how much performance are you willing to pay for. For a home user, there is little point in spending more money than you would spend on a dedicated game console.
In my case, I went for an AGP 8x NVIDIA-based card built by XFX with a GeForce FX 5500 chipset and 256MB of RAM. This is a budget video card, but one that will let me play all the latest games, although not at the highest resolution or with all the optical tricks turned on.
Although replacing a video card is not the challenge that replacing a motherboard is, the same sort of preparatory steps do apply. A good French chef pre-measures and pre-prepares her ingredients and lays them out in advance in a process known as mise en place. This way when the chef reaches the point in the recipe where 1 tablespoon (15 ml) of curry powder is called for, it already is measured out and simply can be poured in. The same idea applies to replacing a video card--have everything required set out and ready to go.
In laying out tools, start with the Phillips #2 screwdriver, as this is the choice of every major (and most minor) PC vendors, except Compaq. If you are dealing with a Compaq PC, you need a Torx T-15 screwdriver. In case of a troublesome case, a flathead screwdriver to act as a pry and a small pair of pliers are a good idea. A grounding strap, along with an anti-static bag are also good things to have handy.
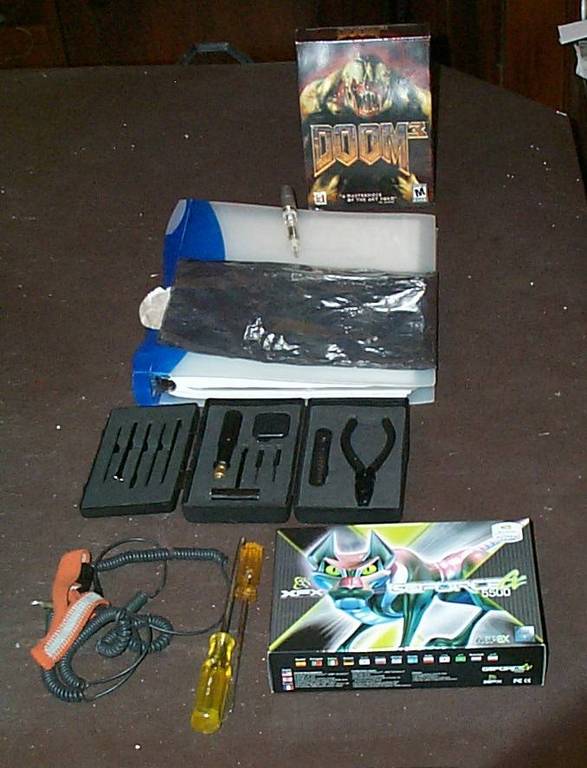
Figure 1. Tools, new video card and software set out before the upgrade.
For the location to do the work, find a well-lit space that either does not have carpet or has carpet treated with an anti-static spray. During the upgrade you should avoid wearing clothes that could create static, such as synthetic fabrics or fur. The space should have enough humidity that static electricity isn't an issue, but not so moist that water is condensing on things. Finally, you want a space where you will not be disturbed by people or animals that could interrupt the upgrade process. In my case, my dining room table was near perfect for the upgrade.
If your current PC has built-in video, power up the PC, go into the BIOS and tell the computer to use an expansion bus video card by default. How to do this varies from one machine to another; check your manual. Then, unplug the computer from everything and move it to your workspace.
Start by removing the case cover. There are a huge number of different case designs out there, and most of them have screws holding the cover on at the back. But I also have seen cases where the screws are on the bottom or behind a front snap on the cover, so you may have to go hunting. Connect your grounding strap to the computer.
If your computer has its video card as an expansion card, start by removing the old card. Locate the current video card. Normally, one screw is holding it in place, so remove the screw. Some motherboards have a latch holding the video card in place that may have to be pushed before you can pull out the video card. Pull the old video card out and drop it into an anti-static bag.
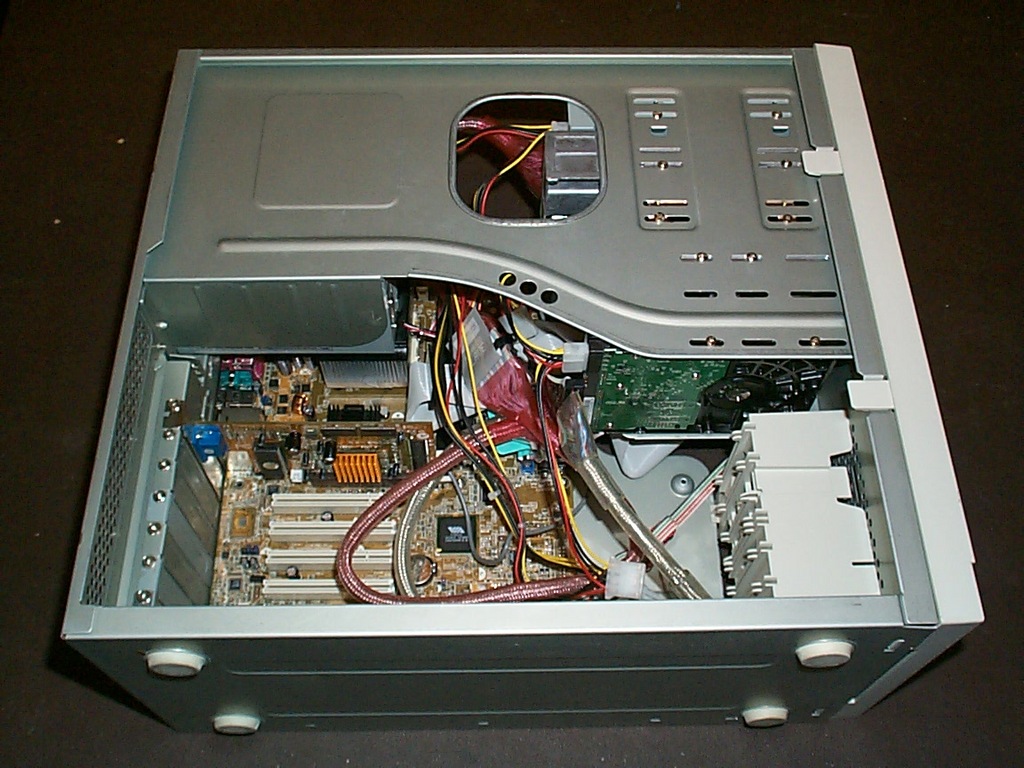
Figure 2. The cover off the computer, the old video card visible.
Take the new video card out of its package and drop it into the expansion slot. If your motherboard uses a latch to keep its video card in place, make sure it is closed. Screw the new card into place, and then replace the case cover.
Now reconnect your PC to power cord, keyboard and mouse plus video. If your machine has on-board video, make sure you reconnect to the new video card. Turn on your monitor, wait a few moments and then turn on your PC. If you see a brief message describing your video card followed by your PC's BIOS messages, great, the hardware stuff is done and you can get ready to deal with software issues.
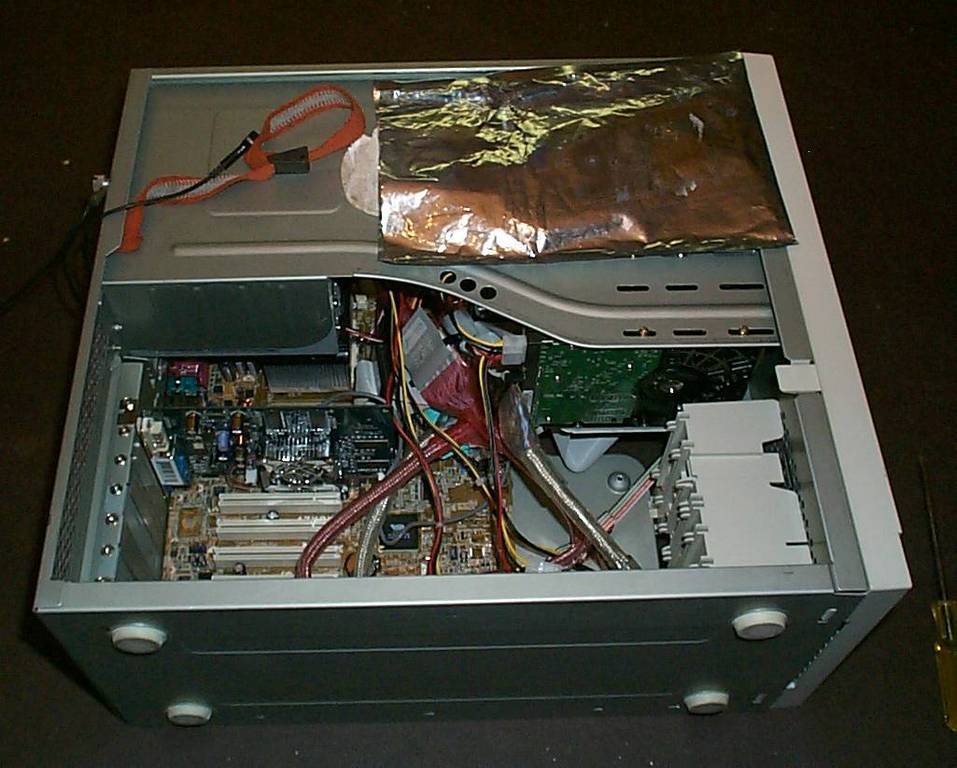
Figure 3. The new video card in place.
If you are upgrading from an older NVIDIA card for which you already have installed the 3-D video drivers, you may be done at this point. NVIDIA drivers support a fairly wide range of cards, so a move from one card in that range to another doesn't mean a change in drivers.
If you are running Fedora Core 4 here is what you do next. Open up a terminal window and become root. Edit the file /etc/yum.conf and add the following lines to the end of that file:
  [livna-stable]
  name=Livna.org - Fedora Compatible Packages (stable)
  baseurl=http://rpm.livna.org/fedora/$releasever/$basearch/RPMS.lvn
  gpgcheck=1
  gpgkey=http://rpm.livna.org/RPM-LIVNA-GPG-KEY
  enabled=1
Next, type yum list *nvidia*. Among the files listed should be nvidia-glx.i386 and you want to install this with:
yum install nvidia-glx.i386
The above command will want to install two files, the nvidia-glx.i386 file and an appropriate kernel for your system. When asked if you want to install these files, answer yes.
Once the above files have installed, reboot your machine and you should be done.
For other Linux releases, some excellent tutorials are available elsewhere on-line, such as this one for Debian.
So, how did it all work out for me? Well, with Tux Racer I went from about 20 frames per second to around 120. Flight Gear went from a modest-sized window to full-screen. Doom 3 went from being completely unplayable to playable, though at 640 x 480 screen resolution.
Colin McGregor (colin@mcgregor.org) works for a Toronto area charity, does consulting on the side and has served as President of the Toronto Free-Net. He also has been a guest speaker at Toronto Linux User Group meetings. Colin also can be found occasionally playing on-line games under the name of a Japanese cartoon mad scientist.
