
PIC Programming with Linux
The vast majority of the computers in the world do not run Windows. While this is good news for Linux enthusiasts, the bad news is that they don't run Linux or much of any kind of operating system at all. These are the computers running your televisions, VCRs, cell phones, pagers and marine radios. They go by cryptic names like MC68HC05, 87C51, or PIC16C84 and are manufactured by companies like Motorola, Philips and Microchip.
Microcontrollers are the workhorse computers of the world. They do the repetitive tasks that require little or no human intervention and most of them will not even blink when the “millennium” bug hits their larger, faster cousins. They power up, do their job and power down again using very little power and defiantly not requiring a heat sink and a fan.
One of these little wonders is the PIC16C84 from Microchip. This is an 18-pin processor with 1KB of electrically erasable/programmable read-only memory (EEPROM), 36 bytes of SRAM and 13 input/output lines; it can operate at speeds ranging from DC (0Hz) to 10MHz.
The PIC16C84 is an excellent introduction to embedded processors and assembly language. The RISC instruction set has only 35 commands (op-codes) to learn, and the cost is under $8 for one. You can build a PIC programmer for under $20 in parts, or you can buy one pre-built and pre-tested over the Internet. Prototype boards are also available that need only a processor; they already have the clock crystal and programmer header, as well as a small prototyping area for adding to the circuits (usually a couple of LEDs for your first project).
This low cost for development doesn't mean that the PIC cannot be used for serious work. Several of my projects include an interface between the PC and the Dallas Semiconductor 1-wire bus, and a wired remote control that uses the Sony Control-L protocol to control a camcorder. In the most recent Circuit Cellar Ink contest, one of the winners implemented the PPP and TFTP protocol using an 8-pin PIC12C672.
Because of the ease of designing and building a PIC programmer to attach to a parallel port, dozens of designs are available, all using different pins on the parallel port. Some use inverters on all the control lines, and others use inverters on only some of the lines. My program picprg can handle all of these, as long as they use the standard five control lines. With all of these variations, the software to drive the programmer needs to be easily configurable.
Another feature of these devices is the ability to design a programming header into the circuit so that the processor can be programmed without removing it from the device it is attached to. This facilitates software work in the field, allowing technicians to easily service and upgrade the software.
When I first started using the PIC16C84, a compiler was already available for Linux, but no Linux software ran the HOPCO programmer that I use. An easy way to solve this problem would have been to get the DOS software included with the programmer to run under DOSEMU. Since I never seem to pick the easy way, I decided to write a native Linux PIC programmer. I decided on a full-screen ncurses interface, which would run on a VT console or an xterm as long as the TERM environment variable is set to xterm-color.
My picprg program allows you to program the PIC microcontroller, read previously programmed PICs, verify a PIC against the program in memory, and view the program in hexadecimal. It also features a versatile configuration screen, which makes it a snap to use with the wide variety of PIC programmers available.
Compiling picprg is easy: you just type make in the source directory and a binary called picprg is generated. The only dependency for picprg that may cause problems is the ncurses library. You must have v1.9.9e or later installed for it to work. All of the Linux distributions that I know of include ncurses by default, so you should be set. If you want to install it as suid root in /usr/local/bin, then type make install; otherwise, you will have to move it to your preferred final location.
picprg must be run as root, since it requires low-level access to the /dev/lp device that isn't available to normal users, even with write access enabled. You can either run it as root or install it as suid root, so that it can run as the root user. Remember that any program running suid root is a potential security risk.
The first time picprg is started, you must pass it the number of the printer port (/dev/lpX) to which you have attached the programmer. I have my modified HOPCO programmer attached to /dev/lp2, so I run picprg -p2 to start it for the first time. You will see a nice blue screen (I'm still addicted to the color scheme of my Atari 800) as shown in Figure 1.
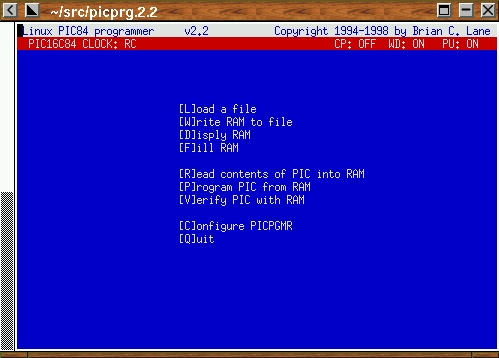
Figure 1. picprg Start-up Screen
The main menu is self-explanatory. Pick option C to get the configuration menu. Use the arrow keys to navigate the list of configuration options, and a short help message will be displayed for each selection.
I am using a programmer from HOPCO that has been re-wired to use the same parallel port connections as a David Tait-style PIC programmer. The connections for my programmer are as follows:
Vpp control       pin 5  inverted logic
Vdd control       pin 4  inverted logic
Clock             pin 3  normal   logic
Data to PIC       pin 2  normal   logic
Data from PIC     pin 10 normal   logic
The connections for your programmer will most likely be different, depending on the pins it uses to connect to the parallel port and the transistor logic used to implement the on/off control. The configuration menu (see Figure 2) allows you to easily specify which pins are being used and the on/off logic used to control them. Press + and - to switch the logic used for control of each pin.
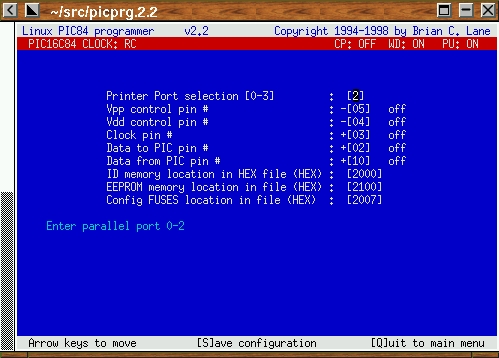
Figure 2. Configuration Menu
After you have entered the correct pin number for each function, test it to ensure that the PIC being programmed is seeing the correct logic level. The configuration menu is used for this, too. When one of the control lines is selected using the arrow keys, the O and F keys can be used to turn that control line On and Off. This on and off state is defined from the perspective of picprg, taking into account the polarity you specified when setting up the pins.
Now, get out your trusty voltmeter or whatever you are going to use for detecting power (it should be able to handle at least 13V). Connect the meter's GND to pin 5 on the programming socket. Then select Vpp in the configuration menu and hit O and F to turn it on and off. You should see pin 4 going from 0V to 13V or so (depends on the programmer). Repeat this for each of the pins listed below:
Vpp      pin 4   0 and approximately 12 volts
Vdd      pin 14  0 and 5 volts
Clock    pin 12  0 and 5 volts
Data Out pin 13  0 and 5 volts
The state of the Data In pin on the configuration display should be the same as the state of the Data Out pin. When Data Out is 1, the Data In line should be 1 as well.
Once you have all the voltages swinging the right direction, press S to save the configuration to ~/.picprgrc; type picprg. You are now ready to start using your PIC programmer.
When reading the object file, the ID and FUSE data are taken from the memory locations specified in the configuration menu. Microchip defines this to be 0x2000, but some assemblers place this data in different locations. The configuration menu allows you to specify where in the loaded file the ID and FUSE data will be found. If you are using the picasm assembler, the default values for ID, FUSE and EEPROM location do not need to be changed. They will work correctly right out of the box.
The PIC16C84 has 64 bytes of internal EEPROM data that can be programmed with data like a unique serial number or configuration parameters. This data can be included in the loaded file at the memory location specified by the configuration menu. This address is usually set to 0x2100.
picprg uses the Intel HEX 16 format, which is supported by most assemblers. (I recommend picasm by Timo Rossi.) The FUSE and EEPROM locations can be defined in the configuration menu if your assembler does not put them in the standard locations. picasm also supports the Intel HEX 8 format, and picprg detects this file format automatically. Just type in the file name, and the program will figure out in which format the file was saved.
When an object file is loaded, it is stored in the internal memory buffer. The clock type and fuse states are displayed on the second line of the display while the file is in memory. The clock type and fuse states are determined by looking at the data stored in the FUSE memory location as defined in the configuration menu.
Make sure the programmer is connected and the processor is plugged in correctly. Press the R key from the main menu and the data from the processor will be read into the internal buffer; its clock type and fuse states will be displayed on the second line of the display. As it is reading, picprg will display every 16th address, just to let you know it is working correctly.
With the programmer connected and the processor plugged in the right direction, press P to start the programming process. The data in RAM will be written to the PIC and the third line will display “Programming PIC”. If any errors are found, they will be displayed with the address, the value read from the PIC during the failed verify and the value expected. Every 16th address it programs will be displayed, assuring you that it is still working.
From this point, it's up to you to learn how to write programs for the PIC. Many useful sites which can help you on your way are on the Internet; David Tait's list of PIC resources is the best starting point.
Brian Lane lives with his wife Denise in Olalla, Washington. He spends his days developing embedded software and his nights writing Linux code. He can be contacted at nexus@tatoosh.com or http://www.tatoosh.com/nexus/.
