
Control Your Home with Vera from Mi Casa Verde
Automating your home is one of those ideas that has been around forever. The idea is older than the light bulb, which was itself a form of automation—no more lighting gas lamps or candles manually, simply flip a switch.
We humans are a lazy bunch—even a simple action like flipping a switch became not easy enough—so various devices and technologies have appeared over the years to automate lights and other electrical devices. The type of devices available to control your house basically can be split into two categories: professionally installed and do-it-yourself.
For all home-control systems, there has to be a way to tell devices to turn on and off. For professionally installed systems, this often means the installation of extensive new wiring, which is fairly easy to put into place if you are building a new house but can be very expensive if you are trying to install a system into an existing house.
For the do-it-yourself crowd, the most popular system has been X10, which sends signals over power lines. This has the advantage of not needing any new wiring. You can build your system out slowly, and you can do it yourself as long as you are reasonably technical. However, X10 has several disadvantages. If you live in an apartment, for example, and you and a neighbor are both using X10, the potential exists for you to turn each other's lights on and off accidentally. Even in a house, things might not work as expected, because sending signals over power lines is problematic, and sometimes interference causes signals to be lost or misdirected.
Z-Wave is a new automation technology that attempts to overcome the limitations of earlier systems by utilizing wireless mesh networking. Each Z-Wave device acts as both a transmitter and a receiver. Any signals it receives are retransmitted automatically. Additionally, whenever it acts on a command, a Z-Wave device sends out a reply message letting the controller know that it acted.
Like X10, Z-Wave lets you automate your home a few devices at a time, which allows you to spread the cost over a longer period, rather than having to pony up a lot of cash up front. There's nothing stopping you from doing it all at once or even from hiring a professional to do it for you, but you don't have to.
The main problem that Z-Wave has, which is common to all home-control systems, is it can be complicated to set up.
One new Linux-powered product, the Vera from Mi Casa Verde, advertises itself as a Z-Wave home-control gateway that anyone can set up. To test that claim, I gave an unopened Vera and several Z-Wave modules to a nontechnical test user, and asked the user to set it up.

Figure 1. The Vera doesn't come with much, just the main box, a dongle, a power brick and an Ethernet cable. In the background are some Z-Wave modules.
The Vera comes with a four-page printed setup guide that walks you through plugging the Vera in and connecting to it for the first time. When it is first turned on, the Vera tries to connect to your home network using DHCP. As the test user knows next to nothing about switches, routers, Ethernet or DHCP, and never has needed to, I had to assist with this. I helped the user plug the Vera in to a free spot on a switch, and the user powered it on.
The documentation at this point states that you should wait a couple minutes after turning the Vera on so that it can boot and announce its presence to the findvera.com Web site. After waiting, all you have to do is go to findvera.com and click on the big green Setup Vera on my home network button. The user did this and was able to connect to the Vera Web interface.
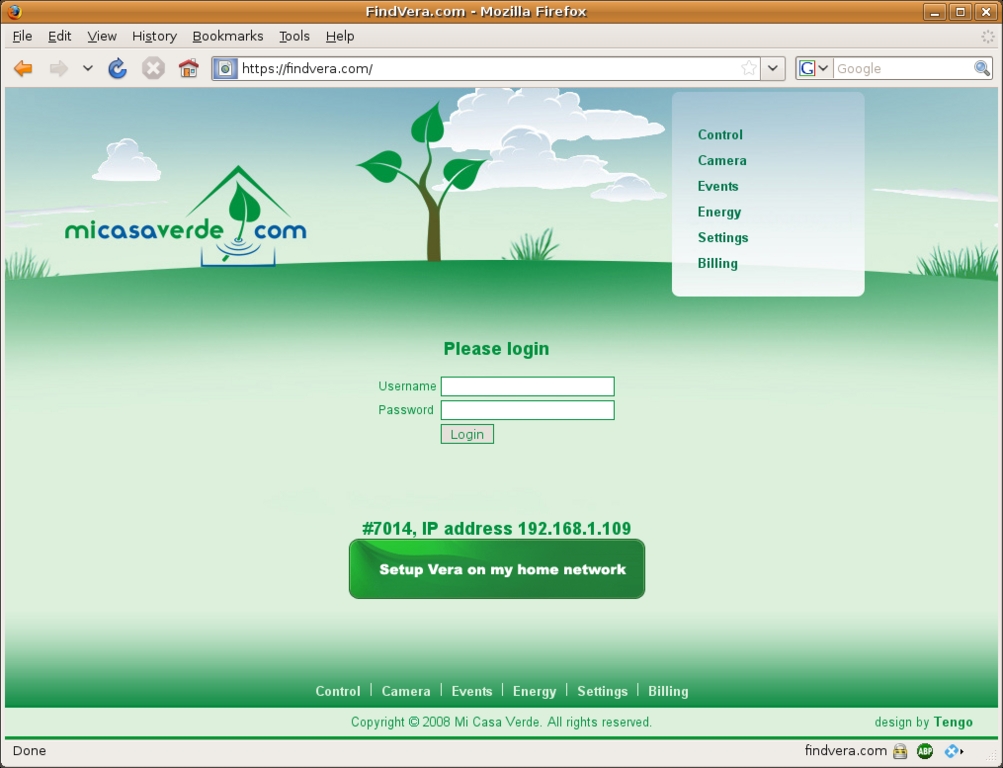
Figure 2. When connecting to Vera, you don't have to know the IP address, simply go to findvera.com and it will connect you.
So far so good. The Vera was plugged in, and the user was able to connect to the Vera without knowing what address it had been assigned by my home router. This integration is slick and makes connecting easy.
The next step in the printed documentation has a screenshot of what you should see after you connect to Vera for the first time. However, when the user connected the first time, the Vera went to the firmware upgrade screen instead of the initial setup screen. The user found this confusing. The printed documentation should state that the firmware upgrade screen might appear and what to do about it before continuing with the initial setup. Or, the Vera should have realized that it was not set up and waited until it was before prompting to upgrade the firmware.
Upgrading firmware on the Vera is easy, and it prompts you to make a backup of your settings before starting, which is a nice touch. However, it is not a process the user was comfortable doing, so I finished that step before we moved on.
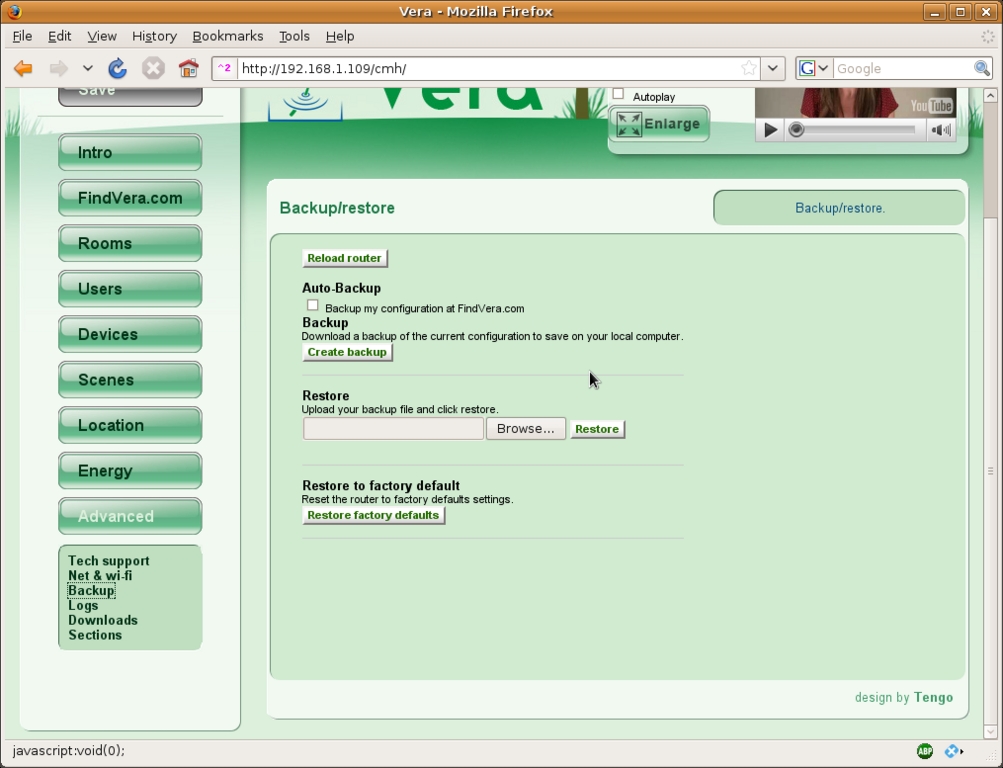
Figure 3. Backing up the Vera configuration is simple. Restoring also is easy.
After updating the firmware and rebooting the Vera, the user connected again, and this time, instead of seeing the setup screen, the Vera went to the Dashboard. This screen is supposed to appear automatically after setup, and it provides a single screen from which to control your devices. It is not what the user expected to see, so the user wasn't quite sure what to do since the page was basically blank (nothing had been set up yet at this point). I directed the user to the setup link at the top right of the screen and after clicking on it, the screen appeared that the printed documentation said you should see.
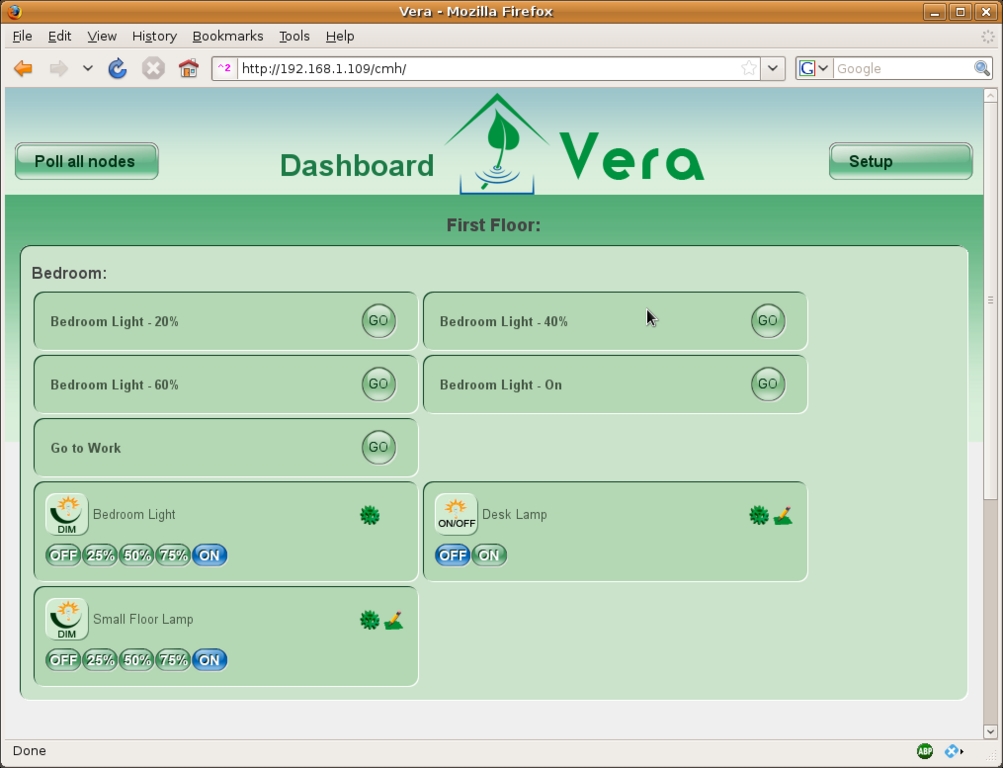
Figure 4. The Dashboard serves up all of your devices on a single page for easy control.
At this point, the printed documentation basically ends (apart from some network troubleshooting information), and the Vera relies on embedded YouTube videos to talk you through what to do next and how to set things up. These videos play automatically by default, which the user found useful. This autoplay feature can be turned off by unchecking the Autoplay button.
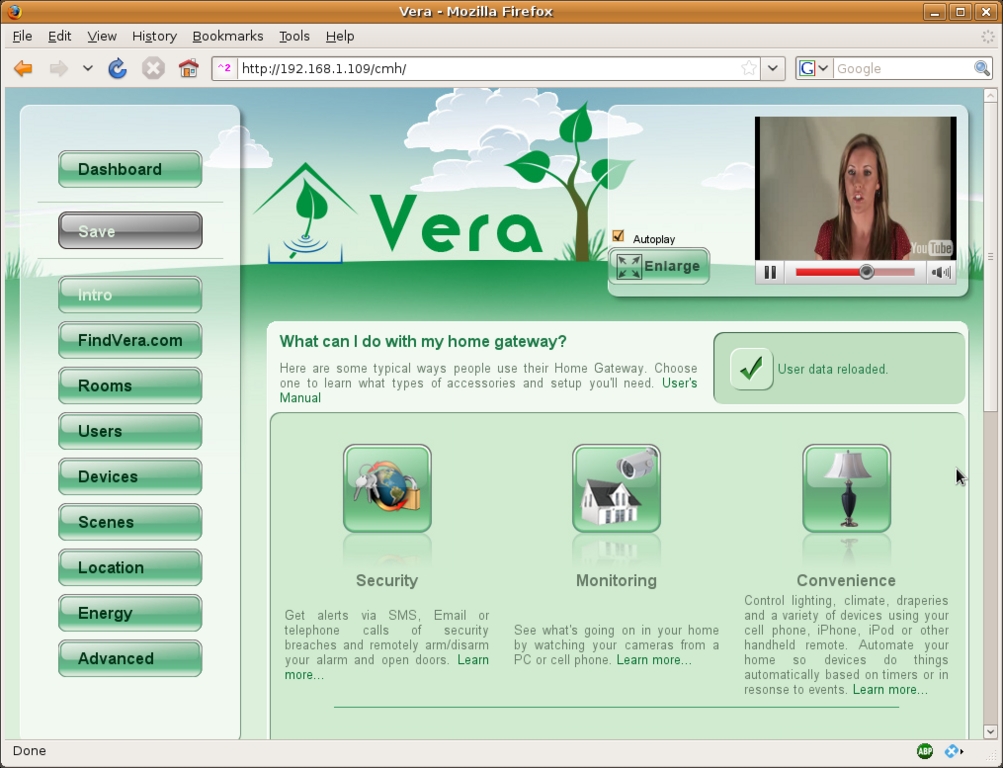
Figure 5. Helpful videos play automatically to walk you through the initial setup of the Vera.
The basic sequence of events for this initial setup is to walk your way from top to bottom through the buttons on the left-hand side of the Vera Web interface. The first step (apart from the Intro section) the Vera asks you to complete is to set up an account on findvera.com, so you can connect to your Vera from anywhere in the world. The use of this remote-access service is free for the first 90 days and costs $7.95/month after that. The on-line documentation does state that the service is optional, and it even points out that you can set up external access yourself if you want to. The Web GUI doesn't mention any of this (you have to click on a “learn more” link to get the information), so I just told the user to skip to the next section.
The next step, and the first real one in my opinion, is to create “Rooms”. This is so the Vera can organize your devices logically. The user found this step easy and did not need any help from me. The embedded video on this page even helpfully suggests that if you have outdoor devices, you should just think of them as rooms to keep things simple.
The next step is to add actual Z-Wave devices to the Vera. Devices range from simple lamp and appliance modules (lamp modules are dimmable, and appliance modules are not), to motion detectors, automatic blinds and thermostats. Lamp and appliance modules come in several varieties, from small boxes that you plug in to wall outlets, to actual in-wall outlets and light switches that you install in place of the originals. Obviously, the in-wall devices will give your room a cleaner, more professional look, but they are harder to install. The Vera also can interface with some non-Z-Wave devices, including IP cameras.
The basic sequence for adding new devices is as follows:
Unplug the Z-Wave dongle from the back of the Vera.
Take the dongle over to the Z-Wave module that you want to add.
Press the button on the dongle (it will start to blink).
Press the button on the Z-Wave module (the dongle light will go solid for a couple seconds to let you know it detected the button press).
Repeat steps 2–4 for any other modules you want to add.
Plug the dongle back in to the Vera.
The steps were easy to understand for me, but they were not as easy for the user. The confusion mainly centered around the terminology. For example, the user was not familiar with the word dongle and wouldn't have known what it was if the documentation hadn't included a picture and mentioned that it was black. The user said the word dongle was about as descriptive as the words thingy and whatchamacallit. Even with this bit of confusion, the user was able to add the devices without help, thanks to the clear instructions.
Once the user added the devices and plugged the dongle back in to the Vera, it was time to configure them. The user also found this difficult the first time and asked for my help on the initial one.
You configure devices by setting up various “scenes”. Scenes are basically groups of commands. An example would be “set all lights in the family room to 50% brightness”, or “turn all lights off in the master bedroom”. Once you have set up a scene, you can call it quits, leave it as is and run it manually at any time. However, the real power of the Vera comes when you add timers and events to scenes.
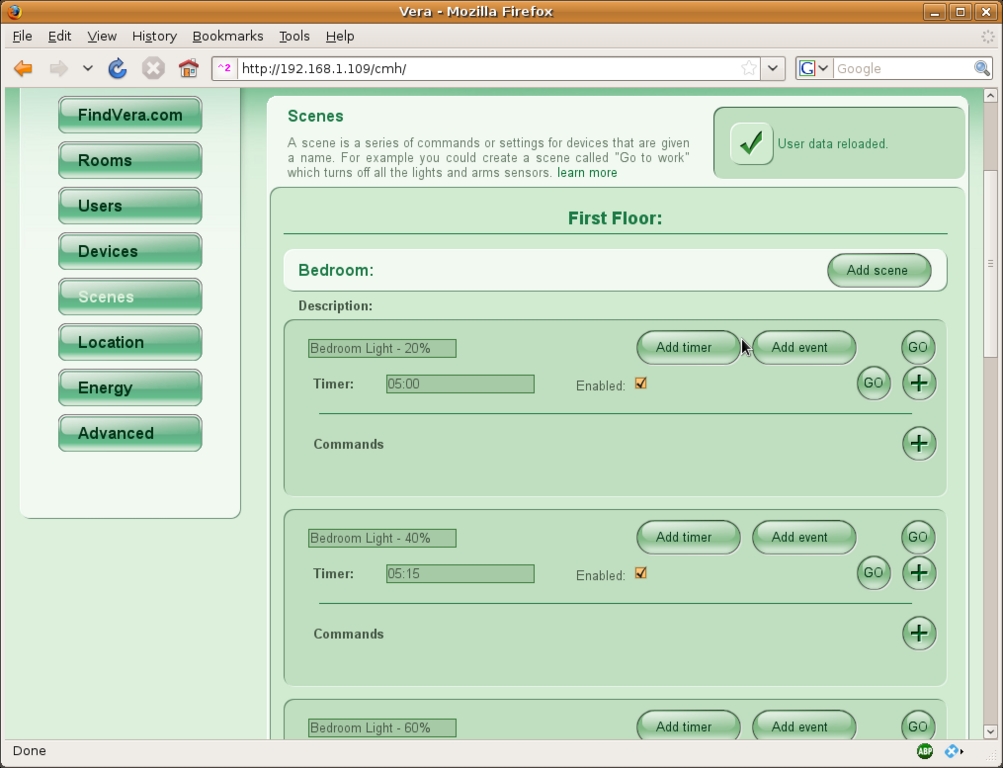
Figure 6. The GUI for configuring scenes has a confusing button layout.

Figure 7. You can Telnet to the Vera to get into the guts of the device.
Timers let you run scenes at specified times, such as “every Monday at 8pm”, “every 2 hours” or “on 12 June 2009 at 3:24am”. Events let you run scenes when a certain event occurs, such as “whenever the doorbell rings”, “if the hall motion sensor is tripped” or “when the master bedroom light switch is turned on”. Once I walked through the process of setting up an event and a timer, the user understood it and was able to add scenes, timers and events.
You probably are noticing a pattern here. At nearly every step, the user got stuck and came to me with questions. One thing the Mi Casa Verde folks could do to alleviate at least some of this would be to show someone actually completing the steps instead of just telling you how to do it. Perhaps they also could have you configure a virtual room with virtual devices that you can configure and play with. The fact that they are attempting to simplify things to the point where anyone can automate a home is a lofty goal, and I think they actually have succeeded in many ways, even though I ended up doing most of the configuration.
The basic flaw is that Vera assumes you know what certain keywords mean. You are expected to know what dongle, LAN, Wi-Fi, DHCP, gateway, USB port and other terms mean. For a reasonably technical person, those terms are easy, but for someone like the nontechnical user in this example, such terms might not be understood. For this user, a computer is just there—you sit in front of it, type and click the mouse. The concepts of files, applications and programs are needlessly complicated. To this user, there are only tasks, such as “check my e-mail to see if Sue has written back”, “print this letter so I can mail it”, “watch a video on YouTube”, “see if check #1234 has cleared the bank”, “upload photos from the party last night to Facebook” and so on. The user has no desire to move past that level of understanding. Vera and other products targeted at everyone need to realize that even the phrase “unplug the dongle” might not be understood.
I found the Vera quite easy to set up and use overall. However, I did run into several issues.
The Web interface is incomplete. Some sections do not have an explanatory video or any other documentation. I'm sure documentation is coming, but that doesn't help me right now.
Besides missing bits, the Web interface is also glitchy. It relies on AJAX-style automatic form submission when you add devices, scenes, events and so on. This works fine most of the time, but I ran into problems a couple times where configuration changes I made were not applied, and I had to enter them a second or even third time before they “took”. The explanatory videos also stopped during playback several times while the interface performed housekeeping on something or other.
Also, on at least two occasions during my testing, the Vera stopped working altogether. During these incidents, the Web interface still was responsive, and it acted like things were working, but none of the lights would turn on or off when told to. I still could turn them on and off via the buttons on the individual modules or by using my Z-Wave remote. A reboot of the Vera solved the issue. I do appreciate the improvements the firmware upgrades have provided, but I hope stability and reliability are at the top of the list for the Vera developers, especially as I continue to add more modules.
Finally, I ran into issues with the Vera doing crazy things on me. I tried at one point to set up an event that would turn on my bedside lamp whenever the ceiling light was turned on. After setting it up, the Vera started doing strange things like dimming and then brightening the lights in the room, shutting the lights off at random times, turning the lights on at equally random times and so on. After the Vera decided to turn on the lights in the room at 5:00am, I had had enough, and I removed the glitchy event.
Lights
Being open source, the Vera is quite hackable. One thing you can do is send it special HTTP queries to control lights. Below is a simple bash script I wrote to turn all of the Z-Wave devices in my house on or off. It's not the most elegant script in the world but it works:
#!/bin/bash
# This file is named "lights" and is placed in
# /usr/local/bin with chmod 755

# lights in the house
#   biglamp="12"
#   smalllamp="13"
#   desklamp="14"
#   tv="16"
#   masterbedroom="17"

# All of the lights in the house
lights="12 13 14 16 17"

function turnlight() {
    if [ "${2}" = "on" ]; then
        # Turn the light on
        curl \
          "http://vera:3451/messagesend?from=1&to=${1}&type=1&id=192"
    else
        # Turn the light off
        curl \
          "http://vera:3451/messagesend?from=1&to=${1}&type=1&id=193"
    fi
}

if [ "${1}" = "on" ] || [ "${1}" = "off" ]; then
    for light in ${lights}; do
        turnlight ${light} ${1}
    done
else
    echo "Usage:"
    echo "   \"${0} on\" to turn all lights on"
    echo "   \"${0} off\" to turn all lights off"
    exit
fi

exit 0
Thankfully, none of my other timers and events have been as troublesome as the bedroom one.
In fact, the Vera has been very reliable about most of my scenes. I have one that momentarily dims the lights in the family room when it is time for the kids to get ready for bed. I'm still working on the part where the kids actually start getting ready for bed at that point, but the scene itself works flawlessly. All of my other scenes, events and timers also have worked well.
Above all, the thing that Vera does do well is hide a lot of the complexity of setting up and operating a home-control system, even if it didn't quite pass the non-geek user test this time around.
Pricing Information
The Vera is $299 from the Mi Casa Verde on-line shop.
Z-Wave modules start at around $35 and go up from there, depending on the brand and features.
I purchased my Z-Wave modules from Amazon.com—simply search for “z-wave” for a list of the available modules. I purchased the following:
Intermatic HA06C Wireless Indoor Wall Switch: $36.86
Intermatic HA03C Wireless Plug-In Indoor Lamp Module: $32.54
Intermatic HA02C Wireless Heavy-Duty Plug-In Appliance Module: $39.97
Intermatic HA01C Wireless Wall Receptacle: $33.79
Resources
Mi Casa Verde: micasaverde.com
Mi Casa Verde Forums: forum.micasaverde.com
Mi Casa Verde Wiki: wiki.micasaverde.com
Mi Casa Verde On-line Store: https://shop.micasaverde.com
Amazon has a good selection of Z-Wave devices: amazon.com
Daniel Bartholomew lives in North Carolina with his wife and children. He can be found on-line at daniel-bartholomew.com.
