
AlienVault: the Future of Security Information Management
Security Information Management (SIM) systems have made many security administrators' lives easier over the years. SIMs organize an enterprise's security environment and provide a common interface to manage that environment. Many SIM products are available today that perform well in this role, but none are as ambitious as AlienVault's Open Source Security Information Management (OSSIM). With OSSIM, AlienVault has harnessed the capabilities of several popular security packages and created an “intelligence” that translates, analyzes and organizes the data in unique and customizable ways that most SIMs cannot. It uses a process called correlation to make threat judgments dynamically and report in real time on the state of risk in your environment. The end result is a design approach that makes risk management an organized and observable process that security administrators and managers alike can appreciate.
In this article, I explain the installation of an all-in-one OSSIM agent/server into a test network, add hosts, deploy a third-party agent, set up a custom security directive and take a quick tour of the built-in incident response system. In addition to the OSSIM server, I have placed a CentOS-based Apache Web server and a Windows XP workstation into the test network to observe OSSIM's interoperation with different systems and other third-party agents.
To keep deployment time to a minimum, I deployed OSSIM on a VMware-based virtual machine (VM). OSSIM is built on Debian, so you can deploy it to any hardware that Debian supports. I used the downloadable installation media from the AlienVault site in .iso form (version 2.1 at the time of this writing) and booted my VM from the media.
On bootup, you will see a rather busy and slightly difficult-to-read install screen (Figure 1). The default option is the text-based install, but by pressing the down arrow, you will see a graphical install option. Select the Text option and press Enter. If you've seen Debian install screens, the OSSIM installer will look very familiar. Set your language preferences and partition your hard drive(s). Configure your settings for Postfix if desired. Finally, set your root password, and enter a static IP address for the server when prompted. The installer will restart the machine to complete the configuration.

Figure 1. A little tough to read, but this is where everything starts.
Open a browser from a machine on the same network and enter the IP address of the OSSIM server in the URL field (Figure 2). Enter “admin” as the user and password to log in to the management site. Change your password under the Configuration→Users section. After logging in, the main dashboard view loads (Figure 3).
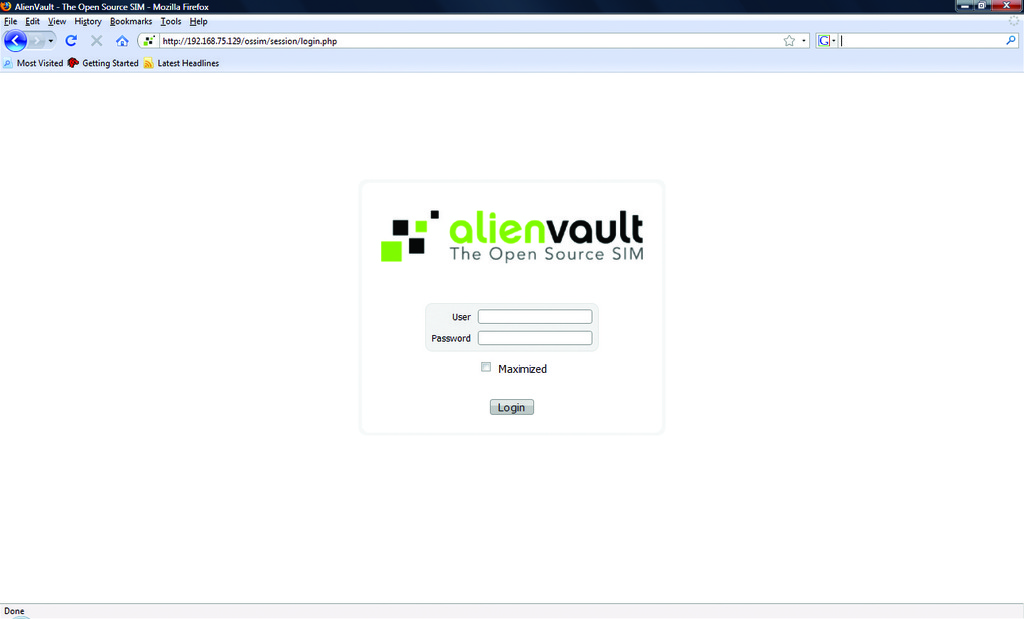
Figure 2. Main Login Screen
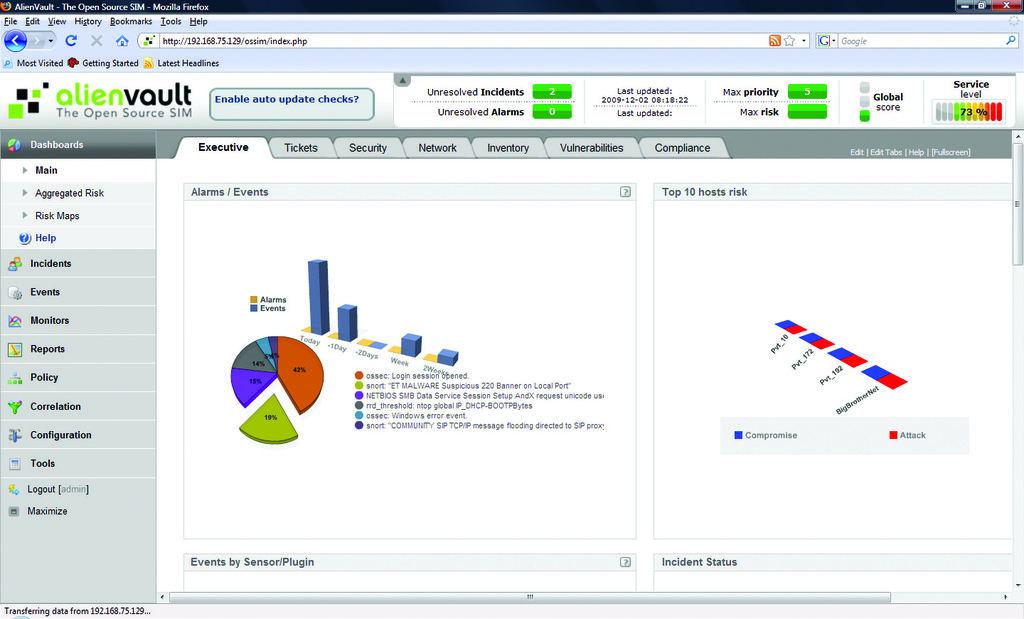
Figure 3. Main Dashboard
The next step is to add systems for the OSSIM server to monitor. Start by defining your local network and performing a cursory scan. On the Networks tab under Policy, click Insert New Network. Enter your LAN information in the fields provided. If you don't see a sensor listed, insert a new one using the hostname and IP address of your all-in-one OSSIM server. Leave the Nagios check box enabled, but the Nessus box unchecked (Figure 4) to reduce the time needed for the first scan. After the scan completes, several hosts should appear on the Hosts tab of the Policies section. OSSIM installs and auto-configures Nagios and ntop during installation, so you also can see basic network information by visiting the Monitors section of the management page (Figure 5). Once all hosts are found, find the CentOS Web server in the Hosts section under Policies, and modify its priority from 1 to 5 (Figure 6). You will use this later in the article when I discuss correlation.
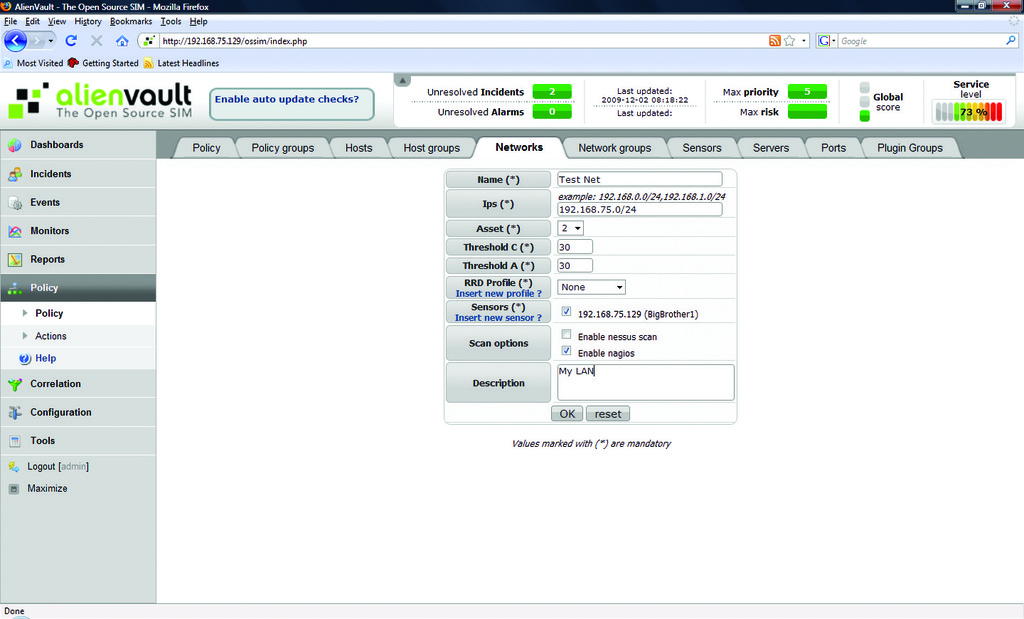
Figure 4. Setting Up the First Network Scan

Figure 5. Nagios Working under the Hood
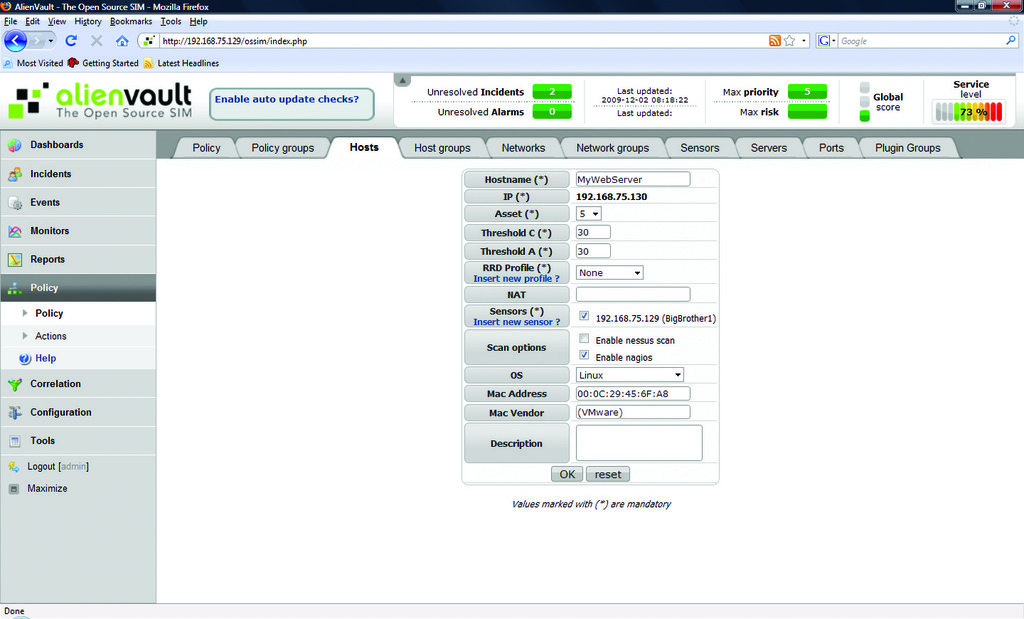
Figure 6. Changing the Web Server's Asset Value
You now have an active OSSIM server using passive network monitors like snort, Nagios and ntop to report on your test network's activity. Next, let's add some client-based agents that feed data into the OSSIM server.
Many client agents can communicate with OSSIM, but because of space limitations, I am covering the one I believe is the most valuable to security administrators: OSSEC. OSSEC is a freely available host intrusion detection system (HIDS) maintained by Trend Micro that performs a multitude of client security tasks, such as logging, alerting, integrity checking and rootkit detection. Additionally, a large number of OSSIM plugins for OSSEC already are installed with your server that can monitor virtually any part of a UNIX/Linux/Windows system.
First, let's install OSSEC on the CentOS Web server. Download and extract the client tar from the OSSEC Web site. If you have difficulty finding the OSSEC agent, or any other agent, links to OSSIM's supported third-party agents are available in the Tools/Downloads section of the management page. Next, run the install.sh script from the unpacked tar folder. Verify your machine information and select the agent install option. Accept the default install directory. Enter the IP address of the server (the OSSIM server). Run the integrity-check dæmon and enable the rootkit-detect engine. When asked to enable active response, answer “no”. To start the agent, run:
/var/ossec/bin/ossec-control start
Now, from the CentOS Web server, ssh to the OSSIM server, and run the following command to add your client agent to the OSSEC server:
/var/ossec/bin/manage_agents
Select A to add an agent, and enter a unique name for it. Add the IP address of your CentOS Web server and give the agent a unique ID. The default ID usually is fine, unless you plan on implementing a naming convention for your OSSEC clients. Enter Y to confirm adding the agent. This returns you to the main menu. Select E to extract. Input the client ID you want to extract (the ID you assigned to the CentOS server). From another terminal window on the CentOS Web server, run the local manage_agents command. Select I to import the unique key. Copy and paste the unique key from the SSH window to the Web server's local prompt. Enter Y to confirm the key, and select Q to quit. Close the SSH connection, and from the local prompt, restart the agent by running the command:
/var/ossec/bin/ossec-control restart
On your XP client, download and install the OSSEC agent as well as the Putty SSH client. When finished, run the Putty client to SSH to the OSSIM server and repeat the same manage_agents command to generate and extract the XP client's unique key from the server. Once extracted, paste it into the XP client by opening the Manage Agent applet from the start menu under the OSSEC program group.
Finally, to begin receiving OSSEC events in OSSIM, open the file /etc/ossim/ossim_setup.conf on the OSSIM server and in the [sensor] section add ossec to the end of the line that begins with the word detectors. Save and exit the config file, and restart your OSSIM server using the shutdown -r now command. Upon reboot, you should start to see OSSEC events appear in OSSIM. To test this, restart the OSSEC agent on the XP machine and look in the Events→SIM Events section of the OSSIM management page. You should see messages related to the OSSEC agent (Figure 7). As you now have an external feed coming into your OSSIM server, let's look at how it digests and analyzes the data.
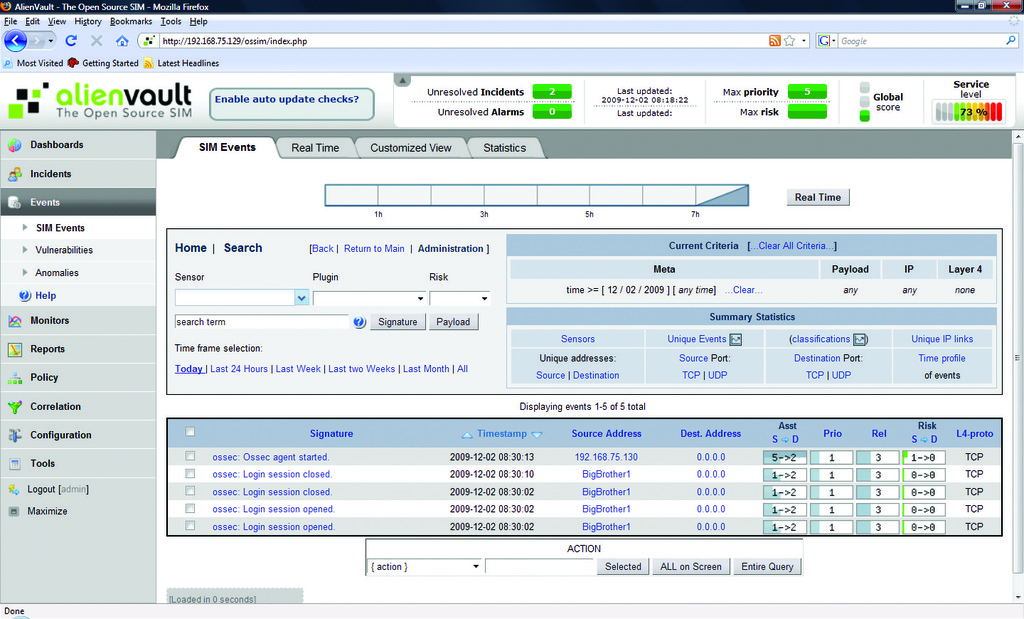
Figure 7. Verifying the OSSEC Agent Is Talking to OSSIM
For OSSIM to decipher data from any source, it first must have a plugin. A plugin is an XML-based configuration file that tells OSSIM how to read information from a particular data source and when to register a security event. According to the AlienVault site, more than 2,300 plugins currently are available (see the Popular OSSIM Plugins sidebar for a brief listing of the leading ones).
Popular OSSIM Plugins
Some of the more popular plugins for OSSIM include the following:
Snort
Nagios
OpenVAS
Nessus
ntop
Nmap
OSSEC
Passive OS Fingerprinter (p0f)
Osiris
arpwatch
syslog
PAM
Honeyd
Passive Asset Detection System (pads)
Cisco—Routers and Pix
Multiple firewalls—iptables, sonicwall, monowall and pfsense
Web servers—IIS and Apache
Windows logs—Snare, OSSEC and ntsyslog
OCS-NG—inventory software
An event is any occurrence that a plugin's native software deems important enough to log or warn on. Events in OSSIM should be treated like log entries. They are not necessarily indicative of a problem, but should be reviewed nonetheless. When multiple events take place in such a way that an administrator has marked them as being “suspicious”, OSSIM throws an alarm. It is also possible for a plugin to set a single event's settings high enough that it can throw an alarm when the single event occurs. The criteria used to trigger an alarm from multiple different events is known as a directive. The process of analyzing multiple events within a directive is called correlation. Correlation is central to OSSIM's operation. With correlation, administrators can take data from a multitude of disparate security devices and tailor directives to reduce false positives and extrapolate threat data in real time.
Take a typical IDS (Intrusion Detection System) device, for example. An improperly tuned IDS can record a large number of false positives. However, with OSSIM, you can create a directive that correlates your IDS events with known vulnerabilities in Nessus. By doing so, you reduce false positives and refine questionable data into a valuable security check. As another example, you could correlate multiple port scans from Nmap with failed logins from syslog (or OSSEC, as I explain later) to detect break-ins. A third example would be to correlate aberrant network behavior using ntop with rootkit checks from OSSEC or virus detections from Sophos, ClamAV or McAfee to monitor for client-based threats. With the number of plugins available for OSSIM, the possibilities for correlation are almost limitless.
Let's create a simple directive so you can see correlation in action. As an example, let's use a simple directive to monitor suspicious access to the Web server using two different plugins. In order to do so, first turn down the values for your OSSEC plugin. From the OSSIM management page, go to the Plugins section under Configuration. Scroll through the tables to find Plugin ID 7010, and click on the ID column to edit the plugin's values. On the resulting page, change the reliability values for the SIDs 5503 and 5716 from 5 to 1 (Figure 8). If you left these values at 5, they would send an alarm before the rule is processed. Because the goal is to observe correlation, you need to turn them down.
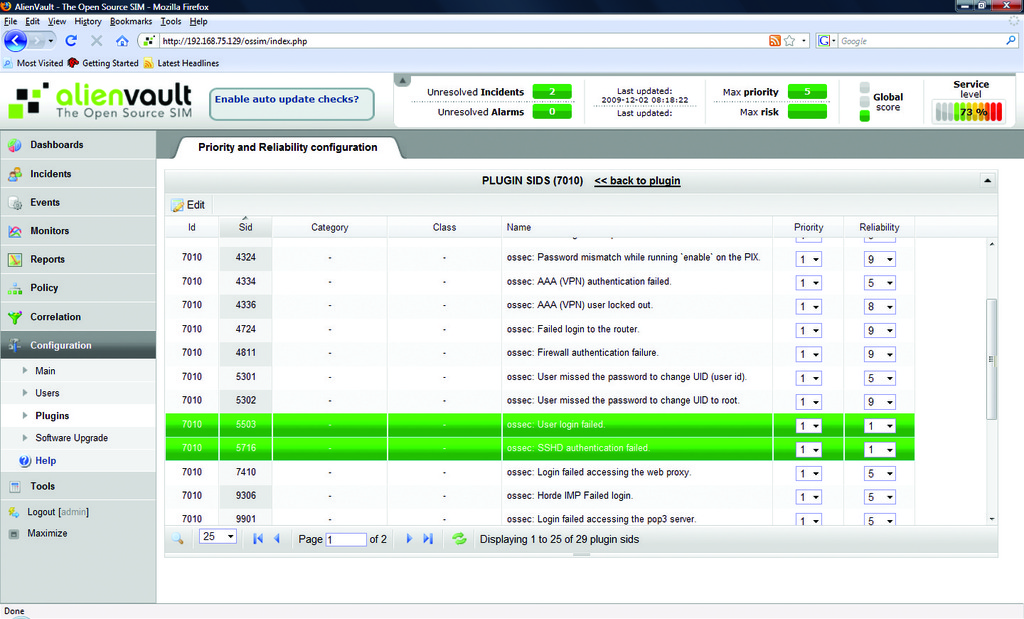
Figure 8. Adjusting the Reliability of Our Plugin's SIDs
Click on the Directives link found under the Correlation section of the navigation pane. From here, you get a brief description of how directives are ordered and processed. Click on the Add Directive line in the top left of the page. In the resulting fields, enter “Unauthorized Access to Web Server” as the Name. In the blank field next to Id, enter 101, which places your directive in the Generic directives group. Set the Priority to 2 and click Save. On the next page (Figure 9), click on the + symbol to add a rule to your new directive. In the Name field, type “NMAP Scan on Web Server from Foreign Host”. Enter 1001 as the Plugin Id (snort). In the Plugin Sid field, type “2000537, 2000545”, and under the Network section in the To field, type in the IP address of your CentOS server and the Port to List 22. In the Risk field, set Occurrence to 3, Reliability to 1. Set the Sticky field to True and Sticky Different to SRC_IP. Click the Save button at the bottom of the page.
In theory, you have a directive that will send an alarm when a host runs an Nmap scan against port 22 on your Web server. However, you won't receive alerts yet. In order for a directive to send an alarm, the risk of the directive being tripped must be greater than 1.
Although I have not talked much about risk until now, it is integral to the function of correlation. Risk is the primary factor used by the correlation engine to determine when alarms are generated. It is calculated using a series of subjective numerical values assigned by the agents and administrators. Expressed in mathematical form, the formula for risk looks like this:
Risk = (priority x reliability x asset) / 25
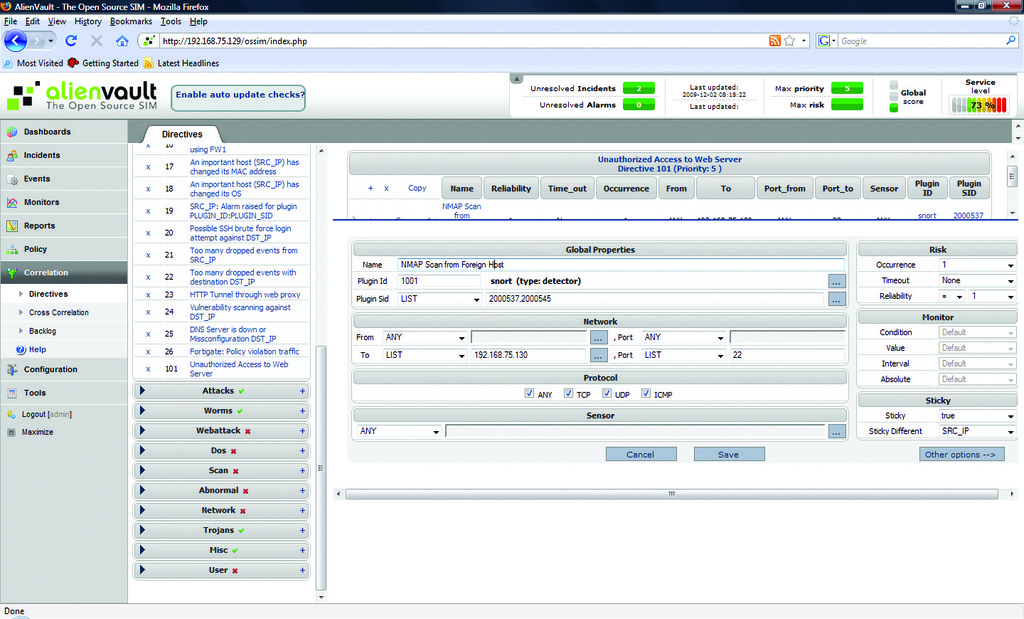
Figure 9. The First Rule of the Test Directive
Priority is the number OSSIM uses to prioritize rules. It is set at the Directive level. Priority can have a value of 0–5. 0 means OSSIM should ignore the alert. A value of 5 means OSSIM should treat this as a serious threat. Reliability refers to how reliable a rule is based on the chance that it's a false positive. It is set at the individual rule level and can be cumulative if there is more than one rule in a directive. Possible values for reliability are 1–10, and they equate to percentages, so 6 would mean a rule is reliable 60% of the time. Asset is the value that represents the importance of a host. You assigned the highest possible priority (5) to your CentOS server in the Policies section earlier in the article.
At this point, you have one rule under your directive, but no correlation, so you need to add another rule. Click on the + symbol on your directive. Give the new rule a name of “Too Many Auth Failures”. Set the Plugin ID to 7010 (OSSEC), and set the From field to the IP address of your Web server as the OSSEC agent will show the Web server as the source of the events. Set Occurrence to 4 and Reliability to 0 for now. Click Save. After adding the second rule, navigate to the row of the new rule and move the mouse over the directional arrows that control how rules are treated inside the directive. The up and down arrows are similar to AND statements, meaning both rules must match, and the left and right arrows nest rules within each other like nested IF statements. Move your second rule to the right. Open the second rule back up and change the reliability to +2, which will increase the reliability by 2 over the previously processed rule (3 if the first rule is met). Now, if both rules are met, the risk will be > 1 and an alarm will be generated. Listing 1 shows the directive in XML format.
Listing 1. Directive in .xml Format
<directive id="101"
           name="Unauthorized Access to Web Server"
           priority="5">
   <rule type="detector"
         name="NMAP Scan from Foreign host"
         from="ANY"
         to="web.server.ip.address"
         port_from="ANY"
         port_to="22"
         reliability="1"
         occurrence="1"
         plugin_id="1001"
         plugin_sid="2000537,2000545"
         sticky="true"
         sticky_different="SRC_IP">
      <rules>
         <rule type="detector"
               name="Too Many Logins"
               from="web.server.ip.address"
               to="ANY"
               port_from="ANY"
               port_to="ANY"
               reliability="+2"
               occurrence="2"
               time_out="86400"
               plugin_id="7010"
               plugin_sid="5716"/>
      </rules>
   </rule>
</directive>
To generate an alarm, log on to the XP client and download Nmap. Run four scans against the CentOS server using the zenmap GUI and the quick scan option. Then, ssh to the same server and attempt to log in as root, but enter an incorrect password five times. You should see a new alarm in the Unresolved Alarms link at the top of the page. Access this link and find the alarm triggered by your test directive (Figure 10). Identify the row with your test alarm and click on the icon resembling a sheet of paper in the Action column to open a new Alarm Incident (Figure 11). A new window will pop up and display basic information about the incident that will be used to create a ticket. Click OK to confirm the information, and the full ticket editor will load. Add a description and any other pertinent information to this page, and click on the Add ticket button. You should see a new Unresolved Ticket on the indicator at the top of the page. To edit a ticket, navigate to the Tickets link in the Incidents section of the navigation pane. From here you can add notes, attach files and change the status of your tickets. A ticket will no longer show in the list once its status is set to Closed. Although quite simple, this built-in ticketing system contains the necessary functionality to satisfy most enterprises' incident-response needs. OSSIM also contains a knowledge base that you can use to link tickets and external documents that adds another layer of depth to its incident response system.
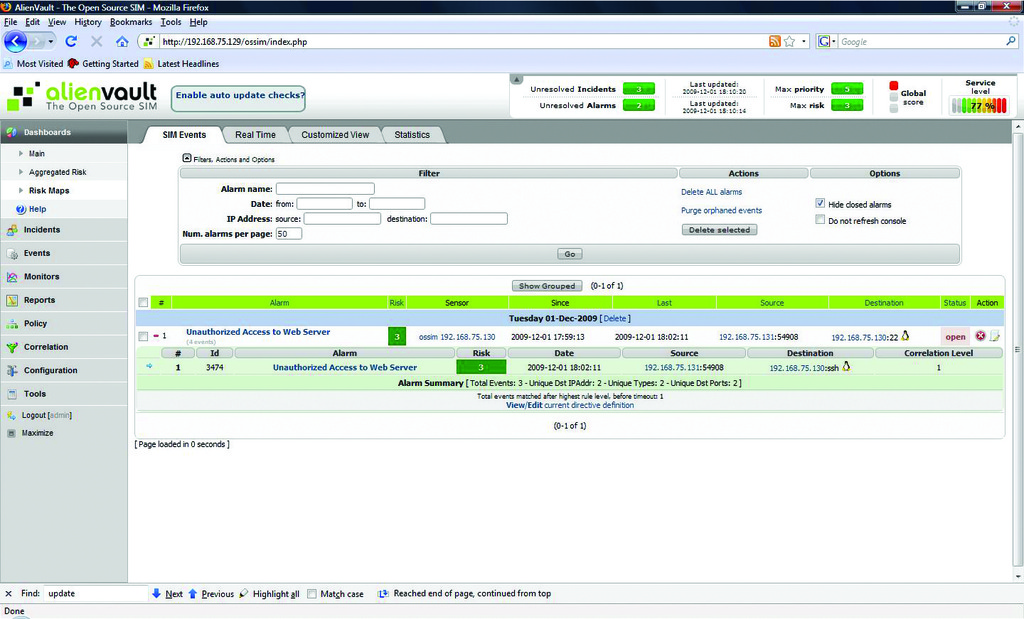
Figure 10. Test Directive Generating an Alarm
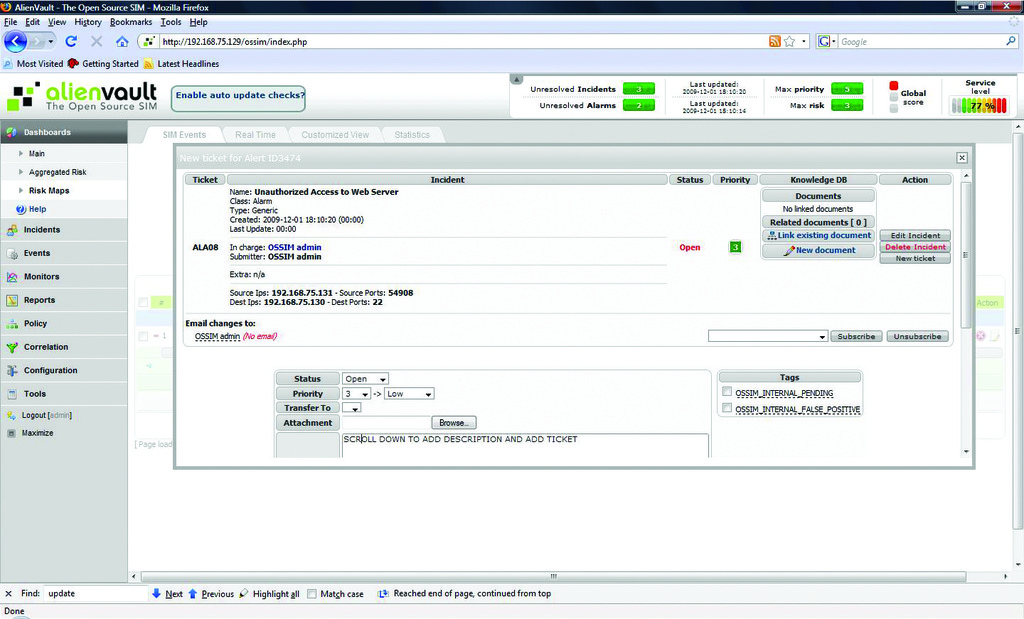
Figure 11. A New Ticket Generated by the Alarm
This brief walk-through barely touches on the power of OSSIM. Its correlation abilities and its multitude of plugins make it an intriguing alternative to the traditional SIM. If you factor in the ability to write your own plugins, you have a tool that is fully customizable for any environment and whose value is limited only by your creativity. The makers of OSSIM have given SIMs a new intelligence that hopefully will drive innovation in the field and take security management to the next level.
Resources
OSSIM Installer Download: www.alienvault.com/opensourcesim.php?section=Downloads
OSSIM Wiki: www.ossim.net/wiki/doku.php
OSSEC: www.ossec.net
Jeramiah Bowling has been a system administrator and network engineer for more than ten years. He works for a regional accounting and auditing firm in Hunt Valley, Maryland, and holds numerous industry certifications, including the CISSP. Your comments are welcome at jb50c@yahoo.com.

