
Adventures with Chumby
I am now the happy owner of one of the coolest gadgets I have ever experienced, the Chumby. At first glance, this diminutive computer appears to be nothing more than a Web-connected alarm clock. This, in and of itself, is a neat idea, and worth the price of admission for me. However, the Chumby is much more than a simple alarm clock, Web-connected or not. To that end, I made a conscious decision when the Chumby was on its way to me from the factory in China not to have the Chumby in the bedroom. Such a useful device should be in a room where people can take advantage of it while they're awake.
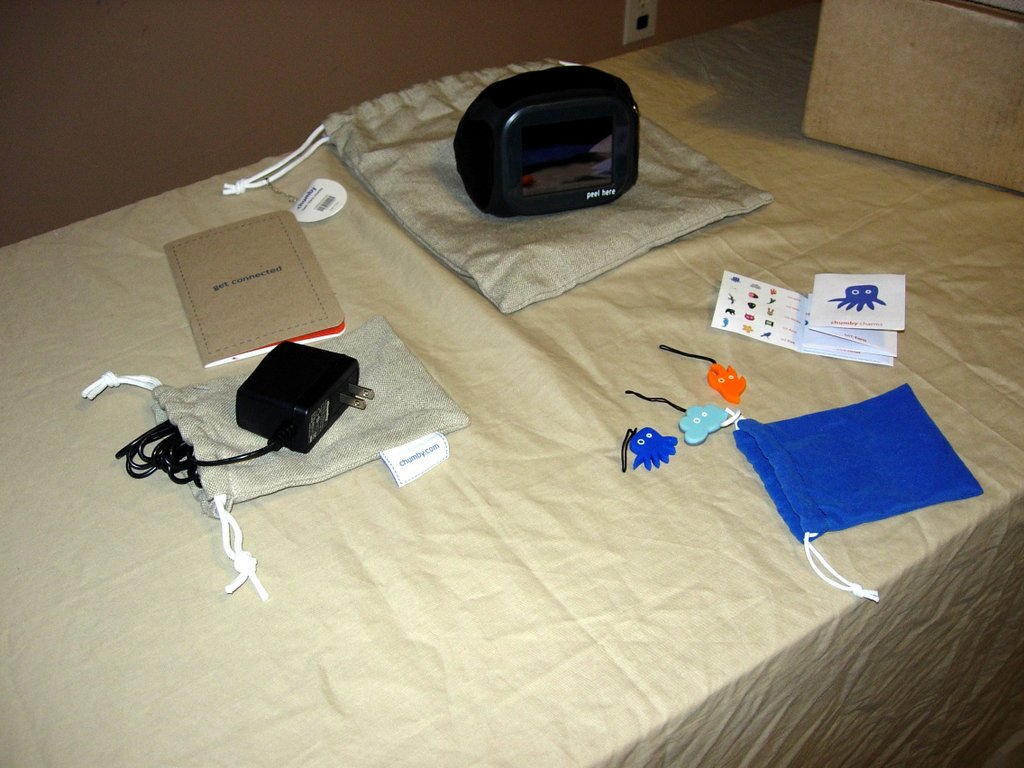
Figure 1. What Comes with the Chumby
The Chumby, at its heart, is a small embedded computer wrapped in a soft, squeezable shell made of plastic and leather. If you want to get technical, the Chumby is powered by a 350MHz ARM processor and contains 64MB of SDRAM and 64MB of NAND Flash ROM. For output, it has a 3.5" LCD color touchscreen, 2W stereo speakers, two USB 2.0 full-speed ports and a headphone jack. For input, it has the aforementioned touchscreen, a squeeze button on the top, and an accelerometer for motion and tilt sensing. It connects to the Internet via 802.11b/g, which means you need to have a wireless network of some sort. Power is supplied by an external AC adapter, and there also is a connector for a nine-volt battery for emergency power.
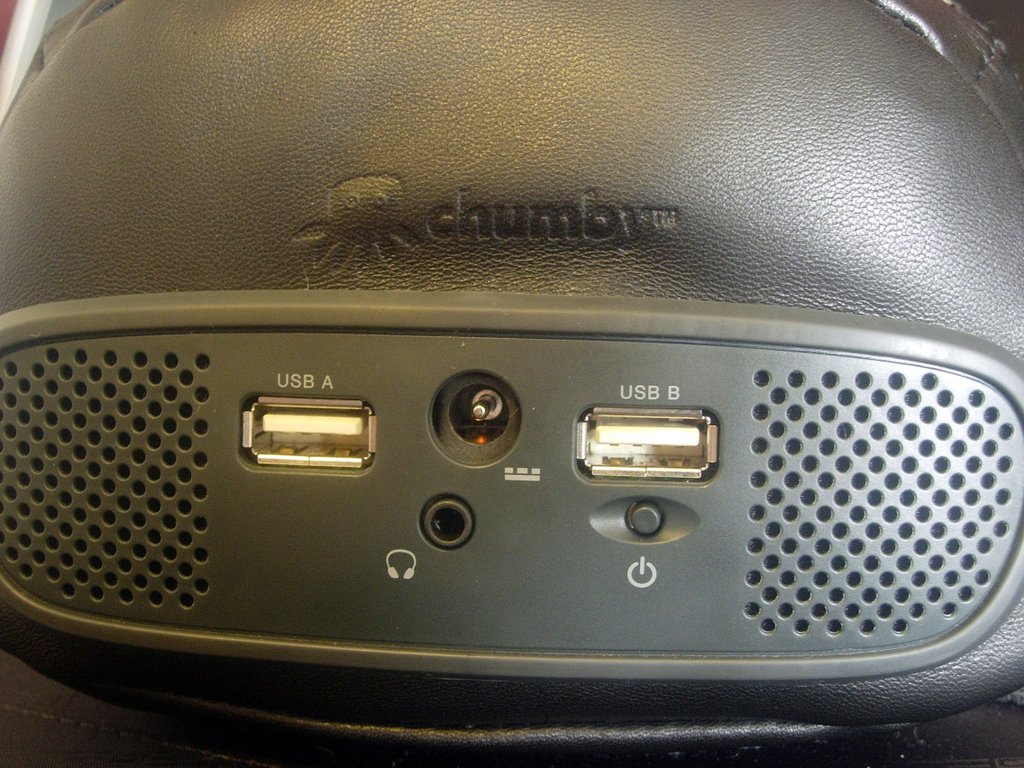
Figure 2. Back of the Chumby
The Chumby displays small Flash movie “widgets”. These Flash movies can do anything that Flash movies can do within the limits of the Flash-Lite-3 embedded Flash player that the Chumby runs. In practical terms, this means it can play most Flash movies that run in version 8 or lower of the Flash browser plugin. Some features were added in version 9 of the browser plugin that are not supported in Flash-Lite-3.
A lot of thought and care has gone into the design of the Chumby, and every effort appears to have been made to make the Chumby as easy to use as possible. Even the packaging contains some nice touches, such as the linen bags the Chumby arrives in instead of yet another box. The bags are useful and mean less waste—always a good thing in my book.
The user interface also is well designed. My very nontechnical wife was able to find her way around the Chumby easily. There even is a nice movie that plays when you turn the Chumby on for the first time that gives you a quick tour of the interface and main features.
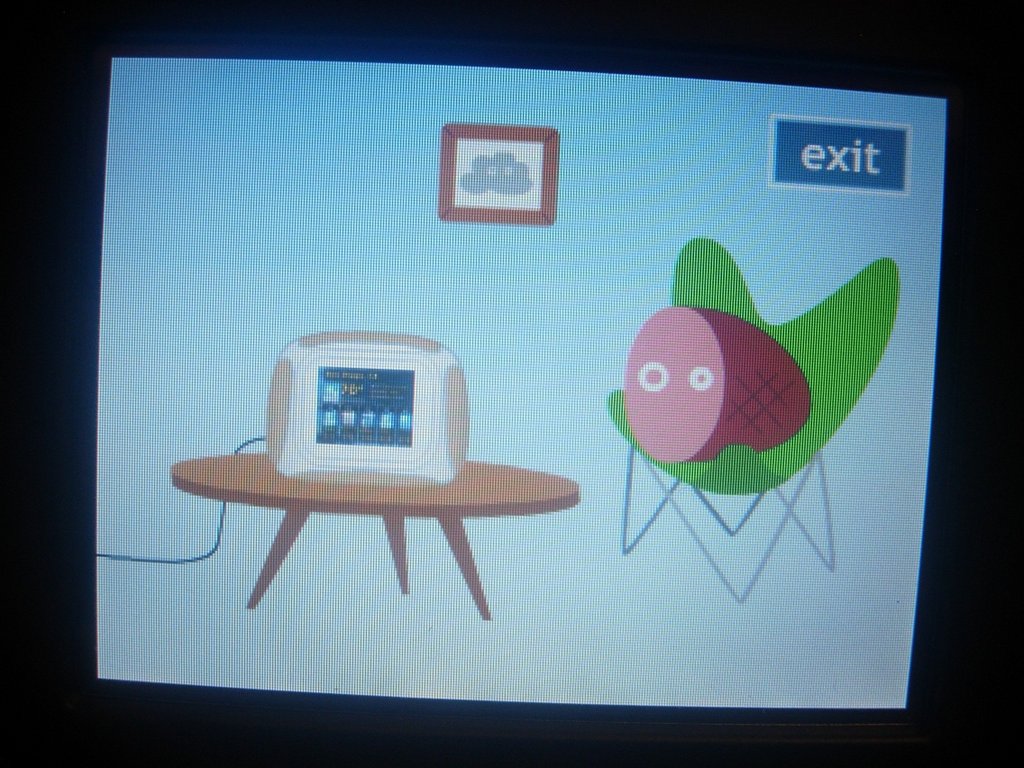
Figure 3. The Chumby Guided Tour
Once I had the Chumby unpacked and connected to my network (and had given the little charms that I found in one of the bags to my kids), it was down to business. My original thoughts on what I wanted to do with the Chumby were to turn it into a kitchen assistant with a favorite recipes database that it served up from either a built-in or in-house Web server, a recipe search widget (to search the recipes in the database, or find new ones on-line), a music player, a shopping list creator, a meal planner, a calendar, a photo album, an egg timer, a calculator and a plain-old alarm clock. Ten things shouldn't be too hard, right? Well, my success was mixed. Some things worked out great, and others, not so much. I haven't given up on getting all of the above working eventually, but not all of them work at this time.

Figure 4. The Chumby in the Kitchen
My first order of business was to try to create some Flash widgets, and I quickly found there are some major downsides to having Flash be the preferred method of application development on the Chumby. The good part is that the Flash software from Adobe is easy to use and can create all sorts of things. The bad part is that said software—apart from it being proprietary, closed-source and available only for Windows and Macintosh—costs twice as much as the Chumby, and there are no easy-to-use open-source alternatives to the Flash programming environment that run on Linux.
There has been some progress in this area, mostly along the lines of simple environments for writing and compiling Adobe's Action Script language into Flash movies, but the best of these, FlashDevelop, is Windows-only. I'm also not too keen on learning yet another programming language. There are some Linux GUI tools that are in the proof-of-concept stage (meaning they look nice but don't work).
Another option for me would have been to hack the underlying embedded Linux operating system on the Chumby and add something like embedded GTK or KDE, but I quickly put that out of my mind, as I don't think I have the chops to avoid turning the Chumby into a paperweight in the process.
So, I went with what I had, and what I could find. The upside to this approach is that new widgets are being released all the time—more than a dozen in the few weeks that I've had the Chumby—and people are constantly thinking up new things for their Chumbys to do.
There is an alarm clock built in to the Chumby, so this one was checked off of my list before the Chumby arrived. The Chumby can have multiple alarms, and the alarms can trigger different sounds and activate different sets of widgets. For example, in the morning I have an alarm that does not make a sound (the Chumby is not in my bedroom, so any alarm sound would not be heard), but what it does do is switch the active set of widgets over to my “morning” set, which contains a mixture of news and weather widgets that I like to look at while I'm getting breakfast ready. When the time comes to take the kids to school, there's another alarm, and this one does make a sound. I also have other morning, afternoon and evening alarms that—although they don't make any noise—switch the active widget set to the sorts of things I am generally interested in at those times.
The photo album also was checked off before the Chumby arrived. There are many options for displaying photos through your Chumby. The easiest are the series of official photo widgets that can pull photos from your Flickr, Picasa, Photobucket or MySpace accounts. You just enter your login details and the album you want, and away you go.
There is also a neat service called Dailio where you can send photos to a special e-mail address, and they will show up on your Chumby without any further effort.
The egg timer was another easy item to cross off my list, as an enterprising member of the Chumby community (the same one who created the Dailio widget) already created one that works very well.

Figure 5. Toasty, the Chumby Kitchen Timer
There is a also a calculator widget that a different member of the Chumby community created. It works well, and that's about all I have to say on the subject, apart from that I wish the buttons were bigger.
The calendar widget I'm using is one that displays my Google Calendar. It is limited to an agenda view that lists each scheduled item in order. It would have been nice to have daily, week or month views, but it is certainly usable if not quite what I was looking for.
I was very pleased with the Chumby's support for listening to music. The music section of the Chumby control panel has several options that let you listen to music from a variety of locations. These include an iPod, SHOUTcast streams, Mediafly podcasts, any radio streams in MP3 or Ogg format from radio stations or your own local SlimServer, or music files (in Ogg, MP3 or FLAC format) from a USB thumbdrive plugged in to one of the available USB ports.
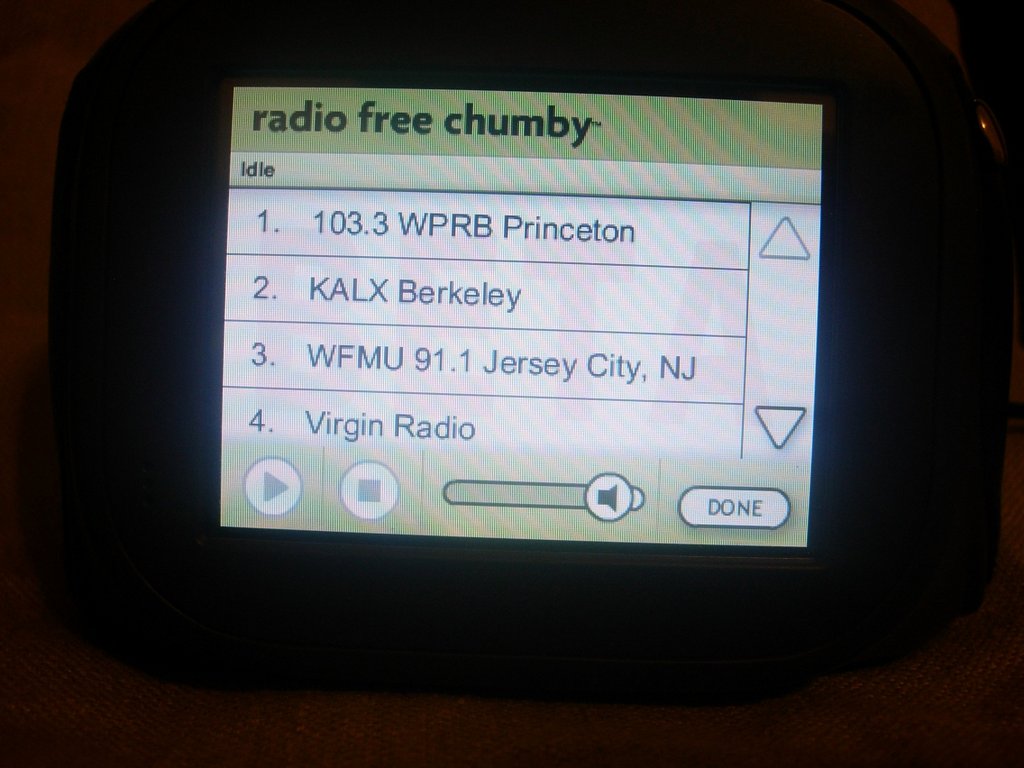
Figure 6. Music on the Chumby
Incidentally, the speakers on the Chumby sound quite nice, especially considering their size. There is, of course, the option to plug in a set of external speakers or a pair of headphones to the headphone jack if you want better sound.
The first idea I had for my kitchen-assistant Chumby was to make it into a recipe book, so I focused a lot of my efforts here. The recipe book idea is also, coincidentally, my wife's favorite use for the Chumby. She's been storing her favorite recipes for years now on her computer in .odt format, and whenever she cooks something she needs a recipe for, she either makes a lot of trips back and forth to her computer, or she prints the recipe out. Neither of those options are ideal.
As with the other tasks I had outlined for the Chumby—I named him George, by the way—I first went looking to see if someone had a recipe widget already created. I could not find any, so I then decided to look to see whether there were any widgets I could easily adapt into becoming a recipe widget.
There are several photo-viewing widgets, so my first inclination was simply to create 320x240 pixel images of my recipes, upload them to my Flickr or Picasa accounts, and then view them on the Chumby. This worked—a PNG image is a PNG image after all—but it didn't work very well, because practically all of the photo widgets are for showing slideshows, with the photos switching every few seconds. This is fine if you are displaying photos—I use the Flickr one for pictures of my kids and love it—but recipes need to stay on the screen for several minutes (or longer, depending on preparation time).

Figure 7. My Early Attempt at a Recipe Book—Individual “Card” Images
The photo widget that worked the best was the Dailio widget. Unlike other photo widgets, this one lets you set how long a photo stays displayed (from five seconds to five minutes). There also is a forever option, which I assume means that the photo stays displayed until you change it manually, but that option did not work for me. Instead, it caused the recipes to blink and stutter. So I was stuck with five minutes, which is okay, but not perfect.
I finally found the perfect recipe option sitting right under my nose: Impress, the OpenOffice.org presentation application. It has an option to export any slideshow as a Flash (.swf) file. It also turns out that these files play perfectly on the Chumby, even though they are not technically the correct size. So I chose one of the basic templates, and then, using each slide as a “recipe card”, created a recipe book.

Figure 8. Creating a Recipe Book
For simplicity and ease of use, I did not put in any transitions or text animations. I also tried to keep the fonts as large as possible while still fitting an entire recipe on a single slide. The side effect of not putting any auto-advancing slides into my presentation is that each slide stays put until I'm done with it, which is perfect behavior.
Each presentation always starts at the first slide, and you have to tap through each preceding recipe to get to the one you want. So I created several presentations with general themes, like desserts, main dishes and so on, to keep the number of recipes per widget manageable.
Currently, the recipe books are pretty plain. Over the next few weeks, I plan to add photos to the recipes and make other general improvements, but as they stand now, they already have been put to good use.

Figure 9. A Recipe on the Chumby
The process of getting a custom widget, like my recipe books, onto the Chumby is simple. There actually are a couple ways to do this, but the most straightforward option is to upload it to Chumby.com and add it to one of your channels there. All you need is your .swf file and an icon. The icon is a simple 80x60 pixel .jpg image. I kept mine simple by putting black text on a white background using The GIMP.
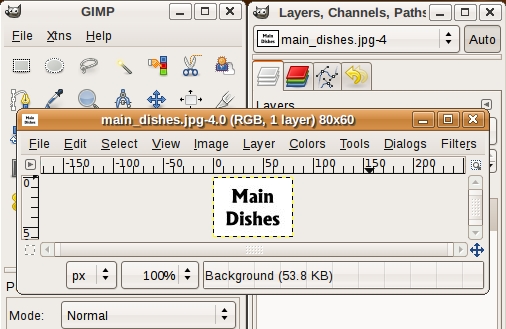
Figure 10. Creating an Icon in The GIMP
Go to www.chumby.com/widgets/upload to upload your widget. The form is self-explanatory. Once uploaded, your widget will be available in the category you chose, and if you marked it as public, it will be viewable by all Chumby users (once the Chumby folks have determined that it isn't a malicious widget).
The only real downside to the browser method is that Chumby.com will let you upload only widgets that are less than 100K in size. If you create a widget larger than that—and I expect that once I've added all my recipes and photos, each recipe book has the possibility to be larger than that—the other way to get a widget onto your Chumby is with a USB thumbdrive.
For the thumbdrive method, apart from the icon and Flash files, you need a text file named profile.xml. The Chumby looks for this file when it boots and will add any widgets described in it to all of your widget channels. This file is self-explanatory, and the Chumby Wiki provides full instructions.
Listing 1. Sample profile.xml File
<profile>
  <widget_instances>
      <widget_instance id="1">
      <widget>
        <name>Breads</name>
        <description>Various bread recipes.</description>
        <version>1.0</version>
        <mode time="180" mode="timeout"/>
        <access sendable="false" deleteable="false" access="private"
         virtualable="false"/>

        <user username="myusername"/>

        <thumbnail href="file:////mnt/usb/breads.jpg"
         contenttype="image/jpeg"/>
        <movie href="file:////mnt/usb/breads.swf"
         contenttype="application/x-shockwave-flash"/>
      </widget>
      </widget_instance>

      <widget_instance id="2">
      <widget>
        <name>Cookies</name>
        <description>Various cookie recipes.</description>
        <version>1.0</version>
        <mode time="180" mode="timeout"/>
        <access sendable="false" deleteable="false" access="private"
         virtualable="false"/>

        <user username="myusername"/>

        <thumbnail href="file:////mnt/usb/cookies.jpg"
         contenttype="image/jpeg"/>
        <movie href="file:////mnt/usb/cookies.swf"
         contenttype="application/x-shockwave-flash"/>
      </widget>
    </widget_instance>

  </widget_instances>
</profile>
I haven't been able to get all the things I wanted to get onto the Chumby onto it. However, after actually using the Chumby for a couple weeks, I'm not so sure they were good ideas to begin with.
The main reason for this is that my intended recipe search, shopping list creator and meal planning widgets all would require extensive text input, and that is where the Chumby is not ideal. The Chumby is mainly an output device, suited to displaying various bits of information. Input is best limited to simple interactions, such as tapping on buttons and sliding your finger around the screen.
The Chumby can handle text input, and some widgets require it. The control panel, for example, has a simple on-screen keyboard where you enter in your wireless settings during the Chumby's initial setup. Also, in the music interface, there is another on-screen keyboard where you enter in the location of the music stream to which you want to connect. But, supporting text input where required and doing a lot of text input are two very different things.
After entering text in just those two above-mentioned places, I could see it was not something I would want to do on a regular basis with the Chumby, because although it works, it's slow. The problem is that when using the Chumby, the natural thing to do is to use your fingers, and most widgets—if they have buttons at all—keep them large and few in number. For effective text input, you need a lot of small buttons, and on the Chumby's screen, lots of small buttons practically requires you to use a stylus—not something I want to have to use with the Chumby.
I toyed around with using an RSS widget to display recipe data from sites that offer it, such as Taste-of-Home's Recipe of the Day, but as you can see from the screenshot, my testing did not go so well.

Figure 11. Some RSS feeds don't work.
The Chumby is an amazing device. It can be adapted to fit in with almost any room in the house and can display any sort of data that can be displayed within the confines of the Flash file format.
New widgets come out all the time, and the basic software is under constant improvement. Check out chumby.com and browse the available widgets; there's something for everyone.
The Chumby is also very hackable. The underlying operating system is embedded Linux, and all the source code (apart from a few licensed bits that they aren't allowed to disclose) and complete hardware schematics are available on the Chumby Web site. The developers really seem to get the idea of making a device hackable, with their only warning being a gentle reminder that if you take your Chumby apart, it will void the warranty. Beyond that, they actively encourage you to turn the Chumby into anything you please and are eager to help you in any way they can through their Web site, forums and wiki.
In these days of locked-down, don't-you-dare-look-behind-the-curtain-or-we'll-sue gadgets, having one that you can mod to your heart's content, with full schematics and source code—and the original developers—to guide you, is a nice feeling.
The Secret Chumby Menu—It's as Easy as Pi
There's a secret menu on the Chumby, and it is fairly easy to reach. Here's what you need to do:
Bring up the control panel.
Tap on Settings.
Tap on Chumby Info.
On the info screen, in the upper-right corner is a tiny Pi symbol, tap it.
Done!
If you followed the above steps, you now are looking at a screen titled “Do you believe in the Users?”. Tron references aside, now you can do things like browse the filesystem and start up the SSH dæmon.
Chumby Software Licenses
The software on the Chumby is open source, through and through. Just take a look at the Software Licenses screen (accessed from Settings→Chumby Info→Software Licenses). Hack away at the Chumby all you want.
SSH and HTTP on the Chumby
Being based on Linux, the Chumby has a lot of functionality that isn't exposed right off the bat. An example of this is the built-in Web server and the ability to SSH into the Chumby.
The Web server, by default, has only a link to some statistics on how good the wireless connection is, but it can be extended easily.
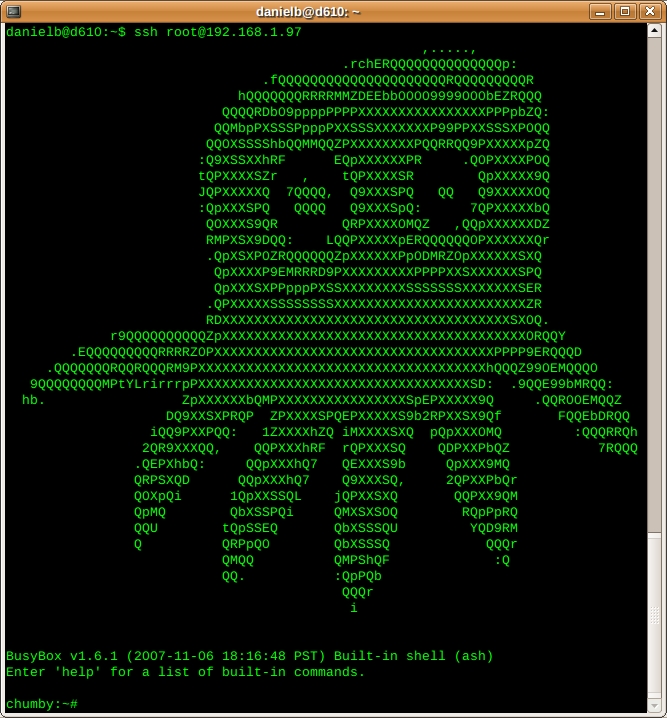
Yes, you can SSH into the Chumby.
When you SSH into the Chumby, you'll find a nice, embedded command-line environment waiting for you, courtesy of BusyBox. You even can set up cron jobs and run shell scripts.
Resources
The Source for All Things Chumby: chumby.com
The Friendly and Helpful Chumby Forums: forum.chumby.com
The Chumby Wiki: wiki.chumby.com
Nitty-Gritty Chumby Details: www.chumby.com/developers
FlashDevelop: www.flashdevelop.org
Daniel Bartholomew lives with his wife and children in North Carolina.

