
Creating VPNs with IPsec and SSL/TLS
VPN (Virtual Private Network) is a technology that provides secure communication through an insecure and untrusted network (like the Internet). Usually, it achieves this by authentication, encryption, compression and tunneling. Tunneling is a technique that encapsulates the packet header and data of one protocol inside the payload field of another protocol. This way, an encapsulated packet can traverse through networks it otherwise would not be capable of traversing.
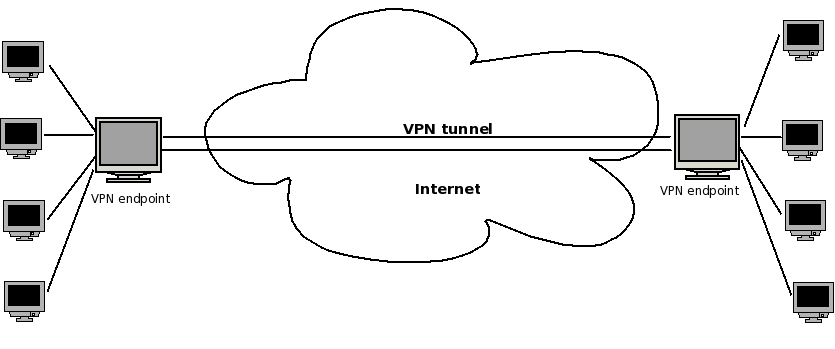
Figure 1. A Basic VPN Tunnel
Currently, the two most common techniques for creating VPNs are IPsec and SSL/TLS. In this article, I describe the features and characteristics of these two techniques and present two short examples of how to create IPsec and SSL/TLS tunnels in Linux and verify that the tunnels started correctly. I also provide a short comparison of these two techniques.
IPsec (IP security) provides encryption, authentication and compression at the network level. IPsec is actually a suite of protocols, developed by the IETF (Internet Engineering Task Force), which have existed for a long time. The first IPsec protocols were defined in 1995 (RFCs 1825–1829). Later, in 1998, these RFCs were depreciated by RFCs 2401–2412. IPsec implementation in the 2.6 Linux kernel was written by Dave Miller and Alexey Kuznetsov. It handles both IPv4 and IPv6. IPsec operates at layer 3, the network layer, in the OSI seven-layer networking model. IPsec is mandatory in IPv6 and optional in IPv4. To implement IPsec, two new protocols were added: Authentication Header (AH) and Encapsulating Security Payload (ESP). Handshaking and exchanging session keys are done with the Internet Key Exchange (IKE) protocol.
The AH protocol (RFC 2404) has protocol number 51, and it authenticates both the header and payload. The AH protocol does not use encryption, so it is almost never used.
ESP has protocol number 50. It enables us to add a security policy to the packet and encrypt it, though encryption is not mandatory. Encryption is done by the kernel, using the kernel CryptoAPI. When two machines are connected using the ESP protocol, a unique number identifies this connection; this number is called SPI (Security Parameter Index). Each packet that flows between these machines has a Sequence Number (SN), starting with 0. This SN is increased by one for each sent packet. Each packet also has a checksum, which is called the ICV (integrity check value) of the packet. This checksum is calculated using a secret key, which is known only to these two machines.
IPsec has two modes: transport mode and tunnel mode. When creating a VPN, we use tunnel mode. This means each IP packet is fully encapsulated in a newly created IPsec packet. The payload of this newly created IPsec packet is the original IP packet.

Figure 2. An IPsec Tunnel ESP Packet
Figure 2 shows that a new IP header was added at the right, as a result of working with a tunnel, and that an ESP header also was added.
There is a problem when the endpoints (which are sometimes called peers) of the tunnel are behind a NAT (Network Address Translation) device. Using NAT is a method of connecting multiple machines that have an “internal address”, which are not accessible directly to the outside world. These machines access the outside world through a machine that does have an Internet address; the NAT is performed on this machine—usually a gateway.
When the endpoints of the tunnel are behind a NAT, the NAT modifies the contents of the IP packet. As a result, this packet will be rejected by the peer because the signature is wrong. Thus, the IETF issued some RFCs that try to find a solution for this problem. This solution commonly is known as NAT-T or NAT Traversal. NAT-T works by encapsulating IPsec packets in UDP packets, so that these packets will be able to pass through NAT routers without being dropped. RFC 3948, UDP Encapsulation of IPsec ESP Packets, deals with NAT-T (see Resources).
Openswan is an open-source project that provides an implementation of user tools for Linux IPsec. You can create a VPN using Openswan tools (shown in the short example below). The Openswan Project was started in 2003 by former FreeS/WAN developers. FreeS/WAN is the predecessor of Openswan. S/WAN stands for Secure Wide Area Network, which is actually a trademark of RSA. Openswan runs on many different platforms, including x86, x86_64, ia64, MIPS and ARM. It supports kernels 2.0, 2.2, 2.4 and 2.6.
Two IPsec kernel stacks are currently available: KLIPS and NETKEY. The Linux kernel NETKEY code is a rewrite from scratch of the KAME IPsec code. The KAME Project was a group effort of six companies in Japan to provide a free IPv6 and IPsec (for both IPv4 and IPv6) protocol stack implementation for variants of the BSD UNIX computer operating system.
KLIPS is not a part of the Linux kernel. When using KLIPS, you must apply a patch to the kernel to support NAT-T. When using NETKEY, NAT-T support is already inside the kernel, and there is no need to patch the kernel.
When you apply firewall (iptables) rules, KLIPS is the easier case, because with KLIPS, you can identify IPsec traffic, as this traffic goes through ipsecX interfaces. You apply iptables rules to these interfaces in the same way you apply rules to other network interfaces (such as eth0).
When using NETKEY, applying firewall (iptables) rules is much more complex, as the traffic does not flow through ipsecX interfaces; one solution can be marking the packets in the Linux kernel with iptables (with a setmark iptables rule). This mark is a member of the kernel socket buffer structure (struct sk_buff, from the Linux kernel networking code); decryption of the packet does not modify that mark.
Openswan supports Opportunistic Encryption (OE), which enables the creation of IPsec-based VPNs by advertising and fetching public keys from a DNS server.
OpenVPN is an open-source project founded by James Yonan. It provides a VPN solution based on SSL/TLS. Transport Layer Security (TLS) and its predecessor, Secure Sockets Layer (SSL), are cryptographic protocols that provide secure communications data transfer on the Internet. SSL has been in existence since the early '90s.
The OpenVPN networking model is based on TUN/TAP virtual devices; TUN/TAP is part of the Linux kernel. The first TUN driver in Linux was developed by Maxim Krasnyansky.
OpenVPN installation and configuration is simpler in comparison with IPsec. OpenVPN supports RSA authentication, Diffie-Hellman key agreement, HMAC-SHA1 integrity checks and more. When running in server mode, it supports multiple clients (up tp 128) to connect to a VPN server over the same port. You can set up your own Certificate Authority (CA) and generate certificates and keys for an OpenVPN server and multiple clients.
OpenVPN operates in user-space mode; this makes it easy to port OpenVPN to other operating systems.
First, download and install the ipsec-tools package and the Openswan package (most distros have these packages).
The VPN tunnel has two participants on its ends, called left and right, and which participant is considered left or right is arbitrary. You have to configure various parameters for these two ends in /etc/ipsec.conf (see man 5 ipsec.conf). The /etc/ipsec.conf file is divided into sections. The conn section contains a connection specification, defining a network connection to be made using IPsec.
An example of a conn section in /etc/ipsec.conf, which defines a tunnel between two nodes on the same LAN, with the left one as 192.168.0.89 and the right one as 192.168.0.92, is as follows:
...
conn linux-to-linux
        #
        # Simply use raw RSA keys
        # After starting openswan, run:
        # ipsec showhostkey --left (or --right)
        # and fill in the connection similarly
        # to the example below.
        left=192.168.0.89
        leftrsasigkey=0sAQPP...
        # The remote user.
        #
        right=192.168.0.92
        rightrsasigkey=0sAQON...
        type=tunnel
        auto=start
...
You can generate the leftrsasigkey and rightrsasigkey on both participants by running:
ipsec rsasigkey --verbose 2048 > rsa.key
Then, copy and paste the contents of rsa.key into /etc/ipsec.secrets.
In some cases, IPsec clients are roaming clients (with a random IP address). This happens typically when the client is a laptop used from remote locations (such clients are called Roadwarriors). In this case, use the following in ipsec.conf:
right=%any
The %any keyword is used to specify an unknown IP address.
The type parameter of the connection in this example is tunnel (which is the default). Other types can be transport, signifying host-to-host transport mode; passthrough, signifying that no IPsec processing should be done at all; drop, signifying that packets should be discarded; and reject, signifying that packets should be discarded and a diagnostic ICMP should be returned.
The auto parameter of the connection tells which operation should be done automatically at IPsec startup. For example, auto=start tells it to load and initiate the connection; whereas auto=ignore (which is the default) signifies no automatic startup operation. Other values for the auto parameter can be add, manual or route.
After configuring /etc/ipsec.conf, start the service with:
service ipsec start
You can perform a series of checks to get info about IPsec on your machine by typing ipsec verify. And, output of ipsec verify might look like this:
Checking your system to see if IPsec has installed and started correctly:
Version check and ipsec on-path                                 [OK]
Linux Openswan U2.4.7/K2.6.21-rc7 (netkey)
Checking for IPsec support in kernel                            [OK]
NETKEY detected, testing for disabled ICMP send_redirects       [OK]
NETKEY detected, testing for disabled ICMP accept_redirects     [OK]
Checking for RSA private key (/etc/ipsec.d/hostkey.secrets)     [OK]
Checking that pluto is running                                  [OK]
Checking for 'ip' command                                       [OK]
Checking for 'iptables' command                                 [OK]
Opportunistic Encryption Support                                [DISABLED]
You can get information about the tunnel you created by running:
ipsec auto --status
You also can view various low-level IPSec messages in the kernel syslog.
You can test and verify that the packets flowing between the two participants are indeed esp frames by opening an FTP connection (for example), between the two participants and running:
tcpdump -f esp
tcpdump: verbose output suppressed, use -v or -vv for full protocol decode
listening on eth0, link-type EN10MB (Ethernet), capture size 96 bytes
You should see something like this:
IP 192.168.0.92 > 192.168.0.89: ESP(spi=0xd514eed9,seq=0x7)
IP 192.168.0.89 > 192.168.0.92: ESP(spi=0x3a1563b9,seq=0x6)
IP 192.168.0.89 > 192.168.0.92: ESP(spi=0x3a1563b9,seq=0x7)
IP 192.168.0.92 > 192.168.0.89: ESP(spi=0xd514eed9,seq=0x8)
Note that the spi (Security Parameter Index) header is the same for all packets; this is an identifier of the connection.
If you need to support NAT traversal, add nat_traversal=yes in ipsec.conf; nat_traversal=no is the default.
The Linux IPsec stack can work with pluto from Openswan, racoon from the KAME Project (which is included in ipsec-tools) or isakmpd from OpenBSD.
First, download and install the OpenVPN package (most distros have this package).
Then, create a shared key by doing the following:
openvpn --genkey --secret static.key
You can create this key on the server side or the client side, but you should copy this key to the other side in a secured channel (like SSH, for example). This key is exchanged between client and server when the tunnel is created.
This type of shared key is the simplest key; you also can use CA-based keys. The CA can be on a different machine from the OpenVPN server. The OpenVPN HOWTO provides more details on this (see Resources).
Then, create a server configuration file named server.conf:
dev tun
ifconfig 10.0.0.1 10.0.0.2
secret static.key
comp-lzo
On the client side, create the following configuration file named client.conf:
remote serverIpAddressOrHostName
dev tun
ifconfig 10.0.0.2 10.0.0.1
secret static.key
comp-lzo
Note that the order of IP addresses has changed in the client.conf configuration file.
The comp-lzo directive enables compression on the VPN link.
You can set the mtu of the tunnel by adding the tun-mtu directive. When using Ethernet bridging, you should use dev tap instead of dev tun.
The default port for the tunnel is UDP port 1194 (you can verify this by typing netstat -nl | grep 1194 after starting the tunnel).
Before you start the VPN, make sure that the TUN interface (or TAP interface, in case you use Ethernet bridging) is not firewalled.
Start the vpn on the server by running openvpn server.conf and running openvpn client.conf on the client.
You will get an output like this on the client:
OpenVPN 2.1_rc2 x86_64-redhat-linux-gnu [SSL] [LZO2] [EPOLL] built on
Mar  3 2007
IMPORTANT: OpenVPN's default port number is now 1194, based on an official
port number assignment by IANA. OpenVPN 2.0-beta16 and earlier used 5000
as
the default port.
LZO compression initialized
TUN/TAP device tun0 opened
/sbin/ip link set dev tun0 up mtu 1500
/sbin/ip addr add dev tun0 local 10.0.0.2 peer 10.0.0.1
UDPv4 link local (bound): [undef]:1194
UDPv4 link remote: 192.168.0.89:1194
Peer Connection Initiated with 192.168.0.89:1194
Initialization Sequence Completed
You can verify that the tunnel is up by pinging the server from the client (ping 10.0.0.1 from the client).
The TUN interface emulates a PPP (Point-to-Point) network device and the TAP emulates an Ethernet device. A user-space program can open a TUN device and can read or write to it. You can apply iptables rules to a TUN/TAP virtual device in the same way you would do it to an Ethernet device (such as eth0).
IPsec is considered the standard for VPN; many vendors (including Cisco, Nortel, CheckPoint and many more) manufacture devices with built-in IPsec functionalities, which enable them to connect to other IPsec clients.
However, we should be a bit cautious here: different manufacturers may implement IPsec in a noncompatible manner on their devices, which can pose a problem.
OpenVPN is not supported currently by most vendors.
IPsec is much more complex than OpenVPN and involves kernel code; this makes porting IPsec to other operating systems a much heavier task. It is much easier to port OpenVPN to other operating systems than IPsec, because OpenVPN runs entirely in user space and is not involved with kernel code.
Both IPsec and OpenVPN use HMAC (Hash Message Authentication Code) to authenticate packets.
OpenVPN is based on using the OpenSSL library; it can run over UDP (which is the default and preferred protocol) or TCP. As opposed to IPsec, which runs in kernel, it runs in user space, so it is heavier than IPsec in terms of performance.
Configuring and applying firewall (iptables) rules in OpenVPN is usually easier than configuring such rules with Openswan in an IPsec-based tunnel.
Resources
OpenVPN: openvpn.net
OpenVPN 2.0 HOWTO: openvpn.net/howto.html
RFC 3948, UDP Encapsulation of IPsec ESP Packets: tools.ietf.org/html/rfc3948
Openswan: www.openswan.org
The KAME Project: www.kame.net
Rami Rosen is a computer science graduate of Technion, the Israel Institute of Technology, located in Haifa. He works as a Linux and Open Solaris kernel programmer for a networking startup, and he can be reached at ramirose@gmail.com. In his spare time, he likes running, solving cryptic puzzles and helping everyone he knows move to this wonderful operating system, Linux.
