
Call MisterHouse to Regulate Your Heat
I am an architect and a software consultant, I am building my own home, and both my wife and I have allergies. Forced-air environmental control systems are not good for people with allergies. I have chosen to use radiant heating. Environmental control systems are one of the areas of home automation into which hobbyists rarely venture. Although the control systems for air conditioners and heat pumps are not particularly complex, a poor control system can wear out an expensive compressor early, if it does not destroy it. This taboo against directly controlling environmental control systems hardware extends to systems that are neither as easy to destroy nor as costly to replace.
This article discusses controlling a home radiant heating system using a home control system running under Linux. I have used several guiding principles in designing and implementing this system. I am a huge proponent of KISS (Keep It Simple), and I am an underutilized software consultant from a community that still believes pennies are money—I am cheap. I think that is a virtue. Simple trumps complex, cheap prevails over costly, software substitutes for hardware, do-it-yourself replaces buying or hiring.
Radiant heating systems are not particularly complex. My house is divided into zones, and each zone has its own controls. To some extent, the control system for the zone interacts with controls for the whole system. In a radiant heating system, when a zone requests heat, water is heated and circulated into something to radiate that heat into the rooms making up that zone.
The first system component is a heat source, and there is a wide variety of possible heating sources. I am using a 144,000 BTU wall-mounted instantaneous natural gas hot water heater with a 95% efficiency rating. One of the features of these units is that they are regulated and controlled internally. Simply drawing water triggers the electronic ignition. The unit itself controls its output to match demand. My unit has some ability to manipulate the preset water temperature as well as monitor its performance. Regardless of whether it is conventionally controlled or controlled by a home automation system, my water heater itself requires no external controls.
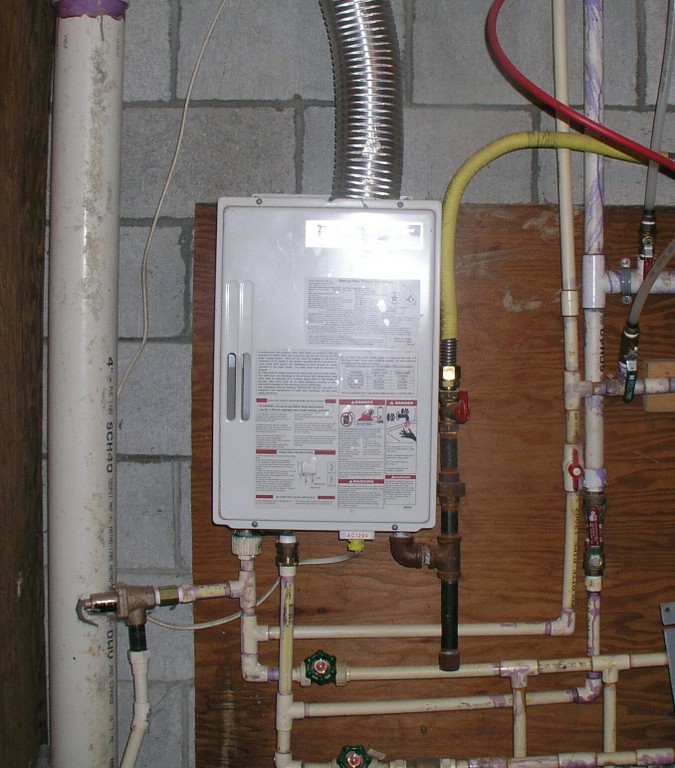
Figure 1. Takagi TkJr 144K BTUH Hot Water Heater
The next component is a heat sink—the way heat gets from the distribution system into the zone. In my house, this is PEX tubing, approximately 16" on center inside a concrete slab. There are many other ways of getting heat from the water into the zone, including baseboards, radiators and tubing stapled to the underside of floors. Each method has its own properties, but the most critical of these is the amount of heat it can radiate into the zone. PEX tubing in a concrete slab is one of the more efficient means of transferring heat to a zone. The maximum radiated heat from a concrete floor with radiant tubing is between 50–90K BTUH per 1,000 square feet or 50–90K BTUH for 1,000 square foot of floor—depending on how warm a floor you are willing to tolerate.
Proper design of the heat source and sink are beyond the scope of this article; however, they are not really complex. The heat sink must be capable of supplying more heat than the zone can lose in an hour under the most extreme conditions. The heat source must be able to provide at least as much heat as all zones could demand under the most extreme conditions. Under cold but less than extreme conditions, I do not want the system running most of the time; the norm is for the heat to run about one-third of the time. All heating systems are over-designed.
Another component is the circulator(s). Water must be persuaded to flow through the system. The norm is that at least one pump or circulator is required. Circulation systems can be designed in a number of ways. I have been able to procure small circulators very cost effectively (cheaply), so I have used a circulator for each zone. This significantly simplifies many other aspects of the design of the system. It eliminates the need for zone control solenoids and their controls. It eliminates controls for the circulator separate from those of the zone. It makes providing a zone-by-zone failsafe override easier, and it reduces the need to balance the system.

Figure 2. Radiant Distribution Manifold and Circulators
Another part of the system is a closed-loop water distribution system. Hot water needs to get from the heat source to the heat sink and back. In my home, this is more PEX tubing, as well as manually constructed manifolds.
Finally, there is the control system, and that is where Linux comes in.
There must be a failsafe at least to keep the pipes from freezing should the home automation system fail. I have no provisions for dealing with an extended loss of power during severely cold weather—very few modern heating systems will work without power. Even the failsafe will fail absent another source of power to drive the circulators and ignite the water heater in the event of a prolonged power failure. A failsafe is accomplished by wiring a traditional cheap thermostat in parallel with the home control system on a sufficient number of dispersed zones to maintain temperatures above freezing.
Feedback is more important than reliability—it is not important that a zone starts heating at a specific instant. It is important that over the course of time, the zone temperature does not wander too far outside the tolerance from the current setpoint for that zone. That tolerance is critical. Expecting to maintain a temperature of exactly 70°F in a zone all the time is unrealistic. Doing so would make the system turn on and off constantly. All environmental control systems have some tolerance built in. The primary difference in my system is that both the setpoint and the tolerance are controllable. Feedback is important in that it allowed me to use an extremely inexpensive means of controlling AC power: X10 appliance modules.
X10 is fairly ubiquitous. It is readily available and cheap. In a lot of installations, it is highly reliable, but some are highly troublesome. Feedback is also important because if all else fails, my heating system needs to attract my attention to solve the problem.
The controls and sensors need to be cost-effective devices easily interfaced to and managed by the home control computer—did I mention that I am cheap?
The X10 appliance modules to turn on and off AC power to the AC devices (circulators) that are being controlled are Dallas Semiconductor DS1820 1-Wire temperature sensors. These are extremely inexpensive and are an easily interfaced means to sense temperatures. Each zone may have one or more temperature sensors. Eventually, I intend to place sensors at different heights within the zones to explore the radiant heating premise that rooms with warm floors are perceived as warmer even if the room temperature higher up is cooler. Furthermore, I monitor the supply and return temperatures for each zone. This provides feedback, and it provides a means of monitoring system performance. The heat supplied to each zone is the differential between the supply and return temperature, the flow rate and the cycle time. The flow rate for the circulators is approximately constant, and all other factors can be monitored. This means the output and performance can be monitored in real time.
Finally, there is a need to determine human input—I need to be able to demand that my living room be hotter or colder. This is done in a number of ways.
For my first heating season, a single $10 US thermostat was used to turn on all circulators for all zones concurrently. At initial startup, the hot water heater started about a minute after the circulators and ran for about 17 hours straight. I was starting to panic, wondering how large a loan I would need to afford heat. Then it stopped. After that it became a game trying to catch the system running the rest of the winter. Once each zone was up to temperature, they very rarely ran.
During the second season, I used a simple MisterHouse Perl script. Changing a zone's setpoint involved simple changes to that Perl script. It worked, but it was not a human-friendly user interface.
Ordinary thermostats can be installed and connected to digital inputs. There are numerous ways to do this, and there are relatively cheap 1-Wire digital input sensors. The thermostats are not used to set the temperature; they are used as inputs to determine whether I want the temperature altered. I use these primarily because all users, regardless of their competence with computers, tend to be comfortable with and understand them, which is important in a guest room. However, because they are inputs to the control system, they constitute requests, not demands, and they are not a failsafe.
The user interface for the normal computer-savvy users (my wife and I) is an evolving Web interface with status and alterable settings for each zone. The Web interface can be used from any computer on the home net, from a wireless PDA supporting a Web browser or even from remote locations, provided sufficient security precautions are taken.
Nothing about an environmental control system is particularly time-sensitive. I develop embedded and sometimes real-time systems. Environmental control is not real time. This means the demands of the control software on the Linux system are relatively low and not particularly time-critical. In fact, in my home, the heat source for the radiant heat is shared by domestic hot water. This has advantages and disadvantages and is not permitted by some building codes. When domestic and heating demands exceed the capacity of the hot water heater, such as when someone is taking a hot shower, domestic needs trump those of heat. It is unlikely I will notice if the heat delays a few minutes before starting. But if I am in the shower, I will notice if I am deprived of hot water just so the heating cycle can start immediately.
The open-source MisterHouse Project provides a capable and highly programmable home control system, with capabilities well beyond those required for this project. It runs on Linux and Windows and supports a wide variety of controls, sensors and other hardware. It provides a very capable Web interface that I was able to extend easily to support my zone controls. And, it has features, such as floor plan integration, that I hope to take advantage of later. There already have been several environmental control systems implemented using MisterHouse. These have used expensive computer-monitorable thermostats controlling traditional HVAC control systems. In my implementation, MisterHouse does all the heavy lifting.
MisterHouse is written in Perl and has provisions to allow MisterHouse users to incorporate their own Perl routines easily, as well as an API with functions and events targeted at home control. It is fairly simple to create a bit of Perl code and have it execute every minute, every three minutes or only on Sundays when there is a full moon. It is easy to monitor or control 1-Wire and X10 devices—all the elements needed to make a working system.
I love programming in Perl, because it is easy, powerful and forgiving. You do not need to be a Perl monk to create custom scripts for MisterHouse. The MisterHouse distribution and Web site include numerous examples, many of which are only a few lines of fairly simple code. A substantial amount of home control can be accomplished with MisterHouse without doing any programming at all.
I primarily used Debian Linux, and I created a Linux Vserver (lightweight virtual server), specifically for MisterHouse. This is not strictly necessary, but it is cheaper and easier than a dedicated machine, and it's simpler and cleaner than running a mess of different dæmons on a single machine. I highly recommend Vservers; they make experimenting with configurations fun and easy.
MisterHouse can be installed under Debian with apt:
apt-get install misterhouse
It requires a collection of Perl modules, and these dependencies should be taken care of by apt.
While planning this system, I decided on a computer X10 interface, the ACT TI-103, specifically because the most common X10 interfaces, the CM17 and CM11, have been known to have issues. The TI-103 sends a stronger than normal X10 signal and can receive a weaker than spec X10 signal. Furthermore, it supports X10 extended addressing, allowing the use of more than 255 X10 devices in a single home. Unfortunately, I mistakenly assumed that there would be MisterHouse support for it.
For early development, I used an old CM11 I had lying around, but eventually, I wrote a new MisterHouse driver for the ACT TI-103 that is now part of the MisterHouse Project. The ACT TI-103 is a nice controller and was easy enough to talk to—with some effort you can manipulate it directly using minicom as it uses ASCII command strings. Developing the TI-103 driver was more complex and time consuming than the rest of my MisterHouse HVAC software. So far, it has not proven to be any more or less reliable than the CM11. But, my TI-103 driver has been part of MisterHouse distributions since MisterHouse 1.102. After I was well underway with this effort, Insteon came out with a new series of power-line devices that are superior in many ways to X10 devices. However, they are still more expensive than X10 modules. Neil Cherry should have MisterHouse support for Insteon completed by the time this article is published.
MisterHouse needs to be configured for the controllers and sensors. The X10 controller is set by assigning the correct port, such as /dev/ttyS0, to the correct X10 device in the MisterHouse configuration file /etc/misterhouse/mh.ini:
cm11 = /dev/ttyS0
or:
ti103 = /dev/ttyS0
You may want to configure a number of other parameters, such as latitude and longitude, that would make MisterHouse more useful, or if you wanted to make heating decisions based on the weather report but nothing else specific to heating control.
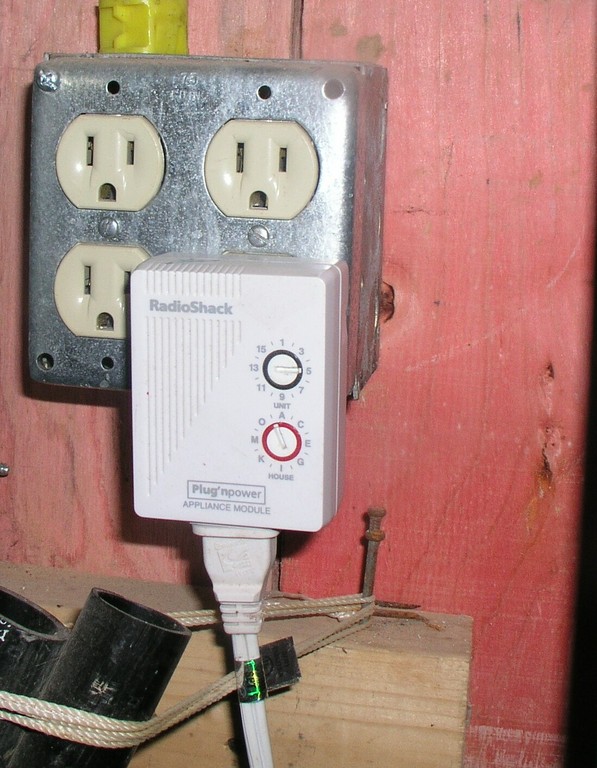
Figure 3. Radio Shack/X10 Appliance Module Controlling Circulator
X10 devices are set up in a separate configuration file, x10.mht. The parameters for each device are the type of X10 module, its address, name and the groups to which it belongs. I needed an entry for each appliance module controlling the circulator for each zone. An example entry would be:
X10A, C1, Circulator1, All_Heat|Night_Setback
for an X10 appliance module with a C house code and a 1-unit code named Circulator1 included in the groups All_Heat and Night_Setback. In a MisterHouse Perl script, one way this can be turned on is with the code set:
$Circulator1 'ON';
and all Night_Setback devices can be turned off with:
&set_all($Night_Setback, 'OFF');
If you have multiple X10 controllers, you may need to assign a controller to the device. And, it is very useful to assign labels and groups to devices. mht files are transformed into mhp (Perl code) files as part of MisterHouse startup, or they can be reloaded on a running system through the MisterHouse user interface. Once X10 devices are correctly entered into the .mht file and MisterHouse starts up, they can be controlled manually by the UI, or they can be controlled programmatically via bits of Perl. It also is possible to add X10 devices to MisterHouse directly from the MisterHouse Web interface.
MisterHouse supports a number of user interfaces, including a Tk interface and Telnet. But, the primary interface I use is the built-in MisterHouse Web server. By default, it should come configured to work and should be on port 8080. Using a Vserver made it easy to move it to the standard http port 80. Inside my home, browsing mh.dlasys.net brings up the MisterHouse main page.
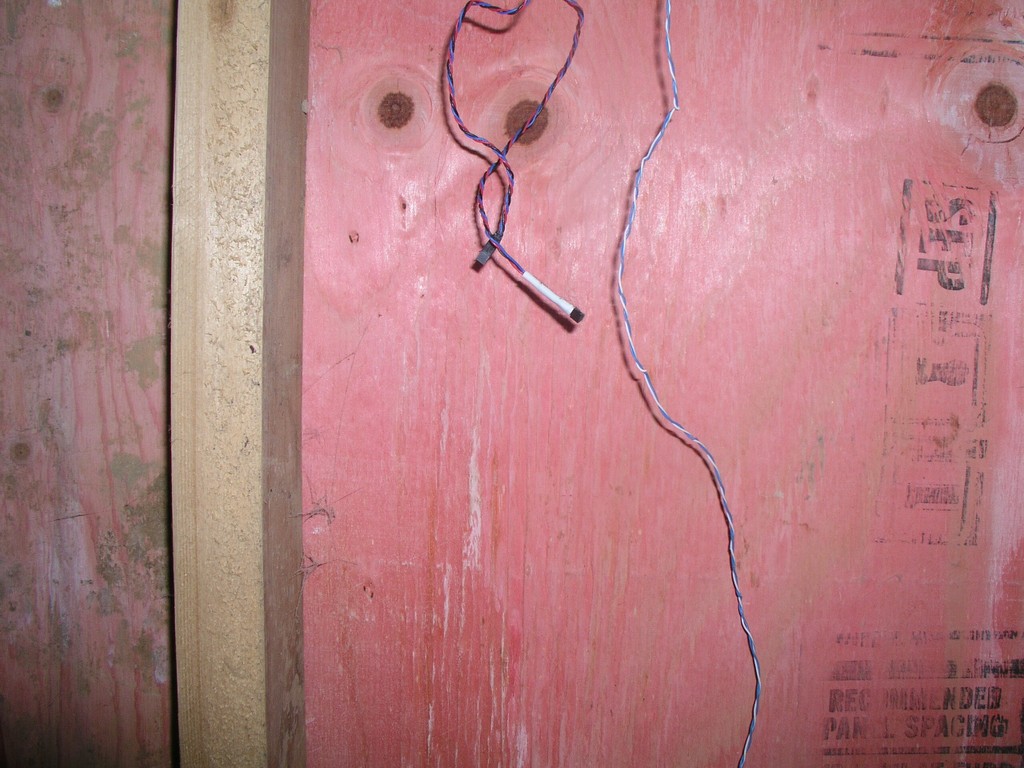
Figure 4. DS1820 1-Wire Test Rig
I had several available alternatives for interfacing MisterHouse to 1-Wire. MisterHouse can communicate directly with 1-Wire devices through a 1-Wire serial interface, and they are configured in an .mht file much like X10 devices. One of the machines I was planning on using did not have sufficient serial ports for both the X10 controller and the 1-Wire serial controller, so I opted for a 1-Wire USB controller. MisterHouse currently does not directly support the 1-Wire USB controller. But there are several Linux-specific means of using the 1-Wire USB controller. The Linux 2.6 kernel recently added support for a number of 1-Wire devices and interfaces. This is what I would have preferred to use. Unfortunately, at the time I was developing the code, it was very new and not well documented. There is a 1-Wire filesystem that maps 1-Wire devices to a filesystem. digitemp, a standalone program for both Linux and Windows, can read 1-Wire devices from both USB and serial interfaces, and that is what I elected to use.
My first implementation had digitemp polling all the DS1820 temperature sensors inside MisterHouse. My current implementation has digitemp polling the temperature sensors as an external cron job and recording the information into an RRD database. The following Perl script creates an RRD database with entries for each DS1820 in the @sensor list:
#!/usr/bin/perl
# Category = HVAC
@sensor = ( "28E8E30500000083", "2853327C000000D4");

my $cmd = "rrdtool create temp.rrd --start N --step 60 ";
for $i ( 0 .. $#sensor) {
 $cmd .= "DS:$sensor[$i]:GAUGE:120:30:180 ";
}
$cmd .= "RRA:MIN:0.5:60:8760 ";
$cmd .= "RRA:MAX:0.5:60:8760 ";
$cmd .= "RRA:AVERAGE:0.5:60:8760 ";
print "$cmd\n";
my $result = system($cmd);
DS:$sensor[$i] specifies the data source (each DS1820), 30:180 are the min and max values for the data source and GAUGE is a particular RRD data source appropriate for temperature sensors. There are three archives: a Min, Max and Average.
I live in the US, so all temperatures are in Fahrenheit; however, digitemp can read and record either Centigrade or Fahrenheit values, and all other values throughout the system are relative to those reported by digitemp.
Polling is accomplished with the following script:
#!/usr/bin/perl
# Category = HVAC

@sensor = ( { sn => "28E8E30500000083", temp => 0 },
	    { sn => "2853327C000000D4", temp => 0 });

# Read the output from digitemp
open( DIGITEMP, "digitemp_DS2490 -c /etc/digitemp.conf \
 -a -q -o\"%s:%R:%.2F\" |" );
while( <DIGITEMP> ) {
 chomp;
 if( $_ =~ /^nanosleep/i ) {
  my $now = localtime;
 } else {
  my ($dvc,$sn,$temp) = split(/:/);
  print "dvc=$dvc sn=$sn temp=$temp\n";
  $temp = 185 unless ($temp);
  for $i ( 0 .. $#sensor) {
   if ($sn eq $sensor[$i]->{sn}) {
    $sensor[$i]->{temp} = $temp ;
   }
  }
 }
}
close( DIGITEMP );
my $cmd = "rrdtool update temp.rrd N:";
for $i ( 0 .. $#sensor) {
 $cmd .= ":$sensor[$i]->{temp}";
}
This can be set up as a cron job with a crontab entry:
*/2 * * * * root test -c /opt/mh/local/bin/temp2rrd.pl \
 && /opt/mh/local/bin/temp2rrd.pl >/dev/null
or it can be run periodically with MisterHouse.
I added a Perl routine to mh to query the RRD database periodically and compare current temperatures for each zone with the setpoint for that zone (specified in the mh UI code). If the current temperature is too far below the setpoint, the X10 module controlling the circulator for that zone is turned on. If the current temperature is too far above the setpoint, the X10 module is turned off. Right now, fault tolerance is achieved by turning on/off the appropriate X10 module on each loop if the current temperature is outside the acceptable differential from the setpoint. Eventually, the temperature sensors attached to the supply and return for each zone will be used to verify whether a zone circulator is running. They also will be used to calculate the actual heat output into each zone.
The RRD database keeps historical data, which might have a number of uses. Furthermore, RRD is designed specifically to record periodically polled values. It has configurable provisions to validate data and to handle queries against invalid data appropriately.
Perl is an object-oriented language, and MisterHouse takes advantage of that. Primarily, MisterHouse manages objects. The display elements, as well as programmed events and actions, all act on objects. MisterHouse already has a variety of interesting objects, but I needed something equivalent to a heating zone, so I created an HVAC_Zone object using an example object as a guide. My HVAC_Zones have a setpoint and a delta property. The setpoint is the target temperature for the zone, and the delta is the allowed deviation before taking action. HVAC_Zone objects inherit from the MisterHouse Generic_Item, so they appear in the UI under browse groups as well as in a few other places. Zones are created much like the X10 items described above. They can be created in the same .mht file with X10 items or in their own .mht file. Other HVAC groups might be North, Night and Vacation.
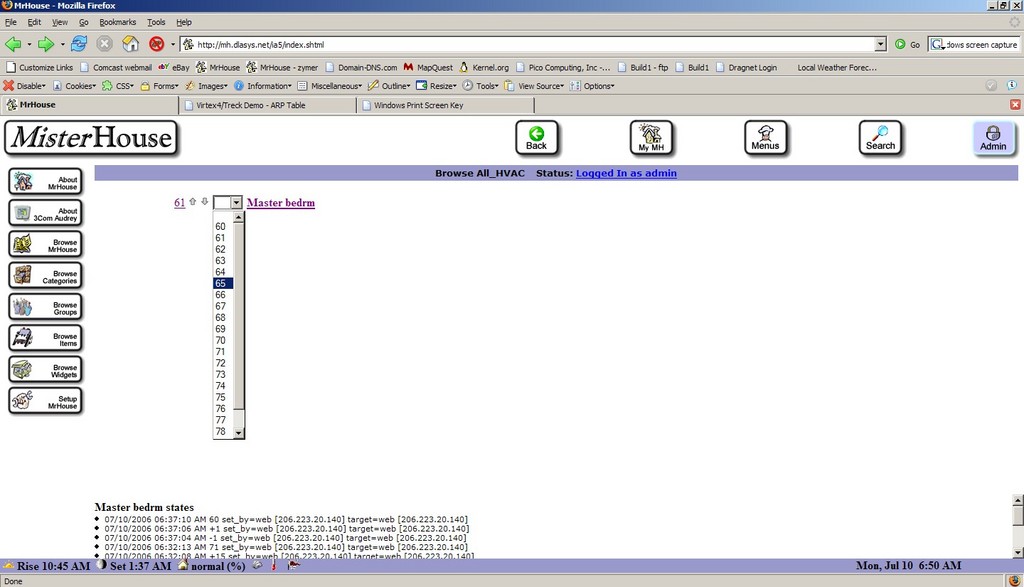
Figure 5. Browsing the All_HVAC group containing a single master bedroom zone—this shows a simple Web thermostat control to increase, decrease or set the setpoint for each HVAC_Zone object.
An example entry would be:
HVAC_ZONE, H1, master_bedrm, All_HVAC|Thermostats, 72, 2,
This would create an HVAC_Zone object named master_bedrm in groups All_HVAC and Thermostats, with a setpoint of 72 and a delta of +/– 2°. A few minor alterations to the MisterHouse Web server were necessary to create a Web control that is displayed for each zone. I used the X10 Lamp item as a reference, as it already had a drop-down as well as arrow buttons for relative changes.
Finally, I use a Perl script executed periodically by MisterHouse to query the the current temperature of each DS1820 within each zone, comparing it to the current setpoint/delta for that zone turning on the appropriate X10 appliance module for that zone if the temperature within the zone is more than the delta below the setpoint. Currently, I repeatedly attempt to turn on the appropriate circulator so long as the temperature remains below the set range, and I repeatedly turn off the circulator so long as the temperature exceeds the set range. This provides limited fault tolerance. Turning an appliance module off when it may be off already or on when it may be on already accomplishes a small degree of fault tolerance. Before the next heating season, I expect to have code to verify the state of the circulator using the supply and return temperatures, as well as raise an alarm if the temperature in a zone drops more than twice the delta below the setpoint.
Resources for this article: /article/9193.
David Lynch is an underutilized software consultant engaged in sometimes fruitless attempts to make a living developing embedded and systems software—usually under Linux. In another life, he is an architect, and he currently keeps himself occupied when not randomly turning lights on and off throughout the house or writing software for clients by building his own home. Home automation combines his vocation of software with his interest in buildings, as well as satisfies his urges for world domination—at least within his own home. Dave can be reached at dhlii@dlasys.net and www.dlasys.net.


