
DVD Mastering Using QDVDAuthor
When I started using Linux seven years ago, I was told repeatedly that only a rank moron would make a serious attempt to do video and multimedia production on a raft load of open-source UNIX tools. At the time, I was just starting into the world of digital production and had a comfortable set of Windows workstations equipped with appropriate tools, and I had no compelling reason to move to Linux, save one: I was sick of Windows.
Consequently, in the intervening years, I have been gradually moving my studio from Windows to Linux. Linux has long been capable of editing digital video with applications like Kino and Cuisine, and of capturing and editing other video with Cinelerra and its predecessors. Even longer, Linux has been an excellent and capable 3-D graphics creation and rendering platform, and The GIMP has long been adequate for most raster graphics manipulation needs. Two areas in which Linux has lagged behind the competing operating systems are in compositing and complex DVD authoring. Although the former continues to be a problem, the latter is beginning to come into its own.
Recently, I had the opportunity and the spare time to revisit the field of Linux DVD authoring and was pleasantly surprised by what I found. Although the command-line tools for DVD authoring have long had the technical capability to construct a complex menu-driven DVD, the GUI tools suitable for use by end users and artists have been sorely lacking. I was pleased to find that this situation has changed. The task: to put together a promotional reel for my independent film, packaged on an attractive, menu-driven DVD.
After browsing around through the various available packages, I chose QDVDAuthor. On balance, it offered the best compromise of smooth workflow, content control and minimal dependency headaches. Its current major weakness (namely, the obscure manner in which it gives direct access to the DVD file structure for hacker-level tweaking) was not of concern to me as I was not looking to put together a commentary track or hide easter eggs.
As we embark, I hardly need to remind you, this is beta-level software. Always save your work; QDVDAuthor is crash-prone in some of its less-well-developed areas, and you don't want to be caught unawares.
After installation (see the sidebar for program and dependencies info), we open up to the main window (Figure 1).
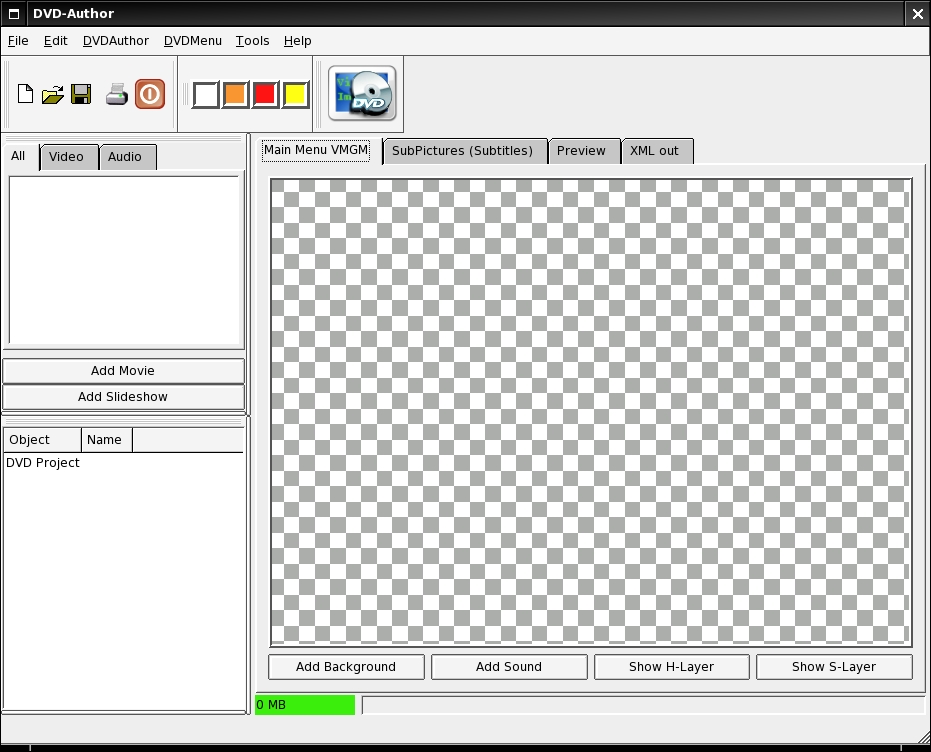
Figure 1. QDVD Main Window
To start a new project (File→New), we need to run through the setup wizard (which appears when you specify the creation of a new project), specifying temp directories, project title and data destination directory (Figures 2 and 3).
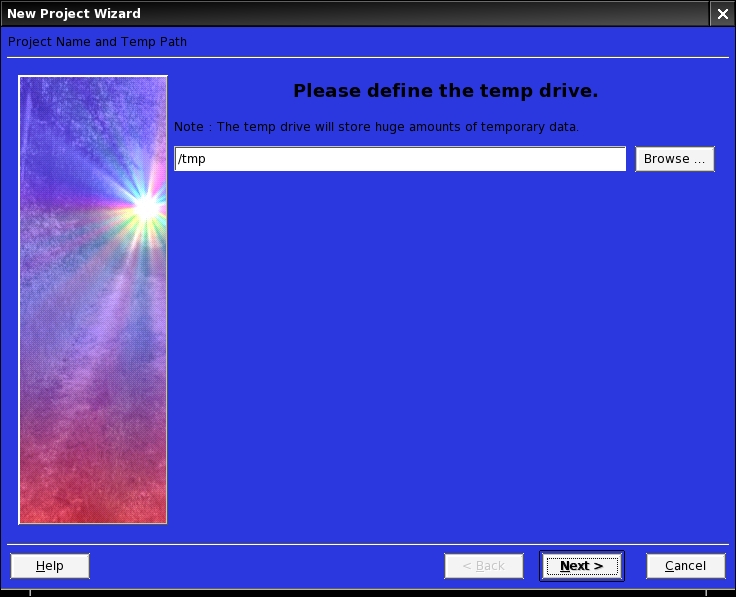
Figure 2. New Project Wizard—Defining the Temp Drive
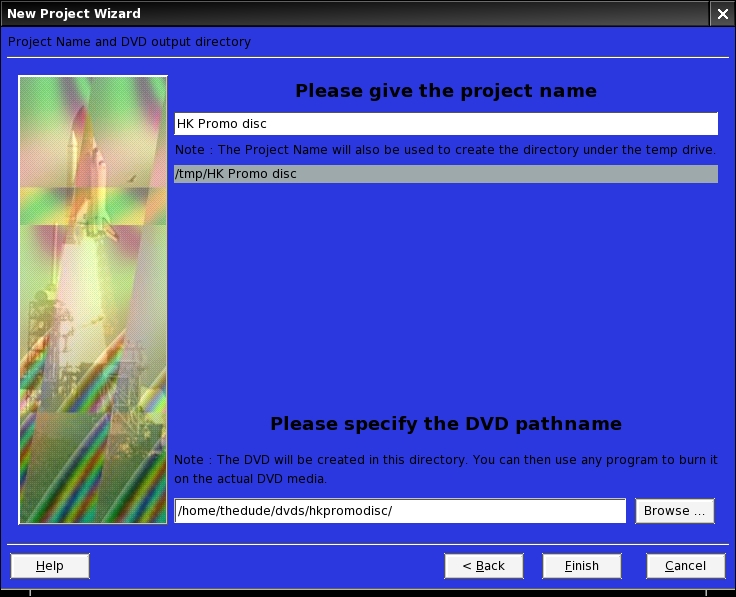
Figure 3. New Project Wizard—Specifying the Project Name and DVD Pathname
Only two screens long, the wizard is quickly finished and we're ready to start building the DVD itself. For the purposes of this tutorial, I'm assuming you already have DVD-spec MPEG-2 video to work with. If you don't, see the sidebar for a quick run-through on encoding DVD video. I'm going to be building a DVD with the trailer and blooper reel from my independent film, Hunting Kestral, which was edited in Kino with titling done in Blender.
Now that our project is set up, let's begin by importing the videos we want to use. Assuming that you've proactively broken up your video to avoid the sync problem, you're going to want to import your video files so that they're organized the way you want them to be and (most important) playable simply from one button with a minimum of fuss. To do this, click the Add Video button to the left of the workspace in the main window, and then select your videos. Selecting multiple files in the import dialog (Ctrl-click) imports the files into a single title heading. If you later want to add more files to a particular title, simply import them and then drag and drop them between titles in the All tab in file list window (Figure 4). By dragging and dropping, you can also mix up the order in which your titles play. For more judicious control over the order in which the files in a title play, right-click on the title and select Properties (Figure 5), and reorder the tracks using the up and down buttons.
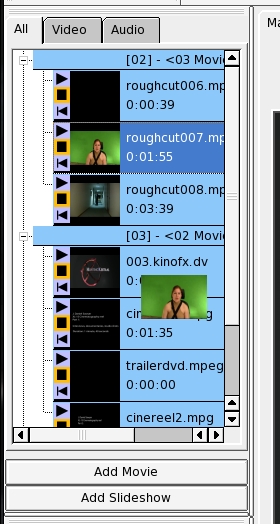
Figure 4. Dragging and Dropping Files

Figure 5. Reordering Tracks
Once you've finished importing all your footage, it's time to begin constructing your menus. You'll want to build your menu structure from the end up, starting with the deepest menus and working your way back up to the main menu, so that when you're linking up all the buttons, you don't have to retrace your steps. I'm going to proceed with the main menu. Because you'll use the same set of steps and tools for creating every menu, feel free to expand as far as you like. In the main window, click the Add Background button. From here, you can select any compliant still image or video (MPEG-2) file that you'd like to underlay your main menu.
If you want to have a looping soundtrack running in your menu, click the Add Sound button, and load in any compliant audio file (.wav, .mpa, .mp3, .mpega, .ogg and so on). However, there is a bug here to beware of: QDVDAuthor seems to have a curious oversight in its design, in that it imports most anything for sound, but it won't actually encode the audio to a suitable format for multiplexing. The transcoding dialog (which you get to by right-clicking on a clip and selecting Properties) seems to crash for no good reason when working on audio, and as such you can't automatically transcode the audio when you're outputting the final project. This means that, at the moment, audio loops for your menus have to be in an mplex-friendly format (AC3 or MPEG-Audio). To get suitable audio out of your .wav, .ogg or .mp3 file, simply type the following at your command prompt:
ffmpeg -acodec mp2 foo.mp2 -i foo.wav
Once that's done, you can import the .mp2 file into QDVDAuthor and proceed normally.
Figure 6 shows the menu background, which I made in Blender, and the soundtrack loop loaded up.
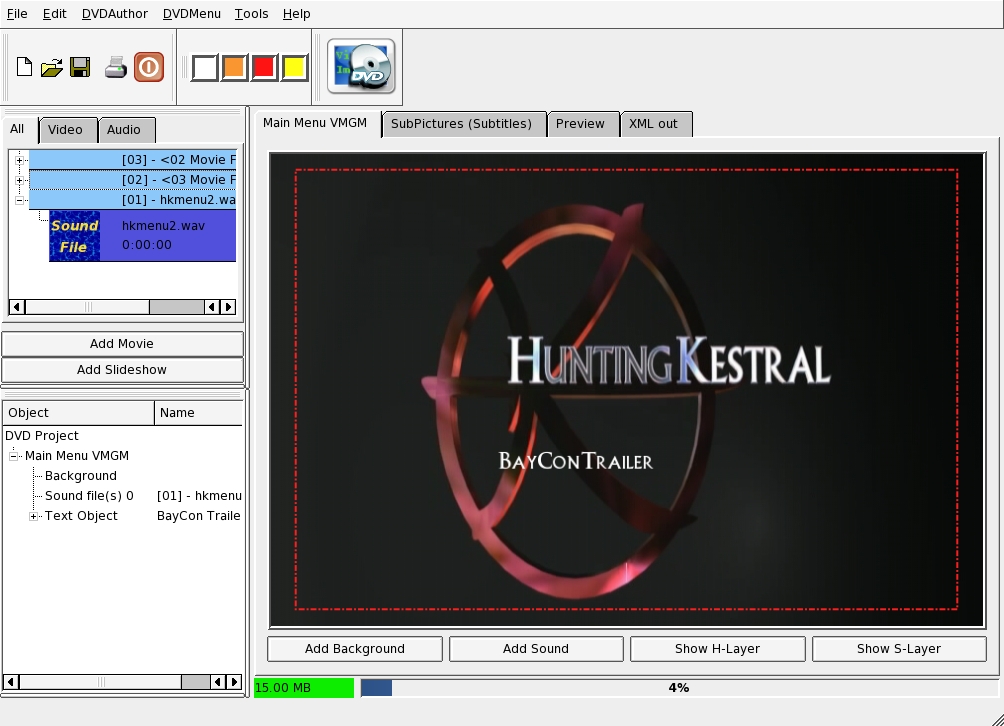
Figure 6. Menu Background and Soundtrack Loop
Now that the background is set up, it's time to construct the buttons. Because this is an introductory article, we work only with text buttons, although QDVDAuthor is perfectly capable of video buttons or image buttons as well.
To create a text button, right-click on the work space, and select Add Text. Doing so turns your cursor into a cross, with which you click and drag to draw the text box for your text to fill. Don't worry if you draw the wrong shape or put it in the wrong location, such mistakes are easily remedied after your text has been specified.
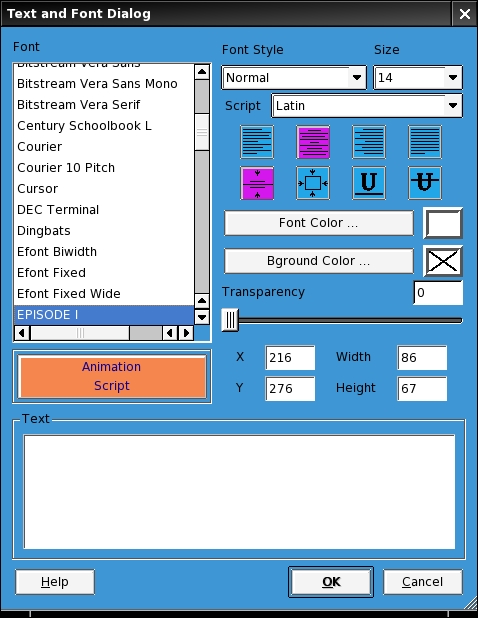
Figure 7. Text Creation Dialog
After drawing the box, the text creation dialog appears, and you can select from any of the fonts installed in your X11/fonts directory, as well as set the color, alignment, size, style and background color for your text box. Specialized TrueType fonts should be dropped into this directory before starting QDVDAuthor, and they will appear in the font selection dialog. This is also the place where you adjust the dimensions of your box and its placement (although placement can also be adjusted by simple drag and drop in the main window).
Once you've finished defining your text box, click OK, and in the main window, right-click on your text box and select Define as button (Figure 8).
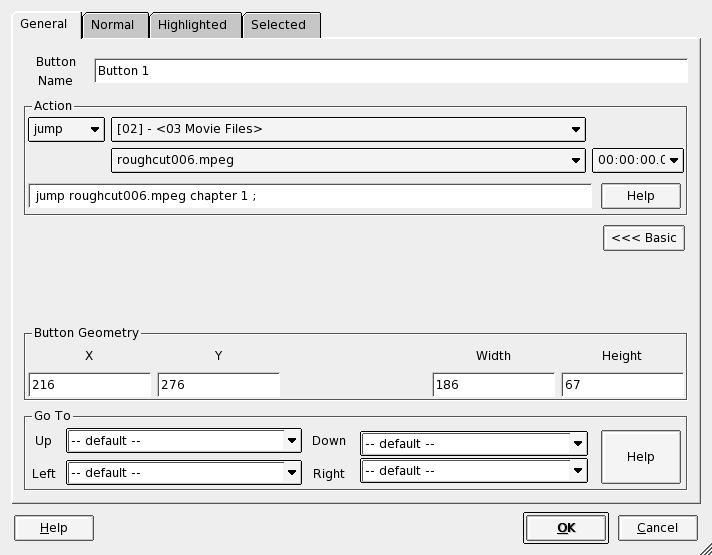
Figure 8. Defining the Text Button
Here, you assign the action that the button will take (jump to a file, call a menu or resume). If you click the Advanced>>> button, you can further define the way the navigation controls move the cursor around the DVD menu (the up, down, left and right list boxes), routing each directional button to a different button on the screen. So, for example, in my current project, I have five buttons, and I want the viewer to be able to navigate between each button in a fairly obvious fashion (Figures 9 and 10).
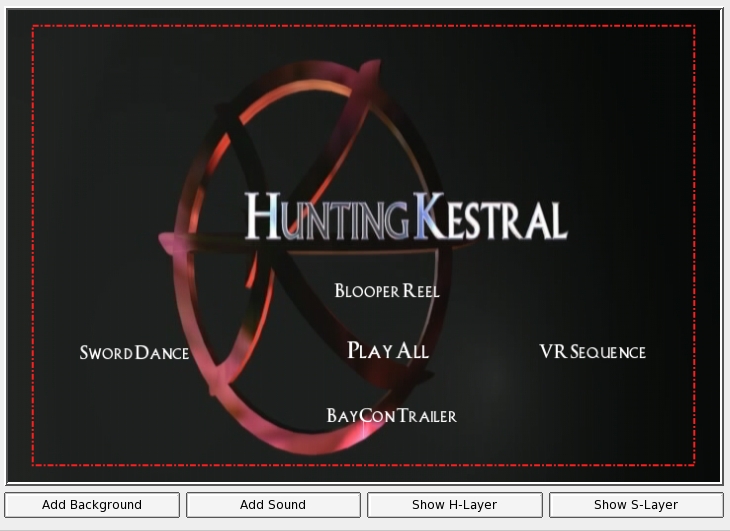
Figure 9. Current Project Showing the Five Text Buttons

Figure 10. Routing the Directional Buttons
As such, I set up the focal Play All button for simple direct navigation, as shown in Figure 11.
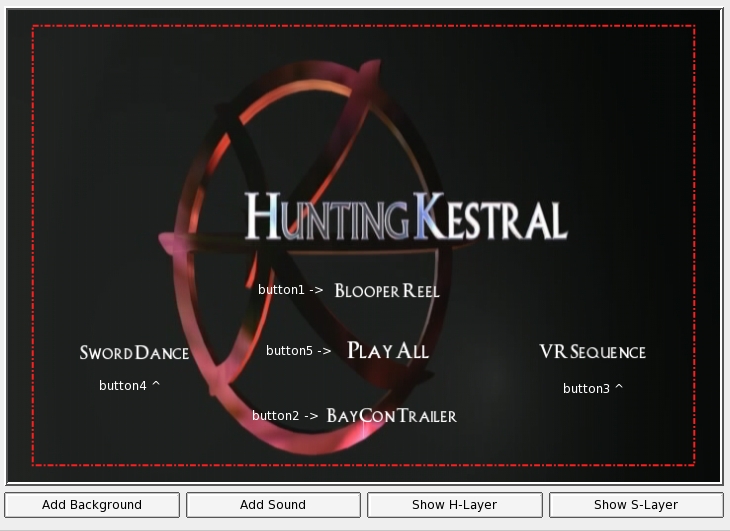
Figure 11. Setting Up the Play All Button
Now, all that's left is getting the Play All button to work properly, which is deceptively easy. Since we grouped our videos all under one title, ordering them upon import in the order in which we wanted them to play, all that's needed to Play All is to link the button to the first chapter of the title. Once started, it will play through all videos in that title before returning to the main menu. More complicated playlist arrangements are possible and fairly straightforward, but are beyond the scope of this article.
Once your buttons are configured and your videos ordered, you're ready to burn. Click on the DVD Export button (Figure 12), and it'll bring up the export batch manager window (Figure 13).

Figure 12. DVD Export Button
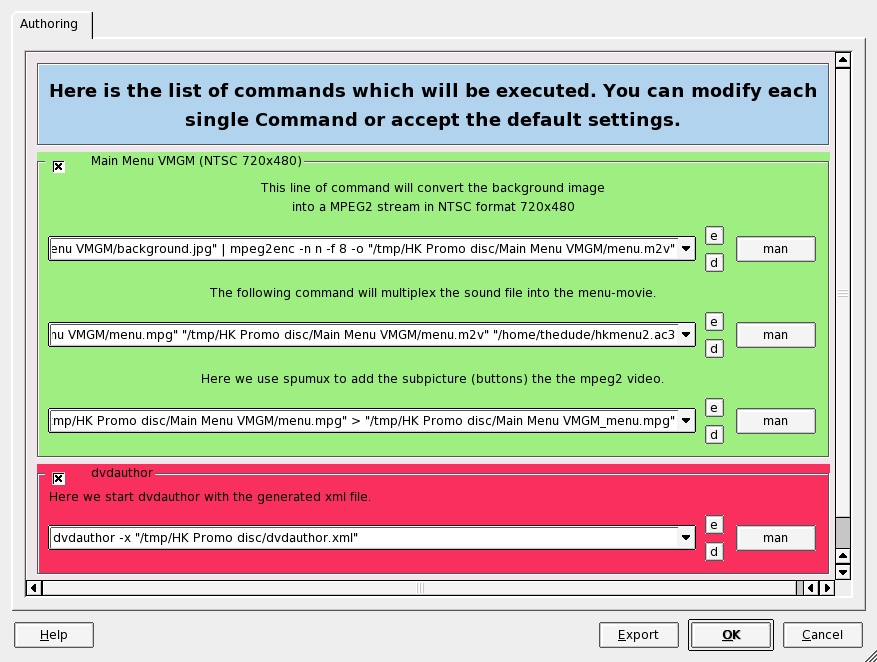
Figure 13. Export Batch Manager Window
Here, you will be able to make any final tweaks to your project before building the DVD—and burning, if you prefer to do it from here rather than from K3b.
Once you click OK, all of these commands are executed in order in the window shown in Figure 14.
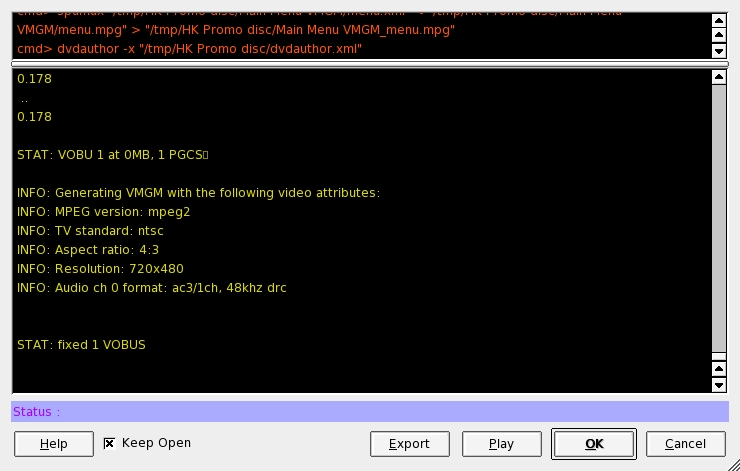
Figure 14. Executing the Commands
Watch carefully for any error flags printed in red. If you ignore them, you'll find yourself burning coasters, if you have a burnable image at all. If you do get any red flags, re-run the batch, clicking the Export rather than the OK button, which will export a shell script that you can disassemble and tweak to track down and correct your problem. This isn't often necessary, but every once in a while the program just doesn't generate the proper output and it has to be hand-tweaked.
If all has gone well, you now have a simple, menu-driven DVD suitable for exhibit on any consumer DVD player and TV.
The authoring toolset available for Linux, although still having its rough patches, is now finally capable of producing professional and complex DVDs with audio commentaries, video menus, animations, photo galleries, score-only tracks, chapter-selection menus, playlists and easter eggs. Each of these specialized structures requires a bit of elbow grease, but all do work together. With a little poking around and the occasional XML tweak, Linux is finally up to the task of filling the authoring spot in the multimedia studio pipeline. Future improvements in QDVDAuthor and its competing programs are sure to make the situation even better.
Now, if only we could get an open-source compositor that's up to snuff....
Video Encoding
If you're working from footage taken on a miniDV camera, outputting a DVD-ready video from Kino is relatively simple. If you haven't used it before, Kino's interface is comfortable and easy to navigate. Good user guides are available at several places on the Web, most obviously at Kino's home page (kinodv.org/article/archive/13). It's not a multitrack editor, more's the pity, but for quick-and-dirty edit work with basic transitions and soundtrack mixing, it works encouragingly well. When outputting video from Kino, I've found that I get the best results (for both video quality and a minimum of sound sync slippage) with the dual-pass encoding in the DV Pipe screen.
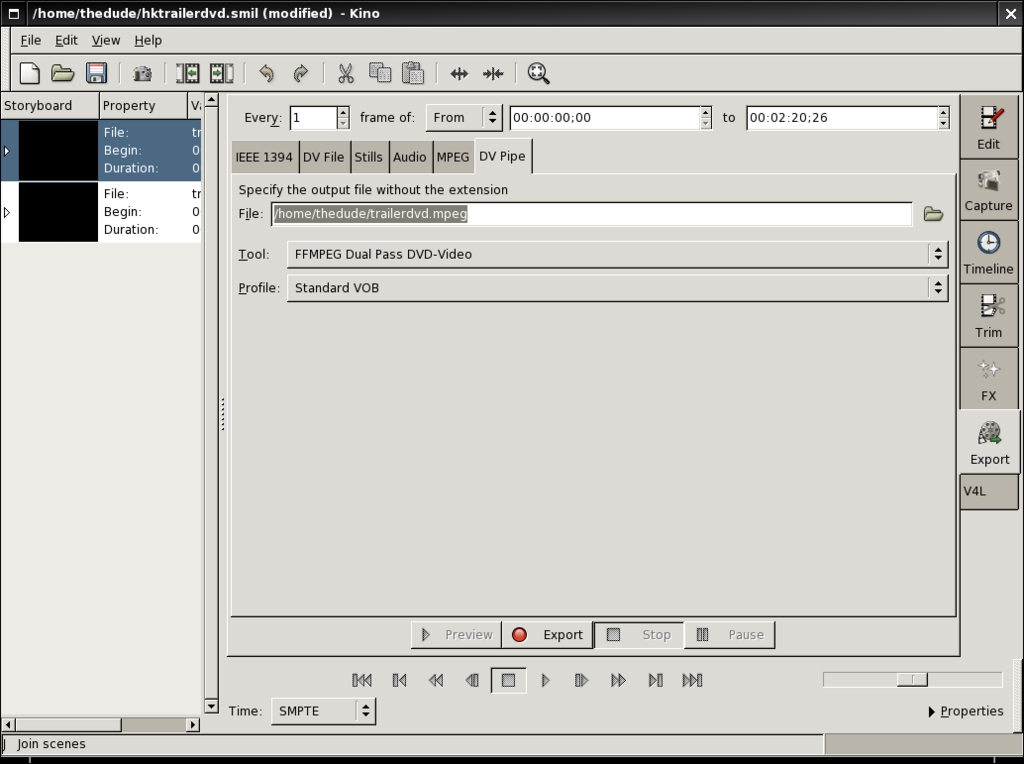
DV Pipe Screen
On the off chance that you're wanting to burn DVDs from your PVR, you still need to get the files into the right format. Mencoder is great for this, though it has a confusing array of options. Here's a sample command argument for moving from xvid to DVD-compatible MPEG-2:
mencoder -ovc lavc -lavcopts vcodec=mpeg2video -oac lavc -lavcopts \
acodec=mp2:abitrate=512 foo.avi -o foo.mpg
An important caveat about encoding to DVD-format MPEGs: every Linux video encoder I have ever run into uses FFmpeg or MJPEGTools as a back end, and they both have the same problem—a big one. They both seem to have a bug that causes a slip of sound sync progressively throughout the file, becoming noticeable after about the first two minutes of footage. It's a problem in the library that I've not found a way around, though it is markedly less pronounced using FFmpeg than MJPEGTools. This is the biggest and most troublesome hurdle still facing Linux DVD authors. The only solution I've found to this deeply irritating problem is to slice your video into two- to five-minute tracks and use each of these tracks as separate titles on your DVD. It's an ugly solution, and not the kind of thing you want to talk about at parties, but for the moment it's the best we can do. In an ideal world, the good folks who maintain these projects would fix the issue, but as this is a common problem for many commercial MPEG encoders, I'm not holding my breath. (I should add, dear reader, on the off chance that this is a user-brain-dead error and I'm missing something obvious, I look forward to your hate mail with cheerful enthusiasm.)
In case you want to strike out on your own with the available command-line tools (mencoder, FFmpeg and mjpegtools), here are the vital stats you'll need to encode a serviceable DVD video file (all numbers are for NTSC):
Video:
720x480 with 4:3 (standard) or 16:9 (anamorphic) aspect ratio.
MPEG-2 @ up to 98,00kbps
Audio:
48khz @ 32–1,536kbps
PCM, AC3, MPEG-1 Layer2
Up to eight audio tracks encoded
DVD File Structure
The difference between a data DVD and a video DVD is essentially the file structure and video format. The proper encoding of the file structure is handled by DVDAuthor, the back end on which all Linux DVD programs depend. It takes an XML file and builds the DVD image from it. Here is the DVDAuthor output from the project I built for this article:
<dvdauthor dest="/home/user/dvddirectory/" jumppad="yes" >
  <vmgm>
   <menus>
    <video format="ntsc" resolution="720x480" />
    <pgc entry="title" >
     <vob file="/tmp/HK Promo disc/Main Menu VMGM_menu.mpg"
pause="inf" />
     <button name="1" >jump title2; </button>
      <post> jump vmgm menu 1; </post>
    </pgc>
   </menus>
  </vmgm>
  <titleset>
   <menus>
    <pgc>
     <post> jump vmgm menu 1; </post>
    </pgc>
   </menus>
   <titles>
    <pgc>
     <vob file="/home/user/dvdmenu1.mpeg.vob" />
     <vob file="/home/user/trailerdvd.mpeg.vob" />
     <vob file="/home/user/video/cinereel1.mpg" />
     <vob file="/home/user/video/cinereel2.mpg" />
     <post> call vmgm menu 1; </post>
    </pgc>
   </titles>
  </titleset>
</dvdauthor>
QDVDAuthor and Dependencies
QDVDAuthor is available at qdvdauthor.sf.net.
It depends on the following packages: Transcode, PCM2AIFF, toolame, dvdrecord, dvdauthor, FFmpeg, mjpegtools, arecord, oggdec, lame, mplayer/mencoder, dvd-slideshow, sox, imagemagik, mkisofs, growisofs and dvd+rw-format.
Dan Sawyer is a freelance director/producer running the backbone of his small studio on Linux. He has been an enthusiastic advocate for Free and Open Source software since the late 1990s, when he founded the Blenderwars filmmaking community (www.blenderwars.com). Current projects include the independent SF feature Hunting Kestral (www.blenderwars.com/kestralmannix) and The Psyche Project, a fine art photography book centering on strong women in myth.
