
Creating DVDs with Kino and DVDStyler
As a user of Linux for nearly two years, one thing I have found is that it has been lacking in software solutions for video production. I'm happy to report that this situation has changed for the better. For the past six months, I've have been using Kino 0.7.5 for my video editing with results equal to and in some ways better than what's offered in some Windows video-editing solutions or Apple's iMovie. Now there is a DVD-authoring solution that complements Kino by being user-friendly and creating authored DVDs that will play on most post-2000 DVD players. It's called DVDStyler, and in this article, I show you how to use it and some of the options it offers to create as simple or elaborate a menu as you want for your video DVDs.
First, you need a few dependencies in place before you install DVDStyler: wxGTK, DVDAuthor, MJPEG Tools, MPEG Toolbox (mpgtx), Xine or Kaffeine (optional, for previewing video) and Totem (optional, for generation of thumbnails). Any of these can be found at your favorite RPM or Debian package resource, like those provided in the on-line Resources for this article. DVDStyler creates only video DVDs. It does not create video on CD, better known as VCD and SVCD. If you don't have a DVD burner, you're unfortunately out of luck as far as using DVDStyler. Now, let's get to the business of creating a DVD video after editing a video in Kino.
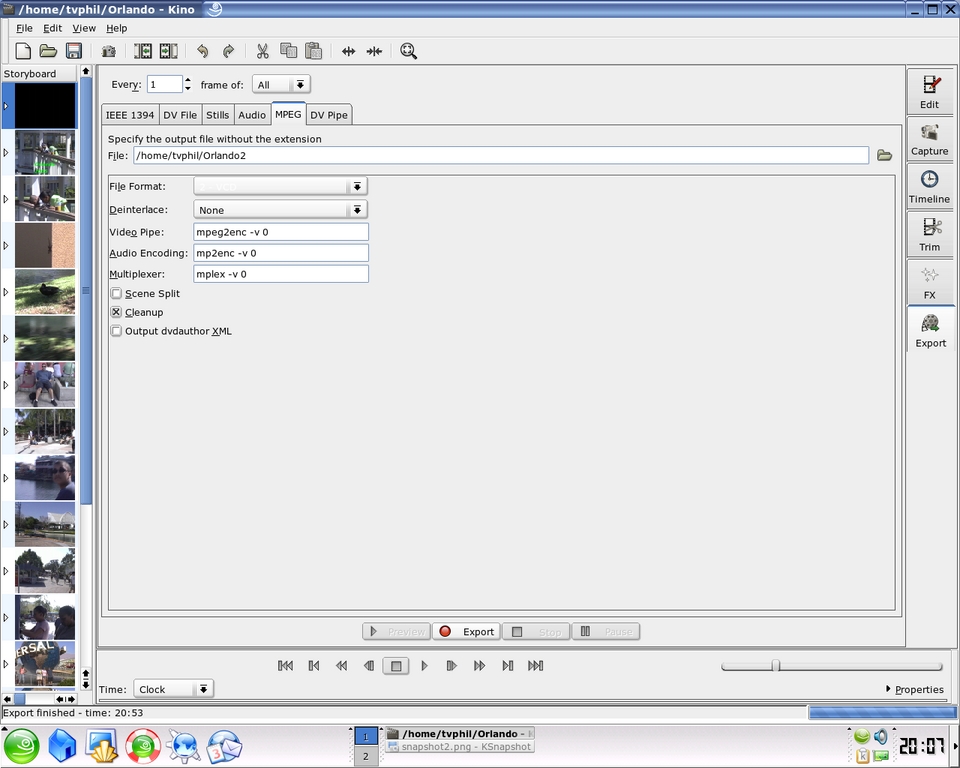
Figure 1. The first step in making a DVD is to export your movie from Kino in MPEG-2 format.
In Figure 1, you can see the Kino export screen. If you're using Kino 0.7.5 or higher, you already should have the dependencies needed to create a DVD-quality MPEG-2 video file, as you can see in the video and audio windows. Make sure you export to a destination where you can find the file easily. This destination is where DVDStyler will find your video for authoring later. Next, click the export button and the conversion to MPEG-2 begins. Depending on the length of your video, this process could be lengthy. Expect it to take roughly two minutes of rendering for every minute of video. So a half-hour movie would take about an hour to render. Obviously, processor speed figures somewhat into this too. Once rendering is completed, you can move on to using DVDStyler to author your movie.

Figure 2. DVDStyler starts with a blank main screen and a selection of menu backgrounds.
Figure 2 shows what you see when you first click on DVDStyler. Default menu backgrounds are available if you don't have a still picture or a video clip of your own to use (more on this later). First, go to the top of the page and set the configuration of DVDStyler. Click Configuration, then Settings, and choose your language and default format (NTSC for North America, PAL for most other parts of planet Earth).
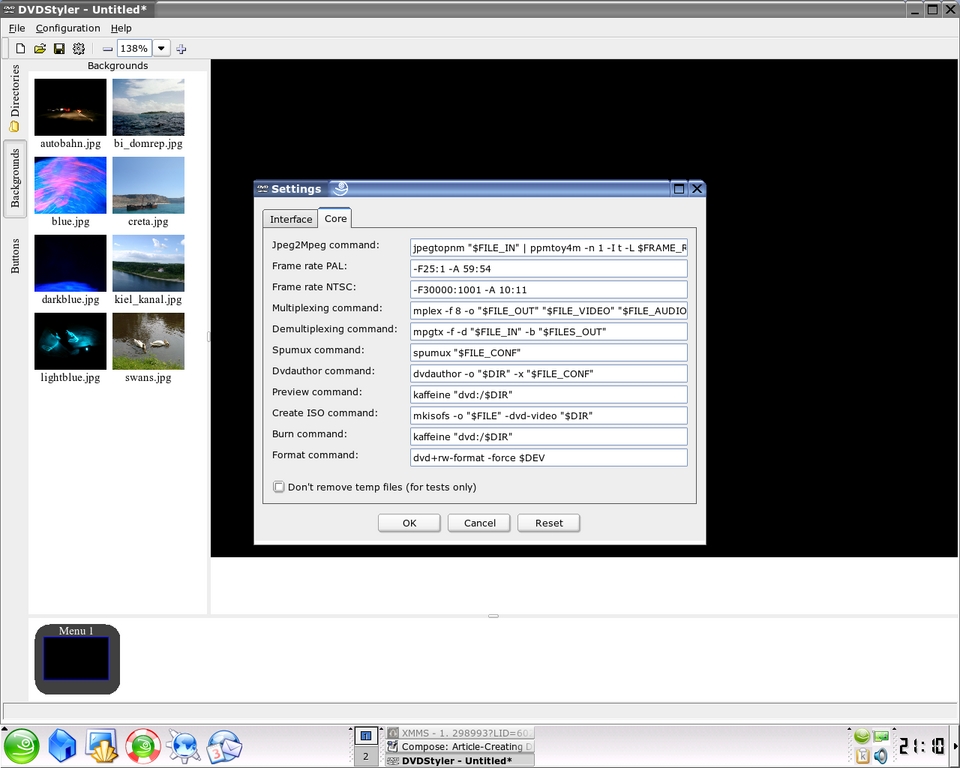
Figure 3. The Core settings tab lets you set your programs of choice for previewing video and burning to DVD.
Next, click on the Core tab to see all the commands and dependencies that are used. The preview and burn commands use Xine by default for previewing, but if you're like me and use Kaffeine, simply type in Kaffeine where it says Xine, so you can preview before burning. Now you are ready to begin inserting your files for menu creation.
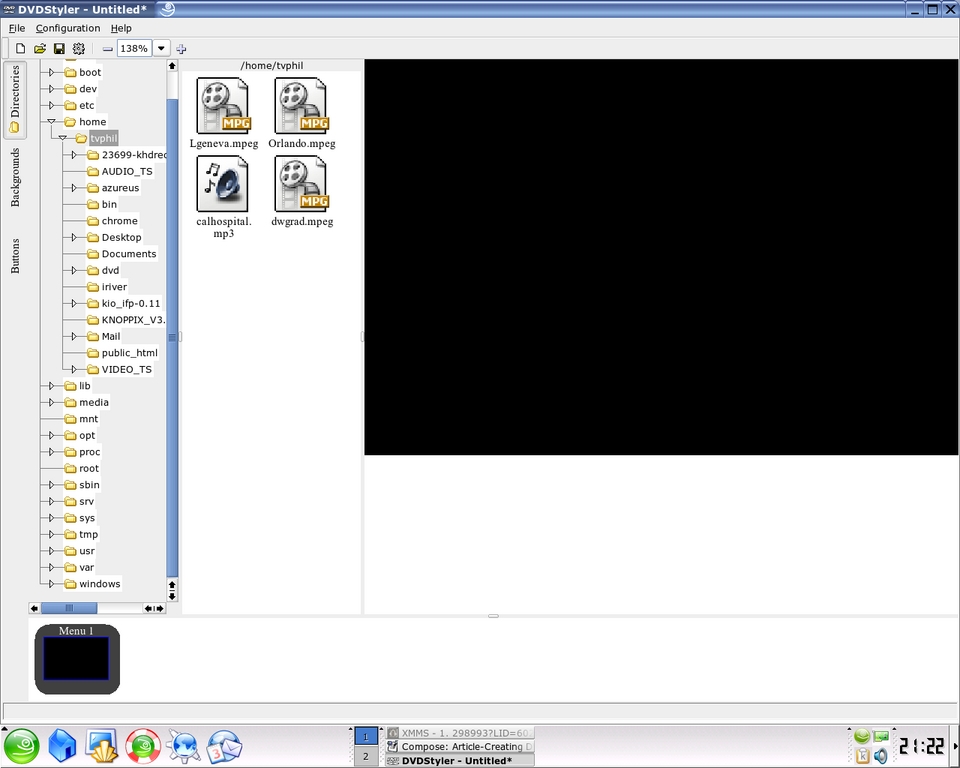
Figure 4. Now you're ready to start building a DVD. Drag the video files you want to use to the time line at the bottom of the screen.
Click on the top-left corner, under the word File on the white square icon to start a new project. If you were returning to a project you already started, you would click the yellow folder icon next to it to find your saved project. Next, on the left side, click on the Directories tab, and you should see all the media files in the current folder that are compatible for DVD creation in DVDStyler. Simply click and drag any of those files you want to use in your DVD to the bottom of the screen to the right of the Menu 1 thumbnail, in the sequence you want, from left to right. This area is commonly referred to as the time line. Now you are ready to create a background for your menu.
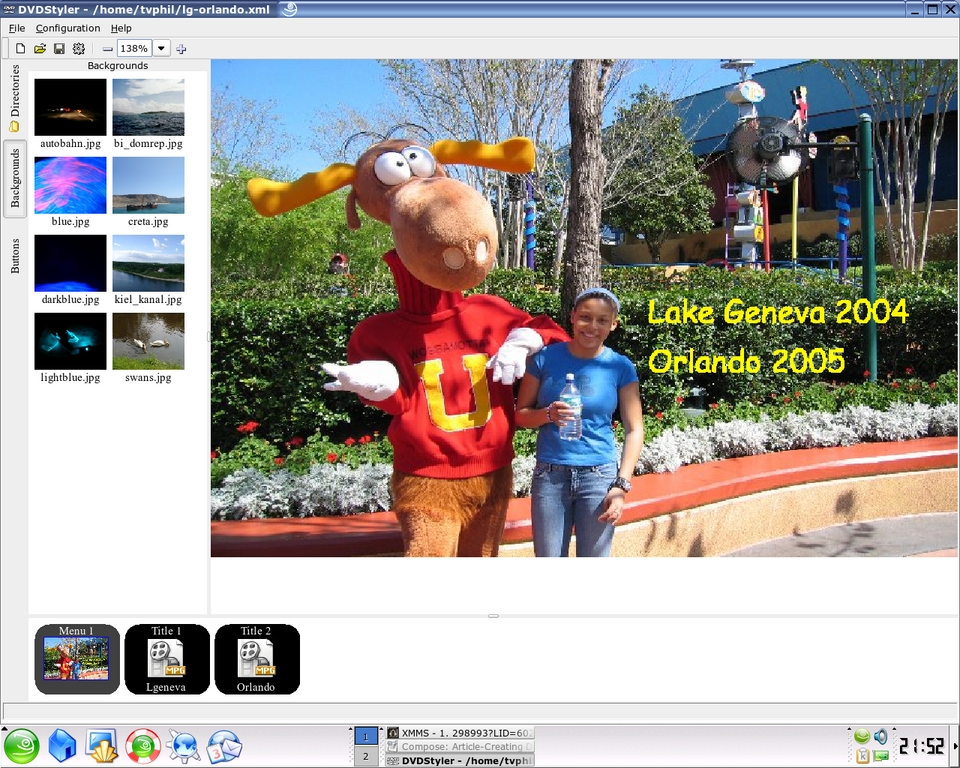
Figure 5. You can use a still photo or a video clip for a menu background.
There are several ways to do this, and each way has nearly infinite possibilities for background creation. First, if you want to do it the easiest way (the best choice if you've never authored a DVD before), simply choose one of the JPEG pictures offered with DVDStyler. Left-click once on your choice, and then drag it over to the left and into the main screen area. If you want to use a still photo or a video clip for a background, it involves a little more work—here's how.
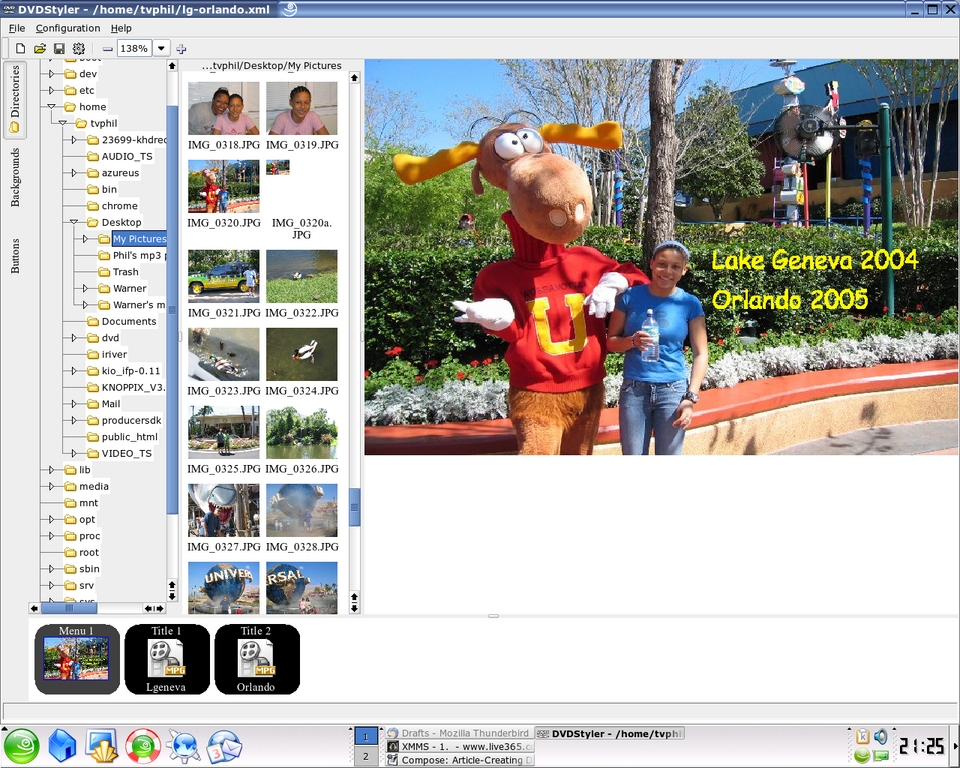
Figure 6. Select the photo you want to use for a menu background, then drag it to the main screen.
For a still photo, go to the Directories tab again and open the folder where your pictures reside. In my example in Figure 6, you see the open My Pictures folder and all of the pictures in that folder. I simply chose the one I wanted to use, left-clicked once and dragged it over to the main screen area, exactly like we did in the first example. The small one (320a) is the one I used for the background.
The reason it is smaller is because I had to resize it using The GIMP before I could use it as a background, as the original size was much larger than what would fit for a menu background. Any still photo needs to be the same size as the NTSC ratio (or PAL) video ratio. In the case of NTSC, it's 720 x 480. If you use a larger photo, you'll end up with some (or a lot) of it framed off. In a DVD menu, a still photo is simply seen as a still frame of video. If you use a pre-edited video clip for your background (something short, 10–60 seconds long), the process is a little different. Simply click on the Directories tab, navigate the tree to the folder where your video clips are located, and then open that folder, double-click on the video clip and you will see the video's file path in your main screen area. You won't actually see the video play at this point, only the words displaying the file path. When your DVD is authored, you will see the video in the background.
Now, it's time to talk about the most important function in DVD authoring, creating buttons. The buttons are what you and other viewers of your DVD will navigate to on the menu to trigger the playback of whichever video clip they want on the menu. The first step in creating a button is to click on the Buttons tab. Then, click and drag the word button to the right of the directory and move it to wherever you want to place the button on the background. Don't worry if you change your mind on the placement later, you still can move it somewhere else on the background and not affect the properties of the button itself. Once your button is on the background, right-click on the word button and choose Properties. You will then see what's shown in Figure 7. Where it says action-jump titles, it is referring to the titles of the movie clips you chose and put on the time line at the bottom of the screen earlier.
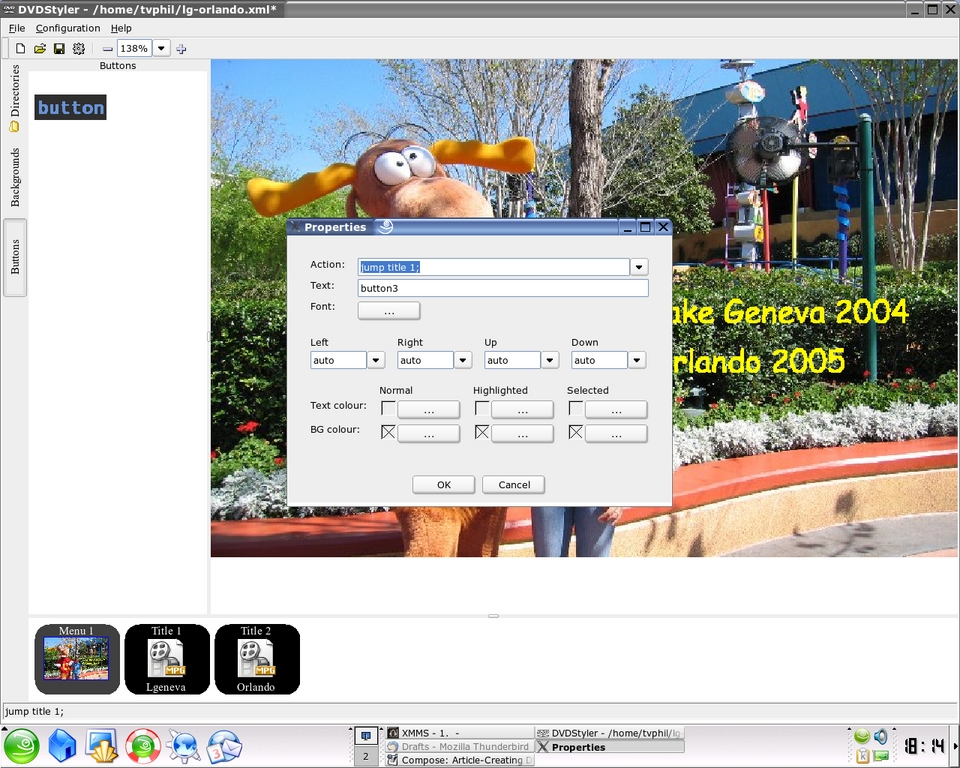
Figure 7. The button Properties dialog lets you set the text and associated actions for a button.
Click on the scrollbar to the right of jump title and you'll see all of the movie titles on your time lime to be represented by button 1. Button 1 doesn't have to be tied to title 1. It can trigger any movie title on the time line; it's your choice. However, you may find it easier to keep buttons and titles tied together chronologically. After you choose which title you want for the button, you also can choose what color background to have behind the text of your button, the color and font for your text and whether it becomes highlighted when navigated to and after it is clicked on when played back on a DVD player.
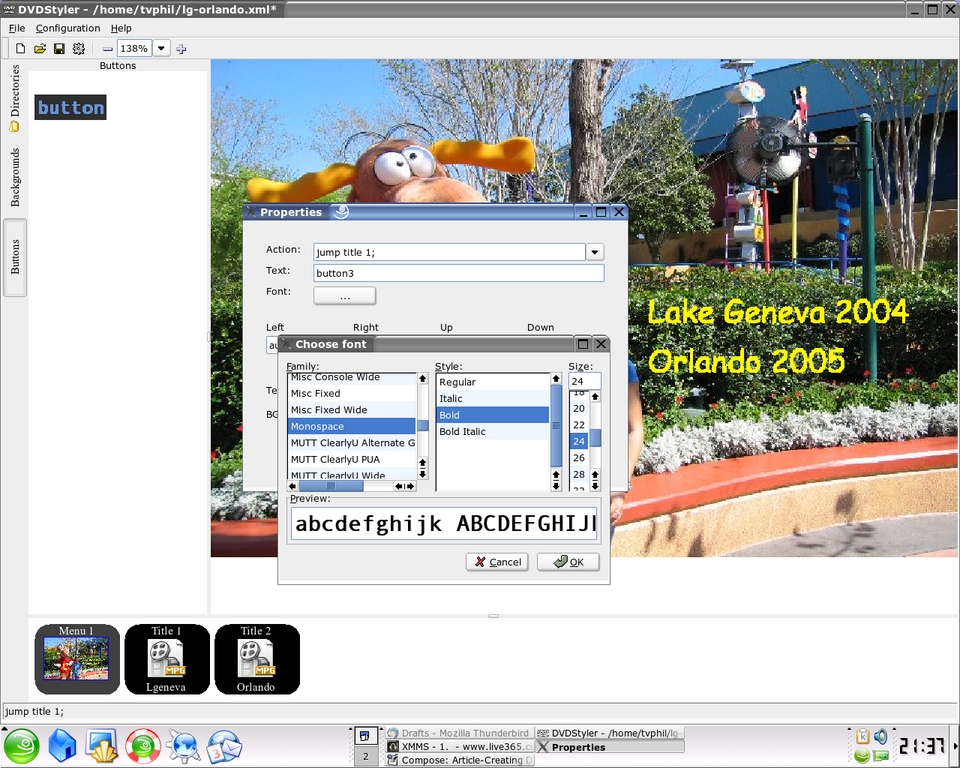
Figure 8. You can set the colors and font for text from the same dialog.
These choices are made right below where the text was entered. In the area called text, it says Title 1 by default. You will want to change that to a name that makes sense to the viewer of the video. One more thing to remember, if you have to stop in the middle of authoring, make sure you click the Save icon in the upper-left corner of the screen before you exit or all of your hard work will be lost. That's it. Now, if you're a more-advanced user, you can create title sets, submenus and make the video background loop. Your options are plentiful. The DVDStyler user guide (a free download from the DVDStyler Web site) goes into great detail explaining how to do everything to create a simple or complicated DVD menu. That's what I think is so great about this application. It's simple enough to use for a beginner, but it also has a lot of more-advanced features that can be used if you know how.
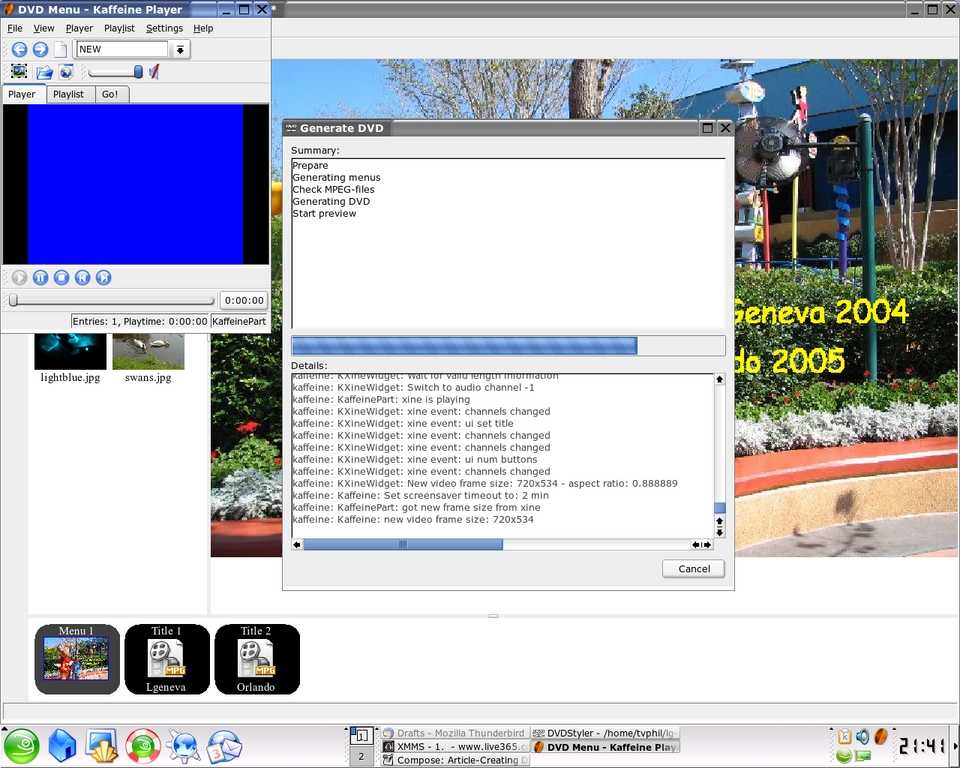
Figure 9. When you're ready to burn the DVD, the Generate DVD dialog keeps track of your progress.
Let's burn! The DVD that is. Simply click on the gear-wheel icon below the word Configuration or click on File in the upper-left corner and scroll down to the command burn DVD. Here you either can preview your work before burning or you can go straight to burning the DVD. When you do, you'll see displayed all the commands that DVDStyler is giving to DVDAuthor to initiate the burning process. If you haven't already inserted your DVD disk into your DVD burner, do it now.
When you insert the DVD, if you get a prompt like I do, asking if you want to start K3b, answer no. K3b is another disk-burning application that many Linux distributions use for burning data DVDs and CDs and audio CDs. It doesn't, however, author video DVDs for DVD player playback. DVDStyler does all the burning by itself. If you're using a distribution that has hotplug, you don't have to mount or unmount your DVD burner. Burning a DVD takes much longer than burning a CD, because it stores much more data. The speed varies with different burners; some go faster than others. Mine is about two years old and burns DVDs only at 2x speed. For me, it takes roughly two minutes to burn every minute of video. A DVD holds only about 58 minutes of MPEG-2-quality video. So for me, it takes about two hours to burn a 58-minute video DVD. If you have a newer 8x speed DVD burner, obviously it will go much faster. Once the DVD is done burning, it will eject itself. Then, go play it on your DVD player. Most players made after 2000 will play it. If yours is older than that, don't be surprised if it won't play. If this happens, go out and buy the cheapest DVD player you can find ($30), and it will play. If you don't want to do that, you always can play it on your computer and navigate the video clips the same way you would on a TV screen.
Video DVD authoring for Linux is a reality, and best of all, it's pretty easy, even for newbie videographers. DVDStyler is one of the Linux applications I have felt compelled to donate to, to help advance this already good application. It's that good!
Resources for this article: /article/8641.
Philip W. Raymond has been a user of Linux for two years and has worked professionally as a Broadcast Technician for 30 years, the last 21 of those years at WFLD-Fox Television in Chicago. He also can be heard wasting time on his Internet radio station, www.bsidehits.com. He can be contacted at tvphil@yahoo.com.
