
Linux in Government: Optimizing Desktop Performance, Part II
As we discussed in last week's article, for most of its existence, people have distributed Linux as a workstation or a server rather than as a desktop. The default workstation that evolved has existed mostly for use by developers. So, when you install a Linux distribution with a graphical interface, it generally looks like what a developer might want. In addition, it performs similar to how many UNIX workstations work, which can seem slow.
In this article, we continue to look at the Linux desktop in a different light. Here, we think of it as a computer system with a fast interface that we can optimize for the knowledge worker and consumer.
Many points exist in a PC where an operating system can slow down. The most common point for this to happen lies between random access memory (RAM) and the hard drive. Similar to increasing the amount of RAM in your computer, you may find that purchasing a better hard drive can improve your performance. Follow the discussion below, and you should see why you may need a better hard drive.
By enabling Direct Memory Access (DMA), data can transfer directly from a hard drive's buffer to the computer's main memory, leaving the processor uninvolved. Although the results vary depending on the devices in your PC, using DMA should improve performance. You should try this to see if you experience improvements in disk performance. Please refer to Figure 1.

Figure 1. Using DMA
Most Linux distributions set the using_dma option to 1, and the Linux kernel normally sets DMA automatically. I discovered that in my system the flag was set to 0, which meant my using_dma option was off. Take a look at the top of Figure 1 which represents where I tested my hard drive parameter.
When I ran the command hdparm -t /dev/hda, my disk read 24MB in 3.11 seconds, which does not provide for the best disk access. So, I turned on using_dma using the hdparm -d 1 /dev/hda command and found that my disk access increased from 24MB in 3.11 seconds to 140MB in 3.01 seconds. You can see the results in the gray area of Figure 1.
Simply turning on using_dma enables a 16-bit mode, so I switched to 32-bit mode and found that my read time improved slightly. My buffered disk reads went from 46.50MB per second to 46.52MB, not much of an improvement. I also looked at turning on multiple sector I/O. This is a feature of modern IDE hard drives that permits the transfer of multiple sectors per I/O interrupt rather than the usual one sector per interrupt. When this feature is enabled, it typically reduces operating system overhead for disk I/O by 30-50%. On many systems, it also provides increased data throughput of anywhere from 5% to 50%.
I then ran the command hdparm -m /dev/hda and saw the following result:
/dev/hda:
multcount    = 16 (on)
But my buffering slowed down:
138 MB in 3.02 seconds = 45.72 MB/sec
In Fedora Core 3, you can change hdparm parameters in the /etc/sysconfig/harddisks file by uncommenting values. However, unless you see a significant improvement, don't make any changes. Simply buy a better hard drive.
Window frame image files can slow down system performance depending on the technique a theme maker uses to draw a frame. In GNOME, for example, the Crux window frame option loads slowly depending on CPU resources. In the system I used to test, I used a Sempron 2200 with a clock speed of 1.5GHz. To reduce CPU usage, I changed my frame options and noticed an increase in application start-up speed. For example, I downloaded and installed a theme called Atlanta and ran:
# gconftool-2 --type string --set /apps/metacity/general/theme Atlanta
I also could have changed the window frame by using Launch->Preferences->Theme and selected Theme Details. Then I could have selected the Window Border tab, clicked on Atlanta and closed.
Although themes use is subjective and people like to select their own eye candy, enterprises tend to want to get the best performance possible. You might try different combinations of theme elements to see if you find a difference in performance.
When you log in to a GNOME desktop, you see a splash screen, which displays icons and takes up time. I turn off my splash screen in order to reduce CPU cycles and because I find it annoying. If you have limited resources, you can use this command to save CPU cycles or get rid of the splash screen if you find it annoying:
# gconftool-2 --type bool --set /apps/gnome-session/options/show_splash_screen false
Users also can get to the splash screen options by using Launch->Preferences->More Preferences->Sessions and then unchecking it in the first tab. See Figure 2 for a look at the Sessions options.
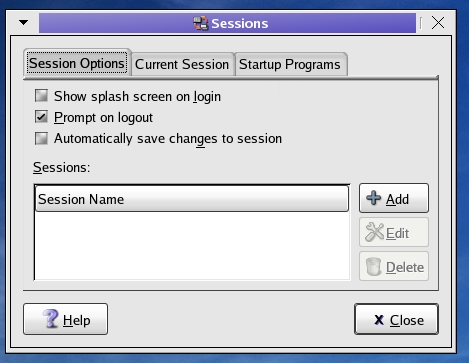
Figure 2. Turning Off the Splash Screen
Notice that you have several options from which to choose in the Sessions tool. Later, we use the third tab, Startup Programs, to show you how to load a script to improve the start-up time for OpenOffice.org.
Today's Linux computer systems typically support 24-bit color, which translates to 16,777,216 colors. You might find that your system performs as well using 16-bit color, however, especially if you use virtual machines, such as VMware or rdesktop, to run Linux as a thin client on a Microsoft Terminal Server. You also can reduce the amount of memory dedicated to AGP Video chips and use that memory instead for system operations, especially if you need to squeeze resources such as RAM.
On Ubuntu, the default color settings are for 24-bit color. Changing that setting is a manual process. So, depending on your distribution, you can change the color depth from the command line:
su root or use sudo

cd /etc/X11 or /etc/

edit  XF86Config-4 or xorg.conf
depending on which X11 you have.
Scroll down to the section titled Screen and find the entry named DefaultDepth?. Change the setting you find there from 24 to 16.
In Fedora, you can change settings by selecting Launch->System Settings->Display and then changing the Color Depth to thousands of colors.
Last week we discussed the graphics cache for use with OpenOffice.org, as well as memory-per-object settings. This week we want to cover the issue of quick-starting OpenOffice.org's productivity suite. OpenOffice.org looks like a collection of separate programs such as a word processor and a spreadsheet program. We might consider it as being similar to Microsoft Office, where you can buy Word or Excel separately.
In actuality, OpenOffice.org consists of a single large application with different interfaces. Thus, it requires time to start the first OpenOffice.org application you use. When you launch OO Writer, for example, you might want to get a cup of coffee. But if you leave one of the applications open, you can open a new document quickly. The big OpenOffice.org application already exists in memory from when you started, in this case, OO Writer.
A couple of utilities exist that preload OpenOffice.org. One, called Quickstarter or oooqs, exists for KDE; another, called ooqstart-gnome, exists for GNOME. We have not seen new development on the later utility, though, and it often causes an error message.
You also can use a built-in program called ooffice -quickstart, which you can start manually from the command line. The command is
$ ooffice -quickstart &
To use it, start ooffice -quickstart manually or have it launched automatically when you start your window manager or desktop. You then can start up your word processor, for example, work and then close the applications. But as soon as you close OpenOffice.org, the background quickstart process automatically dies.
The scripts used by oooqs and ooqstart-gnome do not experience this problem. So, you may want to use a script modified from Linux Desktop Hacks, published by O'Reilly & Associates. With this method we create a script and place it in a file called /usr/local/bin/oostay. The script looks like this:
#!/bin/bash
# Restart ooffice -quickstart every time it exits
instances=`ps ax | grep -e -quickstart | grep -v grep | wc -l`
if [ $instances == 0 ]; then
while true; do ooffice -quickstart ; done
    else
    exit 1
fi
After creating it, make it executable with the following command:
# chmod +x /usr/local/bin/oostay
You can have it start when you logon to your desktop by specifying it in the Sessions dialog in GNOME, for example. See Figure 3.

Figure 3. ooffice -quickstart Every Time
Firefox running on Ubuntu seems to be slower than it is on Fedora Core 3 and some other Linux distributions. You can speed up its launch and rendering of Web pages, however, with a few changes. You have to open Firefox and in the address box type about:config. You then can use the about:config screen to tweak performance by increasing the maximum number of connections to different aspects of the network. Some setting to change and their values include:
network.http.max-connections                    128
network.http.max-connections-per-server            48
network.http.max-persistent-connections-per-proxy    24
network.http.max-persistent-connections-per-server    12
When you find a text string such as network.http.max-connections in the about:config screen, double-click the entry and a text box pops up allowing you to change the values. If you simply want to change a default from true to false, you can double-click the appropriate text string and the value changes. Each text string provides a status to the right of the property field. It displays either a default or user set status. So, you always can go back to the default settings.
For broadband users, Firefox responds to some changes in its default values for the following properties:
network.http.pipelining
network.http.proxy.pipelining
network.http.pipelining.maxrequests
The default browser provides one request to a Web page at a time. Enabling pipelining makes several, which can speed up page loading. Alter the entries as follows:
Set network.http.pipelining to true.
Set network.http.proxy.pipelining to true.
Set network.http.pipelining.maxrequests to 30. This means it makes 30 requests at once.
Right-click anywhere on the about:config page and select New->Integer. Name it nglayout.initialpaint.delay and set its value to 0. The browser waits before it acts on information it receives; this changes the behavior so it acts immediately.
Due to space limitations, we have to break this discussion of optimizations into different parts. Hopefully, this article enables you to make improvements in your desktop's performance. Each change we make in future articles will have a cumulative effect, and soon you will see your entire Linux operating system in a new way--as a fast desktop.
In the meantime, perhaps people want to jump in with comments about prelinking and other performance enhancements. Feel free to do so. We only request that you make your comments constructive and explain how to implement your suggestions.
Tom Adelstein is a Principal of Hiser + Adelstein, an open-source company headquartered in New York City. He's the co-author of the book Exploring the JDS Linux Desktop and author of an upcoming book on Linux system administration to be published by O'Reilly. Tom has been consulting and writing articles and books about Linux since early 1999.
