
Radio's Next Generation: Radii
A phrase we heard many times when we sought venture capital to develop the Internet appliance we call Radii was “If this were 1999, you would already have your money.” Unfortunately, it was 2004 and there was no money for a risky consumer product such as Radii, despite our compelling prototype and a well-defined market. Rather than let our efforts go to waste, we decided to share the details of the prototype here with the Linux community that made its development possible. In this article, we explain how we quickly built our Radii prototype using low-cost hardware and Linux along with some of its companion software, including Perl and GCC.
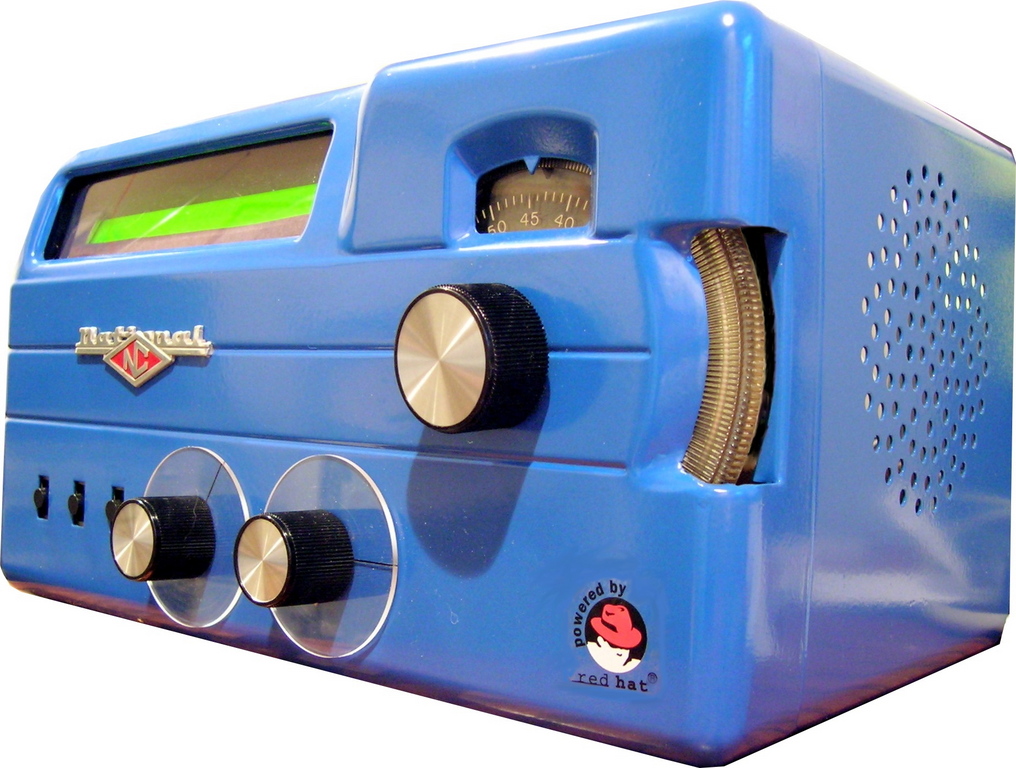
Figure 1. Radii—a 1950s-style radio with Internet content.
Radii is a radio: a box with buttons and dials used to select bands and tune stations in a familiar way. Because this radio receives Internet radio, it provides hundreds of noise-free stations with a wide variety of listening options. The band selection dial, instead of AM and FM, is used to select genres such as News, Sports and Rock. The station selection dial scrolls through station names that can be tuned by clicking the select button.
At the beginning of this project, the three of us threw in $100 each and some spare time while continuing to work our day jobs. We never thought of this as an exercise in rapid prototyping; it was all about implementing our vision as quickly and inexpensively as possible. At every step of our development, we looked for the fastest way to get the task accomplished and balanced that against its cost.
The prototype is housed in a converted SW-54 radio made by the National Radio Company in the 1950s. The radio was in poor condition before the conversion. As admirers and collectors of old technology, we like to think we gave it a new lease on life.
The Radii core hardware platform is an old laptop running Linux. The operator interface consists of two rotary encoders, three momentary contact buttons, a 40x2 backlit LCD, a power supply and a retro radio cabinet. The encoders and buttons are connected to a PIC microcontroller development board that is, in turn, connected to the laptop's serial port. The LCD is connected to the laptop's parallel port.
On our budget of $300, cost was important. As such, eBay was our vendor of choice. Here is our hardware shopping list:
PIC microcontroller dev board (OOPIC) ($70).
One TTL to RS-232 chip (TI MAX232) and associated bits to interface the PIC to RS-232 ($5).
Three momentary buttons for selection/special functions ($3).
Two rotary encoders one for band selection, one for stations selection ($3).
One 40x2 LED backlit LCD ($12 eBay).
Gateway Solo 5150, 300MHz Pentium laptop, broken screen ($100 eBay).
One National NC-54 vintage radio ($35 eBay).
Power supply for PIC and LCD (3/$10 eBay).
Cables, connectors, bubble gum, baling wire and so on. ($25).
Shipping, fees and taxes took up most of the remaining funds.
A PIC microcontroller is a single-chip computer produced by Microchip Technology, Inc. Although these tiny computers are capable of many useful things, we used it here simply to handle operator inputs. For prototyping with a PIC, a development board normally is used. PIC development boards provide an easy way to prototype a PIC application by allowing a range of input power options and easy access to the input and output pins for the chip. It is not necessary to use this, but it makes creating a prototype easier.
We used the OOPIC development board/system by Savage Innovations. It is inexpensive and provides a simple object interface for many input and output devices, including buttons, encoders and RS-232 serial communication. Unfortunately, there is no Linux development environment for OOPIC, although a SourceForge project is underway.
The hardware is rounded out with a Gateway Solo 5150 laptop that has a broken LCD. Similar laptops go for between $50 and $100 on eBay.
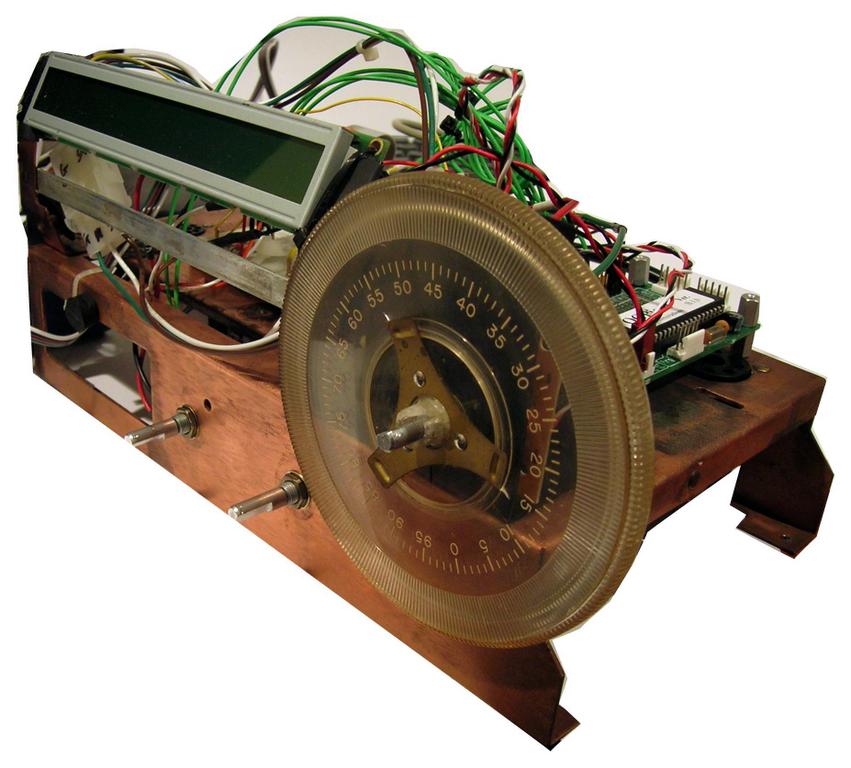
Figure 2. The original chassis is used to mount the controls, PIC development board, LCD and power supply.
We chose Linux from the start for many reasons. The primary reason is that most distributions are configured with many of the tools we thought we might use, such as mpg123, XMMS, Perl and compilers. It also helped us stay on budget because it's free. Linux makes prototyping easy, because many applications and utilities have retained their command-line interface, allowing their use from scripts, such as the one written for Radii and described below.
Installation and configuration of the OS was straightforward, except for audio support. Because our laptop was so old, most installers were not able to detect the audio hardware. In an unscientific way, we tried many different Linux distributions until we found one that installed easily on our machine. We wound up installing Fedora Core 2 with ALSA (Advanced Linux Sound Architecture) support.
To get sound working for your particular machine, it is most important to identify your sound hardware. In our case, we were able to determine the sound hardware by Googling on the model number for this laptop. Once we determined which sound hardware we had, we were able to locate and install the appropriate ALSA driver for our machine, the ES1879 ESS Audio Driver, from the ALSA Project site. You may need to tweak some of the default ALSA parameters by using the alsamixer utility.
With the hardware in place and the OS working, it all came down to finding or creating the required software components. We had simple requirements:
An audio stream player.
An LCD controller.
An application to process operator-induced signals from the serial port and interact with the stream player and LCD.
We needed a way to play streaming audio that we could control from our application. We initially dismissed XMMS because it is a GUI application, but we later re-examined it and discovered that XMMS can be manipulated from the command line.
The XMMS application provides many handy options that can be used to control an already-running instance of itself. It can be stopped by issuing the -s argument. The playlist can be updated by using -p <playlist> and the playlist argument can be the URL of a stream. Use xmms -h for complete details.
For example, you ask XMMS to switch from its current selection to the AM 1710 Antioch Internet station (old-time radio), by issuing the command:
xmms -p http://66.54.65.226:9022
To stop, use xmms -s and so on.
XMMS completely covered our needs for a player, but it introduced a problem as well. XMMS is a GUI application, so it requires a running X11 server. Rather than tax the available resources on our low-powered laptop, we used the X Virtual Frame Buffer, Xvfb. Xvfb provides a lightweight X11 server that can be used to provide X11 resources to applications that require them, but it does nothing else— it is invisible.
We required a CLI application that would display a string on our parallel port LCD. After Googling for this, we found a FOSS application called lcd-info. lcd-info displays system performance information on an HD44780-compatible LCD connected to the system parallel port. It was not quite what we needed, but after studying its source for a few minutes, we found that it could be adapted easily for our purpose.
lcd-info is written in C and compiles into a CLI application. We compile our simpler application with a trivial invocation of GCC:
% gcc -o setlcd setlcd.c iolcd.c
The low-level routines that control the LCD are in iolcd.c, which was borrowed without modification from the lcd-info Project. setlcd.c is the Radii-specific piece that uses functions found in iolcd.c. We called our binary setlcd, and it is run like so:
% setlcd <string to display>
Building the cable to interface the LCD to the parallel port was more time consuming than was adapting lcd-info. It seems that there should be an appropriate off-the-shelf cable, but the pinout on the LCD-side of the cable varies with the manufacturer/model. Rather than finding exactly the right cable/LCD pair, we elected to make our own cable for the LCD we had acquired based on price.
We built the Radii application using Perl. We chose Perl because it's a language we know well, it has many supporting packages and the update/compile/debug cycle is fast.
The first thing to do is read the input from the PIC development board connected to the serial port. We used the Device::SerialPort package. Here is the beginning of our application, which shows how to initialize the serial port using the Device::SerialPort module:
#!/usr/bin/perl
use Device::SerialPort;

use strict;

# Set up the port.
# All port settings must match the PIC settings.
my $port = new Device::SerialPort("/dev/ttyS0");
$port->baudrate(9600);
$port->parity("none");
$port->databits(8);
$port->stopbits(1);
$port->handshake('none');
$port->write_settings;
Then we needed to handle the following messages sent from the PIC development board based on user input:
Msg Meaning
--- -------
U   The station encoder rotated one unit up
D   The station encoder rotated one unit down
s   The select button was pressed
u   The band encoder rotated one unit up
d   The band encoder rotated one unit down

while ( 1 )
{
  while (! ($code = $port->input))
  {
     select undef, undef, undef, 0.075;
  }
}
The outer while loop keeps the application running until it is killed or dies. The inner while loop attempts to read from the serial port. If there is nothing to read, it sleeps for a short time, 0.075 seconds, and then tries again. This sleep is important to keep the application from spinning too hard and consuming a lot of CPU time. Any messages that arrive while the loop is sleeping accumulate on the port and are available the next time we read.
When an input message is received, the application always should respond by updating the LCD. It sometimes should respond by changing the current station, that is, when the selection button is pressed.
When we get a Station Up (U) or Station Down (D) message, we need to display the next station on the LCD, but we don't want the station to change until the user sends a select signal. This brings us to the LCD message display. As previously noted, we use the setlcd command, but now we call it from the Perl script using the Perl system command:
system("setlcd",
       "Sel:$radiiStn{$curBand}{$choice}{name}");
where $radiiStn{$curBand}{$choice}{name} is a hash that is indexed by way of the band index and the choice index. It contains the necessary selection information: display name (used here), station URL and its band.
Once the operator clicks the select button, the PIC sends an s message. In response, the system updates the LCD to the new station name and signals XMMS to play the new stream, again using Perl's system command:
system("setlcd",
       $radiiStn{$curBand}{$choice}{name});
system("/usr/bin/xmms",
       "-p",
       $radiiStn{$curBand}{$choice}{station});
The Radii application is configured using a simple XML input file:
<?xml version="1.0"?>
<Radii>
  <station url="http://66.54.65.226:9022">
    <band>OLD TIME RADIO</band>
    <name>AM 1710 Antioch</name>
  </station>
  <station url="http://205.188.234.38:8040">
    <band>Celtic</band>
    <name>CelticGrove.com 24/7 Celtic/Irish</name>
  </station>
  .
  .
  .
</Radii>
The XML configuration file can be read using the XML::Simple Perl module.
my @station;
my %radiiStn = ();
my %bands = ();

my $file = 'stations.xml';
my $xs1 = XML::Simple->new();
my $doc = $xs1->XMLin($file);

foreach my $key (keys (%{$doc->{station}}))
{
    $band = $doc->{station}{$key}{band};
    $url  = $doc->{station}{$key}{url};
    $name = $key;
    $bands{$band} += 1;
    $radiiStn{$band}{$bands{$band}}{name} =
       $bands{$band}.":$band: ".$key;
    $radiiStn{$band}{$bands{$band}}{station} = $url;
}
This code utilizes Perl hashes for the required band and station information. Band information, including name and number of stations, is kept in the bands hash. Station information, such as name, URL and band, is kept in radiiStn hash.
See the on-line Resources for the URL of a site with the complete script and other associated software, along with details on how to build the hardware.
Radii demonstrates how Linux can be used to prototype a complex consumer device quickly and cheaply. As the iPod revolution takes hold and satellite radio becomes more popular, Radii-like devices inevitably will change the way radio is broadcast and received all over the world.
Rapid prototyping does not require particular hardware, sets of tools or languages. It's not about finding the best solution; it's about getting it done quickly using the available resources. That pool of resources is vast when it is FOSS on Linux. Keep your eye on the goal while you sort through the potential building blocks. Tweak as necessary, and then glue it all together with your language of choice.
We configured our laptop to boot to run-level 3, full multiuser mode. After the laptop boots, we start Xvfb, set our DISPLAY variable, start XMMS and start the Radii application. The startup sequence is:
% Xvfb :1 &
% export DISPLAY=:1.0
% xmms &
% radii.pl
Then we hide the laptop and enjoy the radio that we call Radii.
Resources for this article: /article/8537.
Dan Rasmussen (dan@retro-tronics.com) is a Senior IT Specialist for IBM and holds a BS in Math from UMass/Amherst and an MSCS from RPI. He has been working as a software engineer and IT consultant for nearly 20 years. Dan is also an avid collector of vintage electronics.
Paul Norton (pddknorton@charter.net) spent his early career with large corporations, including Xerox, Litton Industries and Pearson. For the last 20 years he has worked exclusively with small companies, several of which were start-ups. His main business focus is establishing operations and strategic management of product and market development. He has a three-pronged education in technology, humanities and business, holding an MBA from Brunel University in West London. He has worked extensively in Europe and the United States.
Vice President of Product Marketing at Tatara Systems, Jon Morgan (jamncl4@yahoo.com) has more than 18 years of marketing, technical and management experience in the telecom and data communications industries. Most recently, Jon was Director of Product Management/Marketing for Appian Communications, Inc. Prior to joining Appian, Jonathan held various management positions at Fujitsu Network Communications (FNC). Prior to Fujitsu, Jonathan spent seven years at Bellcore. Jon holds a BSEE from Washington University in St. Louis and an MSEE from Rutgers University.
