
At the Forge - WordPress
A fitting end to this series on Weblog software is a brief introduction to WordPress, which offers a wide array of features and continues to grow in popularity and sophistication. WordPress is Weblog software with an extremely clean, easy-to-use interface written in PHP with a MySQL back end.
Installing WordPress is amazingly straightforward if you have a bit of experience with Apache and MySQL. WordPress stores all of its information in a set of MySQL tables, which means you need to create at least one database before installing WordPress. WordPress allows you to have more than one Weblog inside of a single database, which is useful if your site is hosted by a company that gives you only a single MySQL database.
To create a new MySQL database, you need to use the mysqladmin program, which is in /usr/local/mysql/bin on my system:
# /usr/local/mysql/bin/mysqladmin -p create wordpress
The above command assumes you are running as root and that the root user has administrative privileges. Once you have created the database, you need to grant permissions for the WordPress user on these tables; we do this by logging in to the database:
# /usr/local/mysql/bin/mysql -p -u root
Once you have logged in, you can grant permissions to the WordPress user, which I called wpuser, with:
GRANT ALL PRIVILEGES ON wordpress.*
    TO wpuser@localhost IDENTIFIED BY 'wppass';
GRANT ALL PRIVILEGES ON wordpress.*
    TO wpuser IDENTIFIED BY 'wppass';
Next, download the source code to WordPress (see the on-line Resources section) and open that .tar.gz file inside of your Apache document root directory. You probably want to put the WordPress files inside of their own directory or perhaps under a virtual host, but all of the files must be within the document root if they are to be of any use.
Now point your browser to wp-admin/install, and you're on your way. The installation screens check that everything is installed correctly and ask you to answer several questions. Typically, you need to click on a link at the bottom of each page to continue with and finish the installation.
If you fail to create the database first, WordPress tells you to do this, reminding you that the database needs to be created before it can install the tables. You can use the WordPress installer only a single time. If you try to run the installer on an already-installed system, you are told to remove the old installation first. Attention to these sorts of details is nice to see in a program aimed clearly at a relatively nontechnical audience.
Once you have installed WordPress, you can log in as the admin user with a randomly generated password. Logging in as the administrator allows you to add, edit and delete postings, as well as configure the system for other users. WordPress allows you to create any number of users, each of whom is assigned a privilege level between 1 and 10. The administrator, with a privilege level of 10, is allowed to do anything to the system; other users similarly can be given free rein by being assigned 10s.
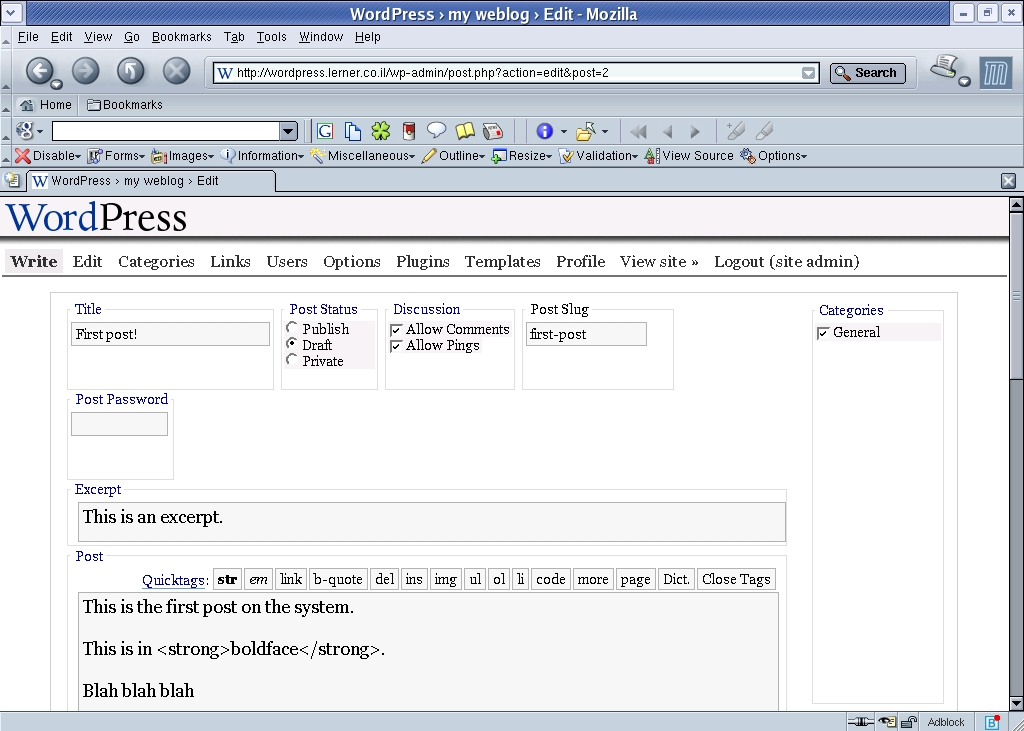
Figure 1. Entering a Weblog Posting with WordPress
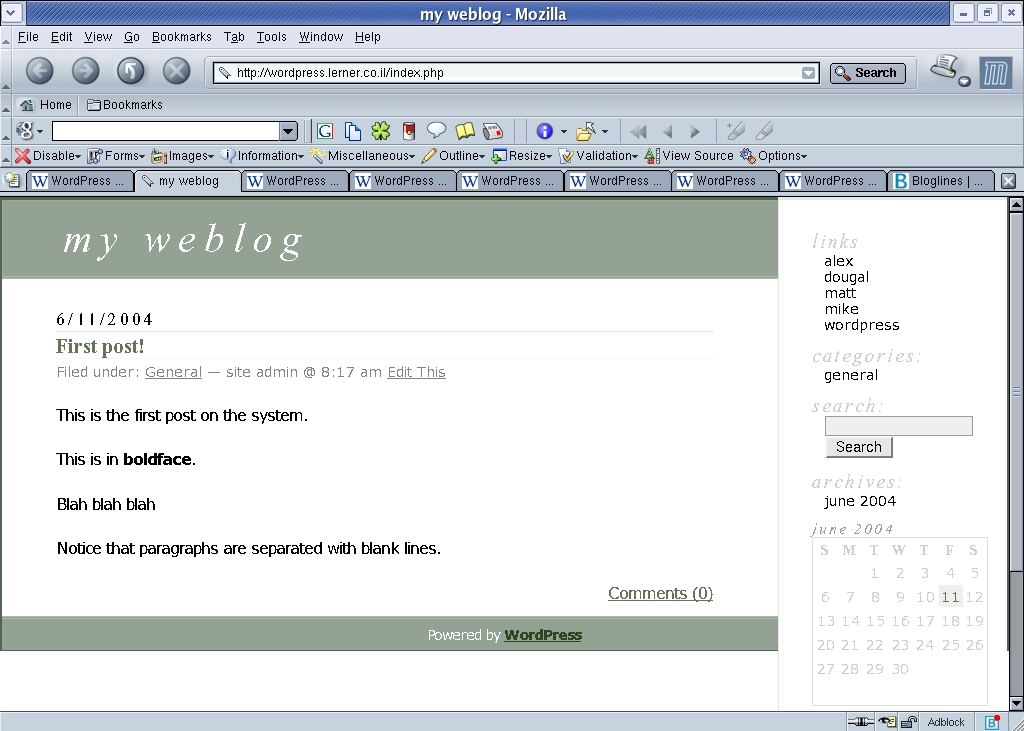
Figure 2. Display of That Posting with the Default WordPress Template
But, of course, you don't want to give every user the equivalent of root access. The default WordPress installation raises the bar on a number of features, so you can assign privilege levels to different users. Thus, users with a level of 5 and above can manage the list of links that appears on the right side of the page, and they also can upload images. These levels can be changed by using the administrative interface.
WordPress administration is entirely Web-based; once you have created the database tables, you can manipulate the entire system by using a Web browser. A number of menus are available when you are inside the administrative interface, and some of these menus have submenus as well. Although I originally was confused by the placement of certain features, I soon began to understand the layout of the system and was able to locate and modify many of the different options.
For example, I decided that it would be nice to include my blogroll, the list of Weblogs I read on a regular basis. I use Bloglines.com, a Web-based aggregator, and was able to generate a list of Weblogs in OPML (Outline Processor Markup Language), an XML application that is the standard for such data. Importing the list into WordPress was a snap by using the links menu and choosing blogroll. One of the listed options was to import an OPML file; as soon as I did that, my list of blogs was visible to the world.
Open-source applications often are criticized for their lack of a friendly user interface. This is largely because open-source programmers are writing the software for themselves and their colleagues, which means that anything other than core functionality is cast aside.
The authors of WordPress, to their credit, have spent a great deal of time on the user interface, trying to ensure that it is straightforward and unsurprising for nontechnical users. For example, many Weblogs assume that the author knows basic HTML tags and understands how to add and remove them. The WordPress editing window lets advanced users place such tags manually, but it also provides a set of JavaScript buttons for less-experienced users. These buttons not only indicate what possibilities exist, but change shape to indicate that a particular format currently is in use. The Close button at the end of the row was a particularly clever idea; it closes all of the currently open tags.
Like most software with good user interfaces, WordPress includes many small features that add up to a pleasant experience. For example, it automatically creates en and em dashes when you use two or three hyphens. It allows you to classify postings as drafts (the default), private or public, which means that you can start working on a Weblog entry, go to lunch and then return to work on it.
WordPress is sensitive to the fact that deleting data is a dangerous act that the user always should have to confirm. Thus, whenever the mouse moves over a delete button, the background of that button turns red. As an additional reminder, users are asked to confirm the action with a JavaScript dialog box.
With the exception of deleting, it is easy to undo any mistake that you might make in WordPress by returning to the menu in question and changing the value. All entries, including drafts and comments, can be edited repeatedly until they are ready for publication.
Finally, the look and feel of a WordPress Weblog can be changed by modifying the CSS, which handles the fonts, colors, sizes and placement; the templates, which largely are standard PHP; and even the plugins, which can change almost anything. It is possible to change the template within WordPress itself, although I expect that most readers of this magazine would prefer to use Emacs or vi to change the file directly on disk.
Installing a plugin requires downloading it and placing it within the appropriate plugins directory, but activating it is completely Web-driven. This means that system administrators can install a number of plugins for their users and let the individuals choose which plugins they would like to activate. Several sample plugins are included in the WordPress distribution, and others are available from the WordPress Web site.
Over the past few months, we have looked at a number of different types of Weblog software. With the exception of COREBlog, a Zope product that installed easily and quickly into my Zope server, WordPress was by far the easiest and fastest to install. It has a full list of features, many of which have to do with the clean, easy-to-use user interface. Even novice computer users and Webloggers can publish regularly with this software. Although the underlying code and technologies used—PHP and MySQL—are not my favorites, the set of features, growth of the platform and the large community all make WordPress a winning choice.
Resources for this article: /article/7641.
Reuven M. Lerner, a longtime Web/database consultant and developer, now is a first-year graduate student in the Learning Sciences program at Northwestern University. His Weblog is at altneuland.lerner.co.il, and you can reach him at reuven@lerner.co.il.
