
DVD Authoring
Traditionally, DVD authoring has been an expensive affair. Full-featured professional applications can cost thousands of dollars, while cheaper products, such as Apple's iDVD, have arbitrary restrictions that significantly reduce their usefulness. A new open-source effort, dvdauthor, is bringing the possibility of low-cost, professional-grade DVD authoring to Linux. Although it doesn't yet support all the features of the DVD specification, development is proceeding at a fast pace, and new features are being added with each release. Together with a more established open-source toolkit, mjpegtools, this article explains how to construct a relatively complex DVD application, a photo album, with dvdauthor. We also illustrate the various features that dvdauthor currently supports and how to use open-source tools to construct a DVD-R that can play on almost every DVD player.
A DVD is comprised of one or more video title sets (VTSes), which contain video information in the form of MPEG-2 video streams. Each disc can have up to 99 VTSes, and each title set can be subdivided further into as many as 99 chapters, allowing DVD players to jump to a certain point within the video stream. Within each VTS, a DVD can have up to eight different audio tracks and 32 subtitle tracks that the viewer can switch between at will. A menu system can be included within a title set, allowing the viewer to select between the different subtitle and audio tracks. An optional top-level menu, known as the video manager menu (VMGM), is used to navigate between the different title sets. One VTS may contain a feature film and another may contain a documentary on the film, and the VMGM allows viewers to select which one they want to watch.
The DVD format doesn't eliminate the differences between the two competing broadcasting formats, NTSC (primarily used in America) and PAL (the standard in Europe and Japan). I live in Britain, so the frame information and resolution details used in this article are for a PAL system, but I point out the differences you need to be aware of when they appear and offer appropriate settings for an NTSC disc.
The DVD specification includes advanced features, such as the concept of region coding, the possibility of viewing different angles of a video stream and simple computations using built-in registers provided by a DVD player. I don't know much about these features, and they aren't discussed in this article. The dvdauthor mailing list is a good source for further information.
Before we rush headlong into creating menus, subtitling and multiplexing, it's a good idea to sketch out the structure of the DVD with paper and pencil. Proprietary DVD tools offer GUI systems for creating this type of structure, but no such tools are available yet for DVD production on Linux. As you'll soon see, the command-line tools have a lot of different options, so having your ideas on paper is preferable to trying to keep everything in your head.
The DVD application I'm creating is a photo album, using pictures that I took while studying abroad at UNC-Chapel Hill this past year. For simplicity's sake, I have only six photos in each category. On paper, I decide that the main menu (the VMGM unit) should have five buttons, four of which are simple text buttons (one for each different photo category), plus a secret link unlocking extra pictures (secret extra features are a common occurrence in commercial DVDs) and a music track playing in the background. The four regular buttons link to one of four menus, one for each different section. The menu system for each section consists of two menus and an audio track, with selectable preview images of the slideshow, a button to move onto the next set of preview images and two buttons that allow the viewer to watch the complete slideshow or go back to the main menu. To keep things simple, the photo slideshow should have the same song as the section menu playing in the background. After the slideshow is finished, the viewer is sent back to the section menu. The secret link is a short slideshow with no menu, but it has two different music tracks that the viewer can switch between while the video sequence is playing.
To prevent things from getting mixed up, I created the directory structure below to organize the files. The image directory eventually will hold the completed DVD, while the raw photos go in the photos/setN directories and the video files go in the titleN or main directories:
dvd
	- title1
	- title2
	- title3
	- title4
	- title5
	- mainmenu
	- photos
		- set1
		- set2
		- set3
		- set4
		- set5
	- image
In order to make the slideshows, we need to transform the pictures into video clips. The mjpegtools suite includes a utility called jpeg2yuv that transforms a JPEG file into YUV (a color model used for video pictures) format, which then can be piped into mpeg2enc to generate an MPEG-2 video file. Before this transformation happens, though, we need to make sure the picture files are formatted correctly for DVD. It is advisable to alter your pictures manually to fit the PAL or NTSC resolution constraints (720×576 and 720×480, respectively) before feeding them into jpeg2yuv. mjpegtools includes a utility called yuvscaler that automatically resizes incoming YUV data into the correct resolution, but this can alter the aspect ratio of your pictures and cause distortion.
A sample command line to generate a slide looks like this:
jpeg2yuv -n 125 -I p -f 25 -j picture1.jpg | \
mpeg2enc -f 8 -o slide.mpg
The -n option tells jpeg2yuv how many frames it should generate, in this case 125 (5 seconds at 25fps); you should use 29.97 for NTSC. The -I option tells it to use progressive interlace (rather than throwing parts of the image away), and -f sets the required frame rate. The -f option to mpeg2enc tells it to create a DVD MPEG-2 video stream. This process needs to be repeated for all the photos to be included on the DVD, so you might want to write a quick Perl or shell script to automate this process.
Now we have video clips of separate slides. The next step is to add a music backing track that plays across each clip. The DVD specification allows for the use of PCM, AC-3 or MPEG-2 audio, at various bit rates. For the photo album, I decided to use MPEG-2 audio; I decided that I didn't need the higher audio quality of AC-3 or PCM. mjpegtools includes a tool called mp2enc that encodes WAV files in MPEG-2 format. Another tool from mjpegtools, mplex, multiplexes one or more audio files into a video MPEG stream. To do multiple audio files, you need the CVS version of mjpegtools. Start by concatenating all the video files required for a particular slideshow using cat, as mplex seems to have problems with handling multiple input files:
cat *mpg > video.mpg
In the title5 directory (the fifth title is going to have two audio tracks), I ran mplex on this new file:
mplex -f 8 -o video%d.mpg photos/set5/video.mpg \
audio1.mp2 audio2.mp2
This creates a series of files called video1.mpg, video2.mpg, ..., videoN.mpg in the current directory, multiplexed with the two audio tracks, audio1.mp2 and audio2.mp2. The -f 8 argument to mplex ensures that the new MPEG files are DVD-compatible, the same as mpeg2enc.
One issue to be aware of is that mplex multiplexes the whole audio track. If the track is longer than the combined length of the video clips, then the final clip is extended to cover the rest of the audio. You may want to adjust the frame times in jpeg2enc phase or edit the audio track to prevent this from happening.
The process for creating DVD menus is similar to generating the slides. Using The GIMP, make a new image of size 720×576 (for PAL), with a resolution of 75dpi in the x-axis and 80 in the y-axis (NTSC values are 81 and 72). Add an alpha channel, then create the menu picture you desire (see Figure 1 for the base image of the main menu). Once this is finished, add another layer and mark out the location of the buttons that can be highlighted, as seen in Figure 2. A maximum of four colors can be used for this mask; I used red to mark the button areas, and white to make sure that the text still was visible when a button was selected. When you're satisfied with the menu, export the background layer as a JPEG file and the mask as an indexed PNG. Make sure you've set the number of colors to four, three if you're saving the transparent background as a color. This process is repeated for all menus required in the DVD (see Figures 3 and 4 for a further example).
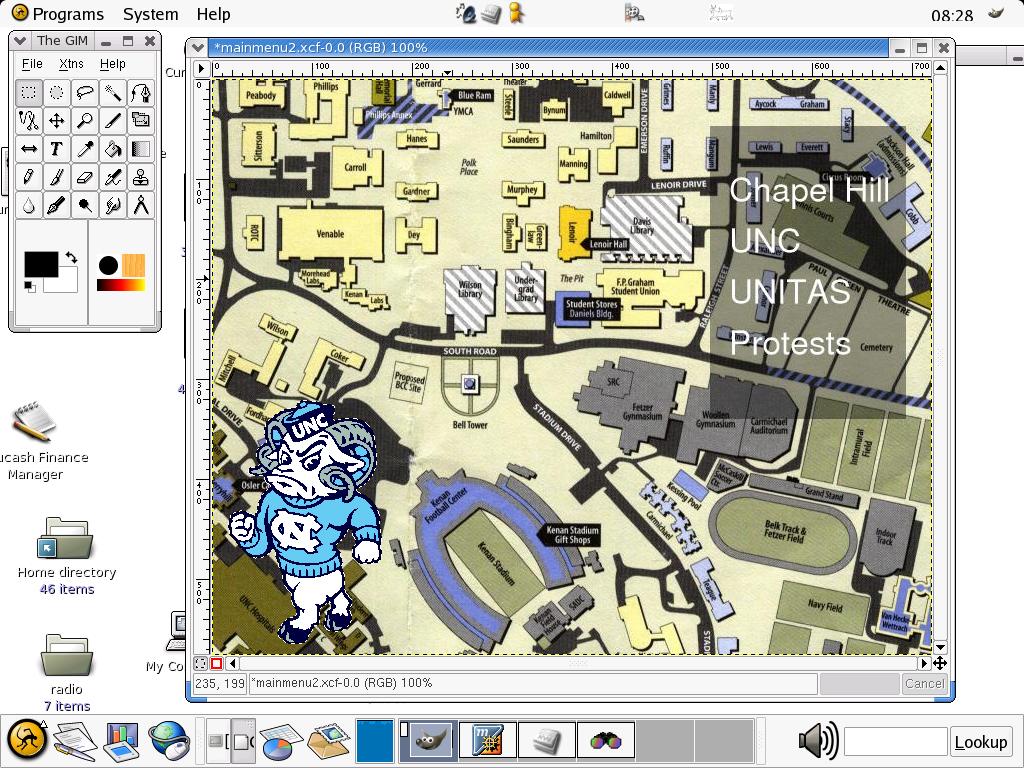
Figure 1. The Main Menu Image
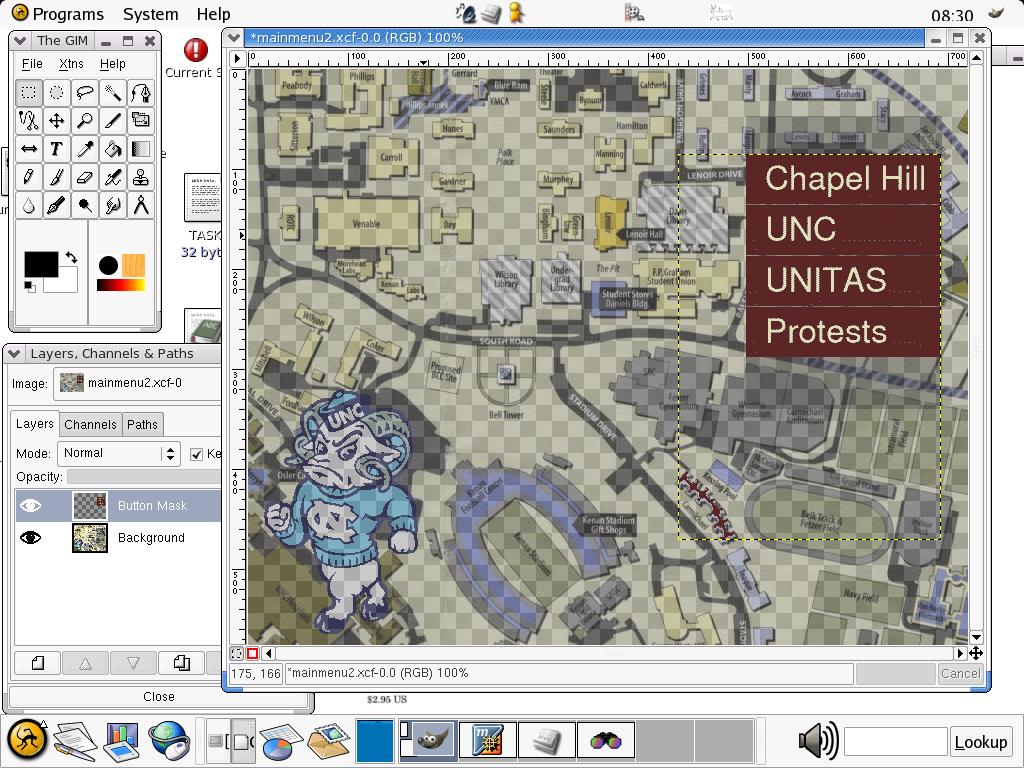
Figure 2. Making the Main Menu Mask

Figure 3. A Submenu with Thumbnail Previews
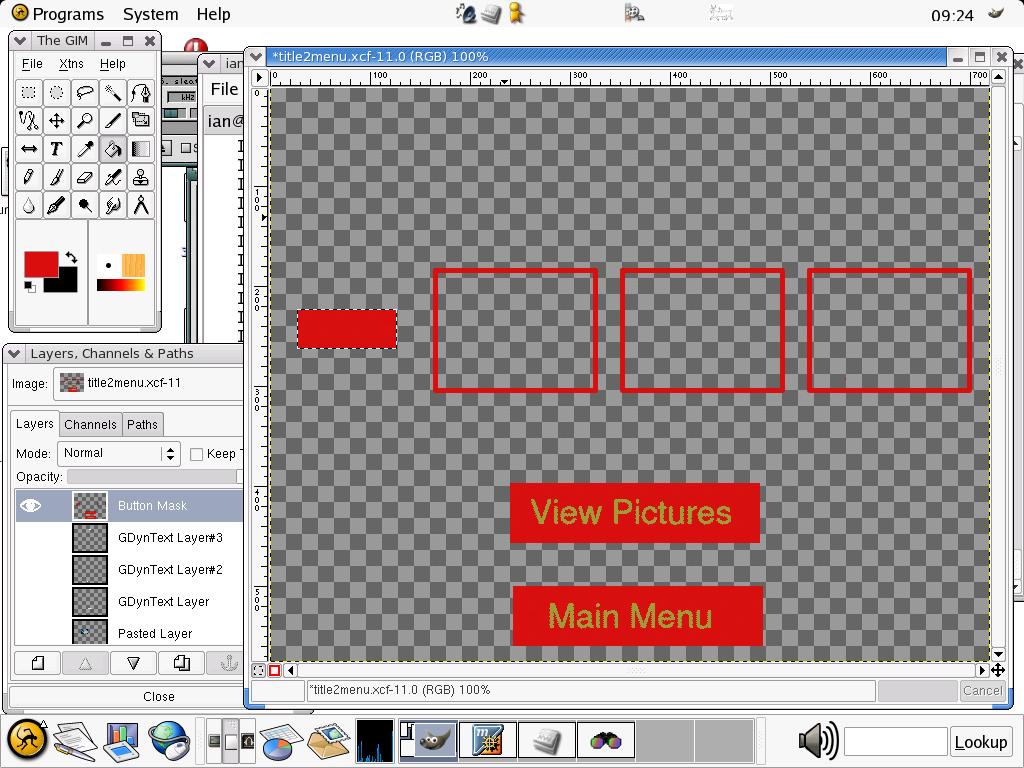
Figure 4. The Mask for the Submenu
As before, use jpeg2yuv and mpeg2enc to create an MPEG file, and mplex to multiplex it with an audio file. For some reason, menus need an audio file to work, so if you want silent menus, you have to use a short burst of silence. Buttons in DVD are implemented as part of the subtitle stream, so we use dvdauthor's submux tool to define a menu's buttons. The program reads in subtitle information from a text file and multiplexes it into the video stream. The format of the submux files looks like this:
<file_name> <start_time> <end_time> <x_offset> \
<y_offset> <4 8-bit numbers>
There can be multiple entries in a .sub file, but only one line is required for the menus:
mainmask.png 00:00:00.00 00:00:00.00 0 0 0 1 0 1
Defining the start and end times as zero instructs the DVD player to keep the subtitle on screen continuously. The 0 1 0 1 sequence turns the selected button red when using the default palette file supplied with dvdauthor. The four different numbers (from 0–255) control the transparency values of the colors in the indexed PNG. You might want to experiment with these values to see what effects you can create, but the sequence above seems to produce reasonable results. Having made a subtitle file, we then run submux to add the subtitles to the video stream:
submux menu.sub < video.mpg > menu.mpg
As previously mentioned, a DVD can have up to 32 different subtitle streams in a VTS. Although they're called subtitle streams, they actually are implemented as overlaid picture files rather than as a text representation, so they can do other things as well. An example of this is the “White Rabbit” feature seen on The Matrix DVD. Subtitling is fairly easy, as it's essentially the same process as creating menus, only without the background layer. Figure 5 shows an example subtitle picture, providing a title for a photo. A sample submux description for this title that keeps it onscreen for two seconds would be:
sub1.png 00:00:00.00 00:00:02.00 0 0 0 255 0 255
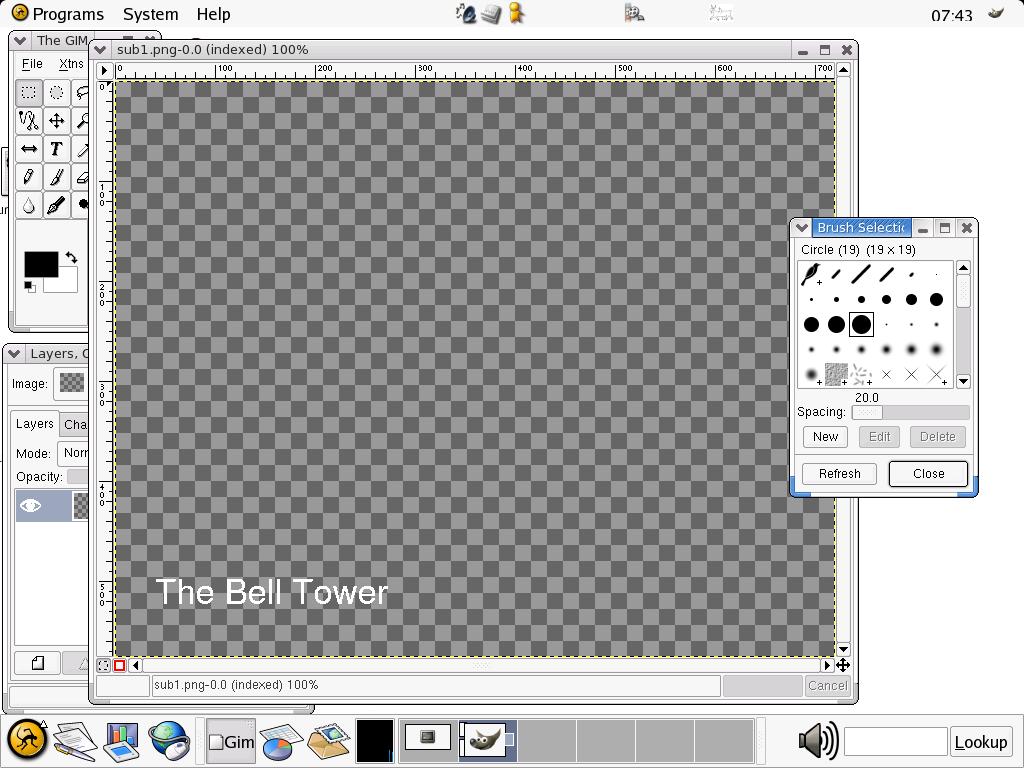
Figure 5. A Subtitle Image
In this application, I'm working with separate, short MPEG-2 clips, so each has to have a separate submux description. For longer clips, a submux file probably would have multiple entries.
Having made the video slides, subtitling them and creating the menus, the only thing left to do is assemble everything together using dvdauthor. dvdauthor works in two modes, one for normal titles and another to define the VMGM menu; the VMGM can't have any video information apart from the menu. Let's start with the first title:
dvdauthor -o tmp -m -P \
-b 239x397-489x457,subtitle32+vts1 \
-b 239x500-489x560,vmgm1 \
-b 27x223-127x263,subtitle32+vtsm.2 \
-b 165x184-325x305,subtitle32+vts1.1 \
-b 352x184-512x305,subtitle32+vts1.2 \
-b 539x184-699x305,subtitle32+vts1.3 \
\
title2/titlemenu1.mpg -m -P \
-b 239x397-489x457,subtitle32+vts1 \
-b 239x500-489x560,subtitle32+vmgm1 \
-b 27x223-127x263,subtitle32+vtsm.1 \
-b 165x184-325x305,subtitle32+vts1.4 \
-b 352x184-512x305,subtitle32+vts1.5 \
-b 539x184-699x305,subtitle32+vts1.6
\
title2/titlemenu2.mpg -t -P \
\
title2/v1.mpg title2/v2.mpg title2/v3.mpg \
title2/v4.mpg title2/v5.mpg title2/v6.mpg \
 -i post=3Dvtsm
This code defines two title menus with six buttons each, six MPEG video clips (dvdauthor defines the transition from one clip to another as a chapter point) and a post-video instruction that returns the DVD player to the title menu. The coordinate system is the same as The GIMP's, so you can use that to get the necessary regions. A button can perform various actions (see dvdauthor --help for a list of possibilities). In the example above, the first button sets the audio track to zero, sets up the required subtitle stream (stream 0 is bizarrely numbered 32, stream 1 is 33 and so on) and plays the video associated with the title. The second button returns the player to the main VMGM menu, and the third button moves the DVD player to the second title menu. The other three buttons move to specific chapters within the video stream, corresponding to clicking on one of the thumbnail pictures. The -o option is for an output directory, in this case the image/ subdirectory. The program works incrementally, so running the same command line twice creates an additional title set rather than updating the original.
For the main menu, you need to pass the -T option to dvdauthor so it knows it should create the required VMGM information. Then, link in the VTS files it already has created:
dvdauthor -o tmp -T -m \
-b 497x89-693x136,vtsm1 \
-b 497x138-693x187,vtsm2 \
-b 497x189-693x239,vtsm3 \
-b 497x240-693x289,vtsm4 \
-b 426x405-490x474,vts5 \
-P mainmenu/mainmenu.mpg
It's a good idea to test the DVD image before burning it onto disc. This can be done using xine; all you need is to give xine an argument like this:
xine dvd:/path_to_dvd_root/VIDEO_TS/
and xine should act as though it is playing the information from a DVD. As dvdauthor is incremental, you should be able to use xine after creating each separate title to ensure that you're doing things properly.
Once you're happy with your DVD, it's time to burn. I used the cdrecord-prodvd application for DVD-R burning. The operation is the same as cdrecord, so first you need to create an ISO image using mkisofs:
mkisofs -o <output_filename> -dvd-video \
<path_to_dvd_root>
Then use cdrecord.prodvd to burn it:
cdrecord.prodvd dev=3D0,0,0 -pad -dao \
<path_to_DVD_image>
Figures 6 and 7 show the DVD running on my iBook.

Figure 6. The DVD Running on My iBook, with the Secret Link Selected
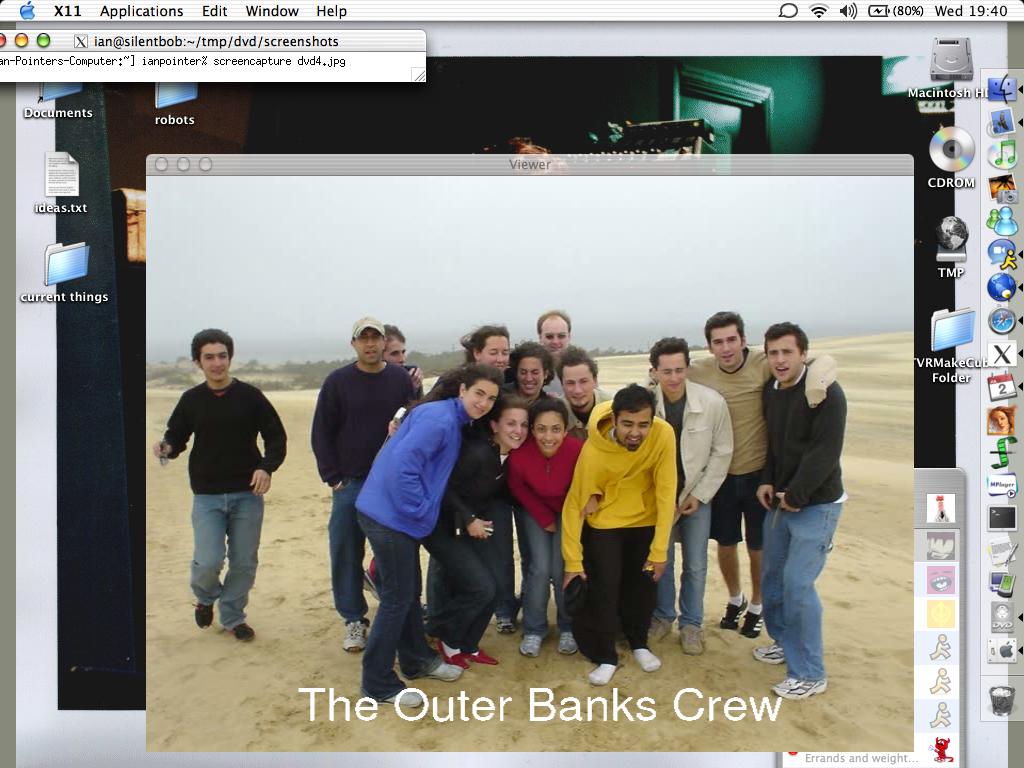
Figure 7. One of the Slides Running on My iBook's DVD Player
Although dvdauthor doesn't have the easy-to-use interface of professional applications, it provides all you need to make DVDs to the same standards as Hollywood uses, merely for the price of DVD-R media. Hopefully, this article has shown you the basics of DVD authoring and provided you with some ideas for your own applications. Get creating!
Resources
cdrecord.prodvd: www.fokus.gmd.de/research/cc/glone/employees/joerg.schilling/private/cdrecord.html
dvdauthor: dvdauthor.sf.net
dvdrtools: www.nongnu.org/dvdrtools
The GIMP: www.gimp.org
mjpegtools: mjpegtools.sf.net
xine: www.xinehq.de
Ian Pointer is an unemployed computer science graduate in the UK who has far too many DVDs in his house and now plans to make more. He can be reached at ian@snappishproductions.com.
