
Linux-Powered Wireless Hot Spots
Wireless access in public areas is provided by 802.11 hot spots, with varying types of access depending on the desires of the hot spot operator. Many commercial hot spots exist in locations such as Starbucks or fast-food franchises, whereas libraries and conference halls might choose to provide free services to visitors and attendees. A public hot spot can be entirely altruistic, offering visitors free network access in the area; it can be a business opportunity, charging visitors for network access and services; or it could be a combination, allowing visitors restricted access and providing paying customers increased bandwidth or greater access.
Proprietary solutions are available for creating wireless hot spots, but why go for a closed-source solution when your favorite operating system and freely licensed tools can do it on a spare PC?
As the operator of a public access point, you have several options. The easiest, of course, is simply to connect a wireless access point (AP) to your network and allow all traffic. Unfortunately, the simplest route is not necessarily the safest one from a security standpoint. If your hot spot is designed to offer connectivity to the Internet at large or if it is connected to a segment of your private network, you almost certainly don't want to allow unfettered access to random passersby.
Many access points have controls to limit access by port and MAC address, but they don't offer any other tools for managing new users, logins or providing the user with information about the hot spot. The hot spots we discuss building here provide a captive portal, a system where users who have not logged in are forced to a single Web page with login, policy and, optionally, payment information.
What do you need to get started providing a wireless hot spot? The list, fortunately, is short:
Your favorite Linux distribution.
NoCatAuth hot spot/portal software (free, open-source and available at www.nocat.net).
A wireless access point, or several. Access points function as a bridge between the wired and wireless segments of your network. What type of wireless you choose depends on the users of your network. Currently, 802.11b is the most widely used; however, 802.11a offers higher data rates over shorter distances. 802.11g hardware, which provides higher data rates and is backward-compatible with 802.11b, is becoming more prominent (see the Sidebar 802.11a, b or g?).
A moderately powered PC (Pentium or Pentium II class is more than sufficient for routing packets). NoCat suggests having at least two servers—one to act as a firewall and router and one to handle authentication—but a single server will do in a pinch.
NoCat builds a captive portal by assigning incoming users an IP address using DHCP and restricting network access until the user has validated, be it as a guest, paying customer or administrator. By rewriting the destination of all port 80 traffic in the firewall, any Web page the user attempts to visit before validating can be rerouted to the portal login page.
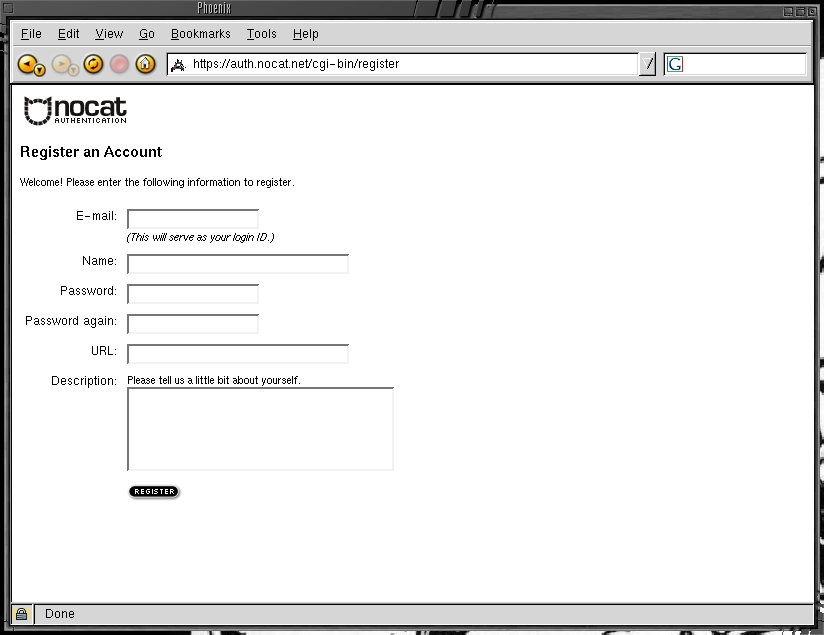
Figure 1. The NoCat Portal Login Page
Not all access points have the ability to control what MAC addresses are allowed on the network, and each manufacturer that does has a different method of configuring it, so NoCat uses the standard Linux iptables firewalling to control network access. It works with any access point. NoCat cannot prevent users from associating with the wireless network nor would you want it to; if a user can't associate, they can't log in. But it does prevent them from gatewaying to the outside network. Because NoCat dynamically rewrites the firewall rules to allow new users and deny disconnecting users access to the wired network, it's best to use a dedicated system that doesn't have other iptables rules on it already as a gateway.
NoCat consists of two main components: the gateway, which handles user logins and routing packets from the wireless network to the real network, and the authentication server, which stores user accounts and passwords. Typically, one gateway server is used per access point, and a single authentication server is used for a given installation.
The NoCat authentication system can use a simple flat-file password system, a MySQL database, a Radius or LDAP server or a Windows domain login over Samba to validate a user. The authentication server can be located on the local wired network or elsewhere on the Internet.
You can run your own authentication server on the same hardware as your gateway. However, it's more secure and easier for multiple gateways to use a single authentication server if you use separate machines for the authentication server and gateway.
Figure 2. Multiple NoCat gateways providing three hot spots linked to the same wired network using a single authentication server.
Before downloading and installing NoCat, you should begin planning what level of access you want users to have and what your acceptable use policies will be. Although the majority of your users likely will be honest, it's possible someone may attempt to cause mischief. Your port restrictions and acceptable use policies must strike a balance between being strict enough to prevent abuse and being permissive enough that the service is useful. Although any port can be used by a determined mischief maker to cause problems, many hot spots choose to allow SSH (port 22), HTTP (port 80) and HTTPS (port 443).
Other ports that may be useful to your users include POP3 (110), IMAP (143) and SMTP (25), but these carry their own risks to users and to your network. POP3 and IMAP traffic typically is not encrypted, which means users checking their e-mail risk having their passwords captured either in transit to their server or by someone sniffing wireless traffic in the area. Allowing SMTP, especially to unauthenticated users, can be dangerous because it could help a spammer connect to your network. The chances of someone sending massive bulk mailings through your hot spot probably are slim, but taking precautions always makes sense.
Building NoCat itself is a simple process: simply download the NoCat tarball from www.nocat.net, do make gateway and make install and edit the configuration file, /usr/local/nocat/nocat.conf. For full functionality, install a DHCP server and configure it to hand out private addresses for your wireless network.
NoCat is controlled by the nocat.conf file. A basic gateway needs:
GatewayMode: controls the type of portal you run. An open portal allows anyone to use it once the terms on the splash page are accepted. A closed portal requires users to authenticate before they get access.
IncludePorts and ExcludePorts: these control what TCP ports users are allowed to access. If you're running an open portal, you almost certainly want to restrict these to prevent abuse of the network. IncludePorts allows only the listed ports to be used, and ExcludePorts allows any ports but the listed ports to be used.
InternalDevice and ExternalDevice: control the network interfaces that NoCat uses. The InternalDevice specifies the device to which the access point is connected, and the ExternalDevice specifies the wired network.
LocalNetwork and DNSAddr: LocalNetwork should be set to the network used on your wireless network, and DNSAddr should be set only if you have a DNS server outside your wireless network. If you have a DNS server on your wireless segment, you won't need this option.
AuthserviceAddr, AuthServiceURL and LogoutURL: control the type of authentication service the portal uses. By default, they are configured to use the NoCat authentication servers. If you're running a closed portal, though, you'll almost certainly want to set these to be your own authentication system.
Your portal can work with only the minimal configuration, but investigate the other configuration options to customize your portal's interface and rules.
Our example portal is a basic open portal. It needs only a single access point and server, because we don't need our own authentication system. We'll also lock it down so anonymous users can browse Web pages, use AIM and SSH to remote systems, but they won't have access to other TCP ports. This is a reasonably secure configuration for anonymous users, but you may wish to restrict it even further and allow only Web page access.
For our example portal, we use the following equipment:
A generic access point, such as the Linksys WAP11, D-Link DWL900, the SMC 2655W or countless others. Normally, access points function as bridges connecting all users on a wired and wireless network, but in our setup we use the NoCat gateway to restrict traffic.
A Linux server with at least 32MB of RAM, preferably a Pentium class processor or better; your favorite Linux distribution with Perl, Apache-SSL, iptables, Bind and DHCP; and two Ethernet cards. Alternatively, use one Ethernet card and one network card of whatever type is needed to connect to your external network. Once we have all the equipment, we can put the portal together in five easy steps:
Configure the Linux gateway to be on the real network and the wireless networks and to connect to server DHCP and DNS addresses. Plug the first Ethernet card (eth0) in to the access point and the second Ethernet card (eth1) in to the real network. Each distribution has its own method of configuring network cards, so here we use the command line. You'll need to configure your system to set up these interfaces at boot time. We're using 123.123.123.123 as an example address; you should change this to whatever your real address is:
ifconfig eth0 192.168.1.1 \
netmask 255.255.255.0 up
ifconfig eth1 123.123.123.123 \
netmask 255.255.255.0 up
Configure BIND (the DNS server) to be a basic caching DNS server listening to the local network. The default bind installation comes with an example caching configuration.
Configure DHCP to hand out addresses in the 192.168.1.X network by putting the following in /etc/dhcpd.conf. If your DNS server is not 192.168.1.1, change the domain-name-servers option line accordingly:
max-lease-time 120;
default-lease-time 120;
allow unknown-clients;

subnet 192.168.1.0 netmask 255.255.255.0 {
    option routers 192.168.1.1;
    option broadcast-address 192.168.1.255;
    option subnet-mask 255.255.255.0;
    option domain-name-servers 192.168.1.1;
    range 192.168.1.100 192.168.1.254;
}
Compile and install NoCat.
Configure NoCat:
InternalInterface	eth0
ExternalInterface	eth1
LocalNetwork		192.168.1.0/255.255.255.0
GatewayMode			open
IncludePorts		22 80 443 5190
When setting up and operating a wireless hot spot, you should remember a few things. First, protect your user information. If you allow users to sign up for your service over the wireless, and especially if you plan to take credit-card information, configure Apache for SSL encryption. Second, encourage users to use encryption wherever possible. POP and IMAP traffic can be encrypted with SSL if the remote site supports it, and any traffic can be tunneled over SSH if users have a remote account to which they can connect. Finally, learn as much as possible about wireless technology and security, and consider running monitoring programs. Many wireless security programs are available, but staying on the free software side of the fence, AirSnort (airsnort.shmoo.com), Kismet (www.kismetwireless.net) and Snort (www.snort.org) are good places to begin.
802.11a, b or g?
802.11a is nowhere near as widespread as 802.11b, and 802.11g boasts the same speeds plus backward compatibility. 802.11a also is extremely short-range.
At the time of this writing, existing 802.11g hardware on the market was released before the IEEE specification was completed and may not be compatible with other or future 802.11g implementations. Many reviewers have found backward-compatibility problems. Future 802.11g implementations hopefully will have these issues resolved. It may be more cost effective to set up a hot spot using 802.11b now and upgrade in the future.
Sam Leffler recently has developed drivers for Atheros 802.11a and 802.11g cards. However, the drivers require a proprietary hardware abstraction layer to restrict the frequencies and power the card uses.
Mike Kershaw currently works for a medium-sized college between Albany and New York City. He became interested in wireless in 2001 and hasn't looked back since. He also is the author of the Kismet wireless security program.
