
Fixing Photo Contrast with The GIMP
In my last article (LJ, February 2003), I described how to improve candid flash photos by removing red-eye using the GNU Image Manipulation Program (GIMP). In this article, I present another GIMP gem for fixing your photographs: using a digital split neutral density filter to repair bad pictures resulting from shooting high-contrast scenes.
The human eye is a remarkable image capture instrument. It is able to view a scene with a large dynamic range (range of luminosity or brightness) and to discern detail in both bright highlights and dim shadows. Dynamic range in photography is often measured in stops, where each stop represents a doubling or halving of light. Humans can discern detail in a scene with about 14 stops of dynamic range. Film and digital capture sensors are not as adept. Slide film typically can handle around 5-6 stops. Detail in areas below the lower limit is blocked up into dark shadows, and detail above the upper limit shows up as blown-out (completely white) highlights. Negative film does a bit better at 9-10 stops, and some high-end digital cameras (DSLRs) can do even slightly better than that. Typical consumer digicams fare somewhere in the lower middle of the pack and capture about 6-9 stops of detail, depending on the bit depth used in the digital capture process, the sensor size and a few other factors.
Knowledgeable photographers often have dealt with the limited dynamic range of their equipment by trying to compress the dynamic range of the scene they are photographing using fill-flash, lighting or reflectors to light up shadows or special filters, such as a split neutral density filter (sometimes also referred to as a graduated neutral density filter) to darken the highlights. An example of such a filter is shown in Figure 1. It is an accessory you can attach to the front of your lens. It has a clear side and a dark gray side, with a small continuous transition zone dividing them. The dark part of the filter has the effect of reducing light by 1 stop, 2 stops or more, depending on the strength of the filter. When the camera is set up for a high-contrast shot (e.g., a sunset), the filter is positioned in front of the lens so that the dark part covers the highlights (e.g., the sky) and the clear part covers the rest of the image (e.g., everything below the skyline). The photographer then can meter the exposure for the shadows. If the filter is positioned correctly, the metering is accurate, and the photographer has knocked on wood, thrown a pinch of salt over his shoulder and said a short prayer, the whole image will come out properly exposed.

Figure 1. A Split Neutral Density Filter
Most casual shooters won't be bothered to carry around split neutral density filters and use them. In such situations, a compromise exposure is the only real option. A typical programmed auto-exposure metering system often will set an exposure that takes the middle road, losing detail at both ends of the luminance range. If you're willing to control the exposure yourself, follow a rule of thumb that is oft-repeated by photographers shooting slide film: expose for the important highlights. It often will be possible to rescue some detail from the shadows later, but once highlights are blown out, there's nothing that can be done to recover that detail. Remember that the rule says “important highlights”. If you are taking a picture of a sunset, you want to preserve the texture and detail in the clouds, which are brilliantly lit by the setting sun; if your main subject is a moose standing in a field at sunset then you'd probably rather have the detail in the moose's fur, and let the cloud detail fare as it will.
Although you can't recover detail that is completely clipped in such exposures, it is often possible to tweak an image to rescue a fair amount that is lurking in the highlights or shadows. The process in traditional wet-film processing is called dodging and burning. When making a print from a negative, parts of the paper are exposed more or less than the rest to hold details in highlights or pull detail from shadows. These sort of machinations used to be reserved for advanced darkroom enthusiasts. However, now anyone with a copy of The GIMP can do all of this and more with considerable ease.
Let me illustrate with the following example: a Utah sunset, shown in Figure 2 loaded into a GIMP window. I had followed the sage advice and exposed for the clouds and highlights on the cliff face and allowed the foreground to go quite dark. Using the LAB decompose plugin, I can decompose this RGB image into the LAB constituents. Of these, the L channel shows the full range of luminance values carried in the image. As you can see from Figure 3, there is a considerable amount of detail in the foreground trees, which in the original image look almost completely blocked up. This is good, but how do I pull out this detail, while retaining the beautiful detail and color of the cliffs and clouds?
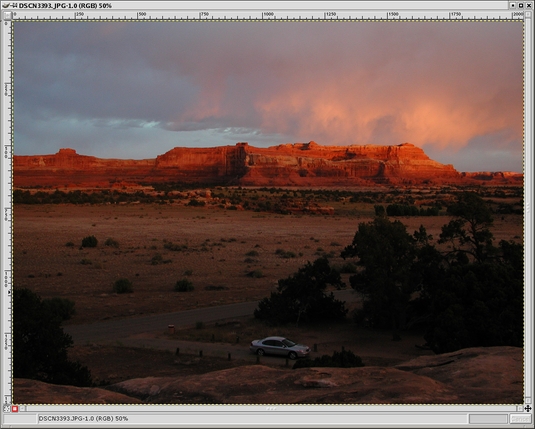
Figure 2. A Utah Sunset Photo Loaded into a GIMP Window

Figure 3. Using the LAB Decompose Plugin
The technique for rescuing that shadow detail is a bit like the digital equivalent of using a split ND filter. I combine two versions of the same scene, where each version has been optimized for either highlights or shadows. The technique makes use of layers and layer masks in The GIMP, so it is important to have a basic understanding of what these are beforehand. The next section introduces these concepts and provides a high-level overview of how the overall technique works.
All images in The GIMP can be composed of one or more layers. When an image is first loaded, it occupies the default Background layer, as shown in Figure 4. You can add additional layers on top of the background layer. These upper layers can contain anything you want. Frequently, you'll want to create upper layers that are different versions of the same image. This is most easily accomplished by duplicating a layer, such as in Figure 5 where I duplicated the Background layer. Each layer can be manipulated independently of the others. In Figure 6, I used a Levels adjustment on the upper layer to lighten it.
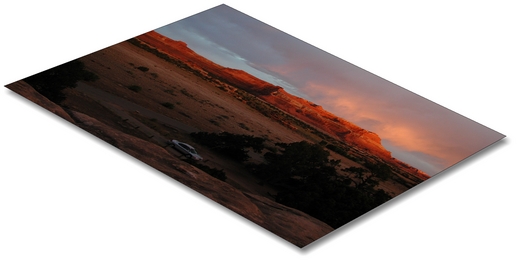
Figure 4. The Default Background Layer
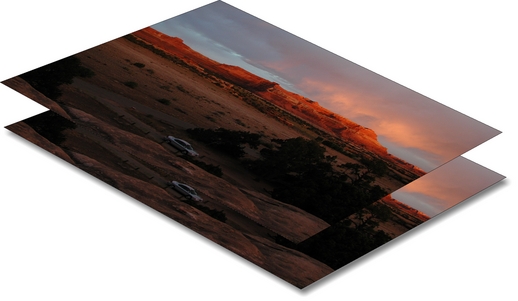
Figure 5. Duplicating a Layer
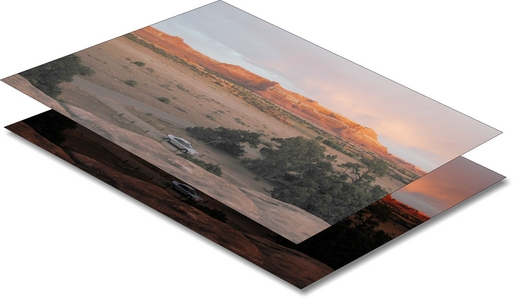
Figure 6. Using a Levels Adjustment to Lighten a Layer
Layers can be combined in various ways to produce a single image, as if you were looking through the top layer down to the bottom. One way of doing this is to reduce the opacity of part or all of the upper layers. The opacity of a layer can be changed from 100% (opaque) to 0% (completely transparent) or anywhere in between. It also is possible to make parts of the same layer have different opacities (or levels of transparency, if you prefer to think of it that way). Again, there are many ways to do this, but one of the most flexible ways is with a layer mask. A layer mask can be added to a layer and becomes one of its attributes. It is a gray-scale image that is the same size as the layer. The layer mask has the effect of varying the opacity of each pixel in the layer according to each corresponding pixel value in the mask. A black pixel in the mask makes the corresponding pixel in the layer completely transparent. A white pixel makes it completely opaque, and any value in between calculates a percentage of opacity between these two extremes.
I'm sure you are beginning to see the possibilities. In Figure 7 we see a useful layer mask created for the upper layer in this image. Once the layer mask is added, it is filled with a gradient, which has the effect of carefully blending the upper layer image from completely transparent to totally opaque, as shown in Figure 8. Finally, the image can be flattened for output, as shown in Figure 9.
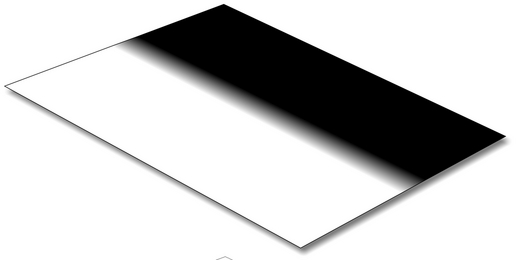
Figure 7. A Layer Mask
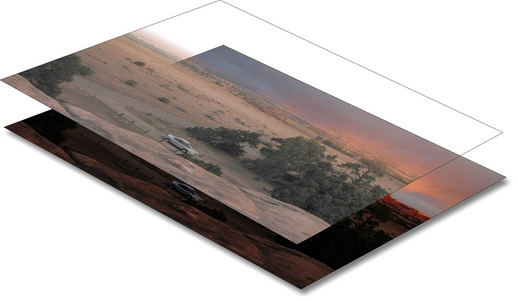
Figure 8. Using a Gradient
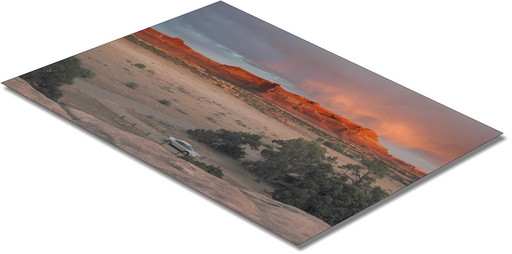
Figure 9. Flattening the Image for Output
Layer masks are only one of the many attributes a layer can have. Other attributes, such as the blend mode, also affect how a layer combines with the other layers below it. Further research into how layers work will pay off with big rewards in your GIMP image editing abilities.
Now that we have layers and masks under our belt, let's get to the details of the technique. Most of the menus in The GIMP are accessed by clicking the right-most mouse button in an image window. In the description that follows, a right-click is abbreviated RC. If I describe a GIMP action to invoke I will mention the series of menus or a keyboard shortcut in parentheses. For example, Open the image (RC-->File-->Open), means right-click in the image window and choose File, then from that menu choose Open. If a keyboard shortcut makes more sense I'll list the combination of keys to press; e.g., copy the image (Ctrl-C) means press and hold the Control key and press C.
In the original image, open the Layers dialog (Ctrl-L). In that dialog, right-click on the Background layer name and select Duplicate, or use the button circled in Figure 10. Now double-click on the duplicate layer and rename the new layer ND Filter. This step is not strictly necessary, but it is helpful to prevent confusion about what is on each layer, especially if you open this file again six months later and are trying to figure out what you did. At this point, your Layers dialog should look something like Figure 10.
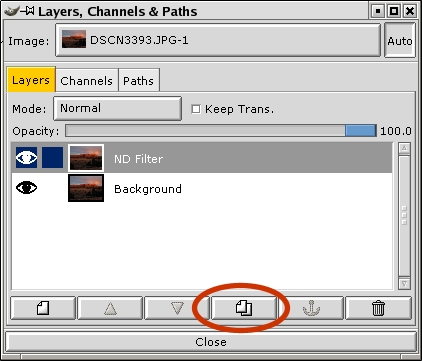
Figure 10. Layers Dialog
In the Layers dialog, select the ND Filter layer. Go to the image window and perform any editing you want to enhance highlight or shadow detail. The Levels (RC-->Image->Colors-->Levels) or Curves (RC-->Image-->Colors-->Curves) operations are good choices for this, but you can also use Brightness/Contrast (RC-->Image-->Colors-->Brightness and Contrast), the dodge/burn tools or anything else that works for you. We are working on the duplicate layer so don't worry about the good part of the image; let it go too dark or too light. Concentrate on the area that needs improvement. In this case I've used Levels (moved the middle slider to the left a bit, as shown in Figure 11) to lighten the whole image until the foreground is about where I want it.
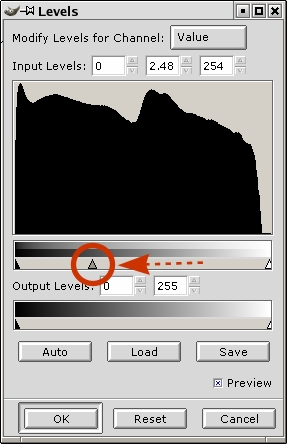
Figure 11. Using Levels to Lighten an Image
At this point you will be in the position illustrated by Figure 6, where you can see your lightened image, which obscures the original image below it. We now want to add a layer mask that will reveal the upper part of the lower image. In the Layers dialog, right-click on the ND Filter layer and select Add Layer Mask. In the Add Mask Options dialog, select White (Full Opacity) and click OK. Finally, click the eye next to the Background layer in the Layers dialog to turn off visibility of the Background layer. Your Layers dialog should now look like Figure 12, with a little white layer mask icon next to the layer image icon on the ND Filter layer.
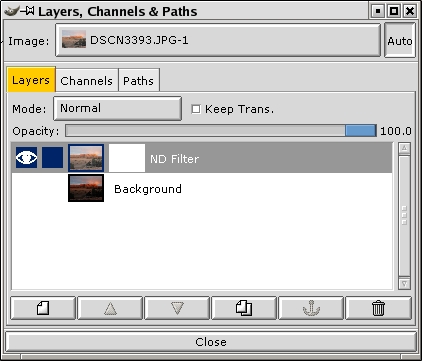
Figure 12. Turning off the Visibility of the Background Layer
Go up to the main GIMP toolbox window and select the gradient fill tool, circled in Figure 13. Go back to the image window and click-drag a line in the angle and direction that you want the split between the upper and lower layers (lower layer at the beginning of the drag, upper layer at the end). The length of the line that you drag determines how graduated or abrupt the transition will be, and the resulting blend. Experiment to get a feel for it, but generally you will want a short stroke centered over the transition zone (e.g., horizon). Because we turned off visibility of the background, your feedback will be immediate, as shown in Figure 14; a portion of the image should disappear just past the transition zone. If you didn't get the split at the right place simply click-drag another line, and the new gradient fill will replace the old. To get an idea of what you are doing, refer back to the gradient in Figure 7. You can see a miniature version of your gradient in the layer mask icon in the Layers dialog. Remember, the gradient fill affects the transparency of the upper layer. White is opaque; black is transparent, and anything in between is some degree of translucent.

Figure 13. The Gradient Fill Tool
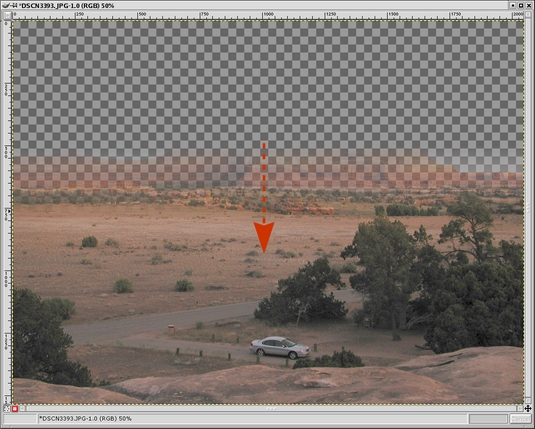
Figure 14. Applying the Gradient Fill Tool
Time to check your handiwork: click the eye next to the Background layer in the Layers dialog to turn visibility of that layer back on. Behold—your combined image with the best exposure of both worlds. Now, click the eye next to the ND Filter layer in the Layers dialog off and on to view the effect quickly with and without this digital split ND Filter. Nice, eh? Figure 15 shows the final result.
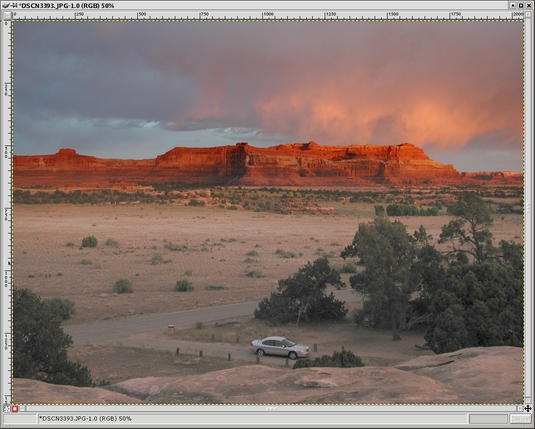
Figure 15. The Final Result
The real beauty of this approach is that our original image is untouched on the Background layer. The lightened image on the second layer did not require any painstaking selection to affect only the required areas, and the layer mask (in this case) was trivial to create. For maximum flexibility, you can save this image in The GIMP's native XCF format, and it will retain all of the layered structure. This allows you to go back in and make additional adjustments easily, safe in the knowledge that your original unmodified image is conveniently available on the Background layer if you ever need to redo the upper layer or the layer mask. When you are ready to export the image to one of the more common image formats, such as TIFF or JPEG, it will flatten the image as shown in Figure 9.
Knowing how the layer mask works, you can visualize how to apply the technique to images that have much more complicated transitions between the highlights and shadows (e.g., a dark mountain sticking up into the sky). The layer mask can be manipulated like any other gray-scale image to force the upper and lower layers to blend together wherever you like and in whatever manner you like.
I hope you find this technique useful. I'm guessing that it will rescue many vacation sunset photos—perhaps one from the Geek Cruise?

Eric Jeschke (eric@redskiesatnight.com) holds a PhD in Computer Science from Indiana University and has worked as a software engineer, university professor and freelance consultant. He lives in Hawaii with his wife, kids and an overweight cat. Eric enjoys his family, outdoor adventures, taking photographs and running Linux.
