
Build a Secure Webmail Service Supporting IMAP and SSL

Editors' Note: The following is a chapter from the book Multitool Linux, written by Michael Schwarz, Jeremy Anderson, Peter Curtis and Steven Murphy. The chapter presented here was written by their collaborator, Jose Nazario. Book coauthor Michael Schwarz would like to note, "Jose Nazario wrote this chapter for our book back in late 2000. I'm sure he would want readers to know substantially newer versions of all the software mentioned herein are now available. Feel free to contact the book authors if you have questions. Consult the book's web site for links, updates and errata.
This article describes how you can set up your Linux computer to be a web-based e-mail system for yourself or a group of friends. It will work best, of course, if you are on a dedicated internet connection, like a cable modem or a DSL line at home. This will provide you with a secure method to check your e-mail from remote locations without having to add insecure connection methods that could be used by an attacker. While your friends and coworkers complain about their free web based e-mail system being inaccessible, yours will be humming along.
The combination of software we are using is Apache with mod_ssl and PHP4, and the webmail package we describe below is Aeromail. We chose this combination because it is under active development (as of this writing), easy to install and quite feature rich. We also describe some additional webmail packages at the end of the article and provide several resources for more information.
We assume you haven't installed a web server or the SSL libraries on your system, which we will cover here. While it may seem like a lot of different components, it's really quite simple. Furthermore, your secure web server can be used for other things you may wish to try.
First we need to install the basic connectivity for the mail server, the IMAP server, and secure it to accept only local connections. Secondly, we'll build a powerful web server, one that supports secure socket layer (SSL) connections and the PHP scripting language. After that, the actual software used to display your mail on a web page is quite simple to install.
To begin with, these are the files we have downloaded and their versions:
-rw-r--r--   1 jose  jose    22841 Nov 19 15:18 aeromail-1.40.tar.gz
-rw-r--r--   1 jose  jose  2847497 Oct 25 19:14 apache_1.3.14.tar.Z
-rw-r--r--   1 jose  jose  1866035 Oct 25 13:27 imap.tar.Z
-rw-r--r--   1 jose  jose   748253 Oct 25 19:15 mod_ssl-2.7.1-1.3.14.tar.gz
-rw-r--r--   1 jose  jose  2086131 Sep 24 11:46 openssl-0.9.6.tar.gz
-rw-r--r--   1 jose  jose  2225976 Nov  5 13:31 php-4.0.3pl1.tar.gz
The versions were chosen because they provide the most features and stability, plus they contain the latest security patches as of this writing. You're definitely encouraged to use at least these versions. The IMAP server we're using is the latest version available.
Now that you've obtained the pieces needed, we'll get to work. Building things shouldn't take too long, approximately one hour on a 300MHz system. The longest waits are, of course, during the compilations. For reference, we will keep all of the archives in one directory, webmail/, as we build them. We install to the default apache directory, /usr/local/apache/htdocs/.
We need to install one package for the computer to handle listening services, one that's not normally installed by a workstation Linux installation. This is the inetd server, which listens for several daemons. On Red Hat 6.2 installations, this is in the RPM inetd-0.16-4.i386.rpm. In earlier Red Hat systems, such as 6.0 or 6.1, this was in the netkit-base-0.10 RPM. On Red Hat 6.2, these steps will install and turn on the inetd daemon:
# rpm -ivh inetd-0.16-4.i386.rpm
# /usr/sbin/inetd
# /sbin/chkconfig inetd on
IMAP, or the Internet Message Access Protocol, provides a way for a person to access their mail or Usenet newsgroups from a variety of computers. It works by storing the messages on a central server and allowing you to view copies of them. Then, when you delete a message locally, you can synchronize your mailboxes at your local workstation and the server. Also, you can have folders for your mail and full access to them, unlike with POP3.
First, having downloaded and verified the archive, you should unpack it:
$ tar -zxvf imap.tar.Z
Now, we're going to enter the newly formed directory and proceed to build the IMAP server. Because we're using Linux, the process is quite simple:
$ cd imap-2000
$ make slx
 (make output omitted)
Installing the new IMAP server also is quite easy; we simply drop it in place and it's almost ready to go:
# cd imapd
# cp imapd /usr/sbin/imapd
Now we have to tell the computer how to listen for imapd connections and how to handle them. First, we edit the inetd configuration file inetd.conf:
# vi /etc/inetd.conf
Change the line that normally reads:
#imap stream tcp nowait root /usr/sbin/tcpd imapd
to instead read:
imap stream tcp nowait root /usr/sbin/tcpd imapd
By removing the prepending pound sign (#), it's now a directive to inetd and not a comment. Now we have to tell inetd to reread its configuration. We do this by sending the inetd process the HUP signal. First we get the process ID of the inetd process:
# ps -ax | grep inetd
         7699 ?        S      0:00 inetd
Here 7699 is the process ID of the inetd process. Your process ID will most certainly be different. Now we tell inetd to reread the configuration file:
# kill -HUP 7699
Lastly, we secure our inetd installation against unwanted connections. Unfortunately, a lot of hackers like to break in using the imapd service. However, we will limit connections to this server to only the local machine itself, which means that only our local web server can connect to it. We do this using the TCP wrappers program already installed on your system. We edit two files, first the file that defines who cannot connect and then the file that lists the exceptions to that rule.
# vi /etc/hosts.deny
and add a line for the IMAP daemon:
imapd: ALL
Now we will edit the file that lists who is allowed to connect:
# vi /etc/hosts.allow
and add at the end of the file the line:
imapd: 127.0.0.1
That's it, the first piece of installation is done!
Now we're going to build and install the libraries for our secure web server. These libraries provide the functions needed for SSL, or secure socket layers. We want a secure web server to protect your password and all of your traffic to your web server while you check your e-mail. This will prevent someone from listening to your conversation and gathering your password.
Building the libraries and installing them is really quite simple. Starting from the directory which contains all of our archives, webmail/, the steps are easy. First, we unpack the archive:
$ tar -zxvf openssl-0.9.6.tar.gz
Now we're going to configure and build the libraries. The configuration management is pretty smart, and it can figure out a lot about our system without asking us any questions. The build process is also automated.
$ cd openssl-0.9.6
$ ./config
 (output omitted)
$ make
(output omitted)
Now all we have to do is become root and install the software in the default directories. Programs that use OpenSSL usually expect it in this default location (/usr/local/ssl), so we wont change it.
# make install
And that's all there is to that. We now have the needed libraries for our secure server to be built. Other programs can also use these libraries, and also some applications in the OpenSSL installation. See Resources for where to find more information about OpenSSL and the applications that use it.
Now comes the most time-consuming part of the install, but it's still pretty easy to do. We're going to build a powerful web server, one that supports the scripting language PHP4 and secure connections via SSL. To do this, we first have to merge these components into the server software, then build it.
First we unpack the sources we will be using for this installation:
$ tar -zxvf apache_1.3.14.tar.gz
$ tar -zxvf mod_ssl-2.7.1-1.3.14.tar.gz
$ tar -zxvf php-4.0.3pl1.tar.gz
Note that mod_ssl has two version numbers, in this case 2.7.1 and 1.3.14. This is because it is a large set of patches and source additions to the Apache source code tree. Therefore, it must match the Apache source code version you are using; otherwise it won't work.
The first thing we do is apply the source code patches from mod_ssl to Apache. The only directive we have to tell mod_ssl is where the Apache source code tree is, which is up and to the right:
$ cd mod_ssl-2.7.1-1.3.14
$ ./configure --with-apache=../apache_1.3.14
$ cd ..
Be sure to watch for errors in this step. Any errors will almost surely mess up the rest of the steps here. If you do find errors, make sure that your mod_ssl version matches your Apache version. It should apply cleanly. If you have to, remove both directories, unpack them again and start this step over.
Now we have to preconfigure the Apache source code tree. We do this so the PHP source code knows all about our Apache system and can prepare itself correctly.
$ cd apache_1.3.14
$ ./configure --prefix=/usr/local/apache --without-confadjust
$ cd ..
Now we can prepare PHP for its installation in Apache. This may seem a bit strange, but we're going to install it in the Apache source tree. At this stage most of the PHP module is built, which can take a bit of time since there's a lot of software to build. We build it to also support the IMAP client functions, which we need for web based e-mail using IMAP.
$ cd php-4.0.3pl1
$ ./configure --with-apache=../apache_1.3.14 --with-imap=../imap-2000
Now go ahead and install its components on your system and for Apache:
# make install
$ cd ..
Now we're ready to build our Apache server. It has SSL support and PHP4 support prepared, so we only have to tell it to be sure to include them in the configuration step. We also have to tell it where our SSL libraries reside, which we installed above when we installed OpenSSL.
$ cd apache_1.3.14
$ SSL_BASE=/usr/local/ssl ./configure \ --enable-module=ssl --without-
confadjust \ --activate-module=src/modules/php4/libphp4.a
One thing to note here: libphp4.a does not yet exist, but this step ensures that it is built and added into the server. Don't try and outsmart it, it's supposed to be like this!
Now we can build and install the web server and the SSL certificates.
$ make
$ make certificate
This step interactively generates a certificate for your server. These are used in cryptographic negotiations with your web clients. See Resources for where to find more information on SSL. In the meantime, these are my suggested answers to the questions (you'll have to adjust some parameters)
Signature Algorithm ((R)SA or (D)SA) [R]: R
(omitted)
1. Country Name (2 letter code) [XY]: US
2. State or Province Name (full name) [Snake Desert]: Ohio
3. Locality Name (eg, city) [Snake Town]: Cleveland
4. Organization Name (eg, company) [Snake Oil, Ltd]: Home
5. Organizational Unit Name (eg, section) [Webserver Team]: Parents
6. Common Name (eg, FQDN) [www.snakeoil.dom]: friend.dsl.isp.com
7. E-mail Address (eg, name@FQDN) [www@snakeoil.dom]: friend@isp.com
8. Certificate Validity (days) [365]: 365
______________________________________________________________________
STEP 3: Generating X.509 certificate signed by Snake Oil CA [server.crt]
Certificate Version (1 or 3) [3]: 3
(omitted)
Encrypt the private key now? [Y/n]:n
(omitted)
While the certificate process correctly notes this certificate should not be used on a production system, for home use it should be fine. Basically, there is no trust mechanism in place, so the certificate could be a forged one, allowing an attacker to listen to sensitive information. However, since it is just you and signing a certificate can be expensive, we'll work with these certificates. If you want to host, say, a commerce site on your web server, you should definitely get it signed by a recognized authority.
We also chose not to encrypt the private key with a passphrase. This is because this passphrase would be required if the server had to restart. If you are away from your server and it reboots and restarts, it would wait for you to enter this passphrase before it continued. By omitting a passphrase, we allow the server to restart without you. This is not advised if you are on a multiuser machine with untrusted users, by the way.
Finally, we can install the whole server, configurations and certificates:
# make install
To get it to understand PHP files, which the server has to process before serving, we need to edit the configuration file. While we're at it, we'll add forcing webmail clients to use SSL.
# cd /usr/local/apache/conf
# vi httpd.conf
We first want to change the server to understand PHP files and interpret them. This is absolutely required for webmail to work. Uncomment (remove the leading # sign) the following lines:
    AddType application/x-httpd-php .php3
    AddType application/x-httpd-php-source .phps
    AddType application/x-httpd-php .php
    AddType application/x-httpd-php-source .phps
The first lines will be for application/x-httpd-php3 and source, so remove the 3. PHP3 is slowly being phased out, and PHP4 is backwards compatible. However, it doesn't get parsed properly if it is treated as a PHP3 file, so treat it as plain PHP.
Now we're gong to change the server to require SSL to be used if you want to read your e-mail. This way you can't make a mistake and send your password across an untrusted network in plaintext, letting someone listen to it. We do this by adding the following lines, called a Directory Directive. Place these after the </Ifmodule> directive where PHP handling was described.
<Directory /usr/local/apache/htdocs/aeromail>
SSLRequireSSL
<Directory>
Yes, these directives read like HTML, with a start and an end tag. Now go ahead and write out the configuration file. We're almost ready to start the server and test it out.
Finally, we can install the webmail package, Aeromail. We chose Aeromail because it's simple, easy to install and ready to run in a few minutes after the web server is installed.
Installation is a breeze; simply unpack it and edit a configuration file. All we have to do is unpack it under the wb documents tree.
# cp aeromail-1.40.tar.gz /usr/local/apache/htdocs/
# cd /usr/local/apache/htdocs/
# tar -zxvf aeromail-1.40.tar.gz
# cd aeromail
Now we're going to edit the Aeromail configuration file, config.inc.
# vi config.inc
You can change the window name at the top of the window, which is normally set to Aeromail (the program name). Maybe call it CoolMail. If you want to, you should edit this line:
$PROG_NAME = "AeroMail";
Because we're running our own mail server and an IMAP server, we'll use the localhost directive. If you wanted to point it to another server, say your ISP, you should edit that value. It's important that they be using either the Cyrus or University of Washington (UWash) server types. Other servers are not supported by Aeromail. Above we installed the UWash server, so again we can leave this unchanged.
The biggest thing to change is the page you get redirected to when you log out or cancel a login. You should set it to your own web server. Change this line to somewhere other than your Aeromail installation on your server:
$SERVER_REDIR = "http://the.cushman.net/";
Other variables, like the number of messages per screen, color theme or even language (Aeromail supports German, English, Spanish, French and Hungarian), are configurable. The comments in the configuration file should help you through this.
Write out the configuration file, and you're ready to go.
Now we're ready to take the server for a test drive. First we start up the server for both normal and SSL web traffic:
# /usr/local/apache/bin/apachectl startssl
You should see a message like this:
apachectl startssl: httpd started
If you don't, something happened to prevent the server from properly starting. The best place to look to diagnose what is wrong is the error log file, in ../logs/error_log.
Now look to see if you have two new ports listening, ports 80/TCP and 443/TCP. We will use the netstat command to look for them:
# netstat -na | grep LISTEN
tcp        0      0 0.0.0.0:80              0.0.0.0:*               LISTEN
tcp        0      0 0.0.0.0:443             0.0.0.0:*               LISTEN
Sure enough, we have two listening sockets, the 80 and 443 TCP ports. These correspond to the normal and SSL traffic for the server, respectively. And now we will connect to our server and test out the secure webmail connection. Fire up a browser like Netscape of Explorer (if you are on a Windows machine) and point it to your web server. In our example the machine's name is friend.dsl.isp.com, so the secure Aeromail site would have the URL https://friend.dsl.isp.com/aeromail/ .
The first thing you should go through is the acceptance of the certificate. For Netscape, it's a several stage process, illustrated below.
First, we are presented with a popup window noting that the site uses encryption, but Netscape doesn't recognize the signing authority (remember we didn't have a big name sign it above). Use "Next" to move on in the process.
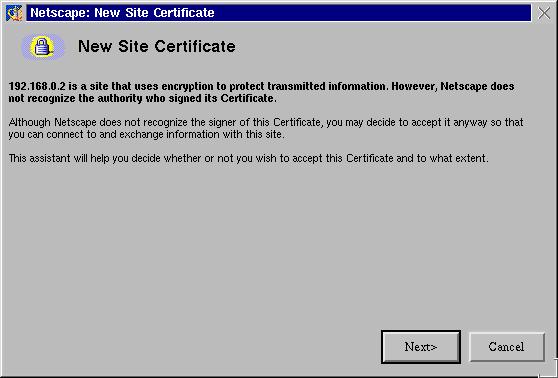
Figure 1. netscape-cert2
Secondly it tells us a little bit about the certificate. If you click the "More Info" button we can view more information, and "Next" will continue in the process.
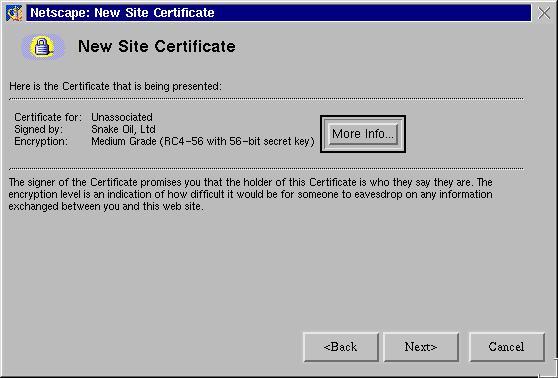
Figure 2. netscape-cert3
Now we can chose whether to accept this certificate and for how long. I usually chose to accept the certificate until it expires and click "Next".
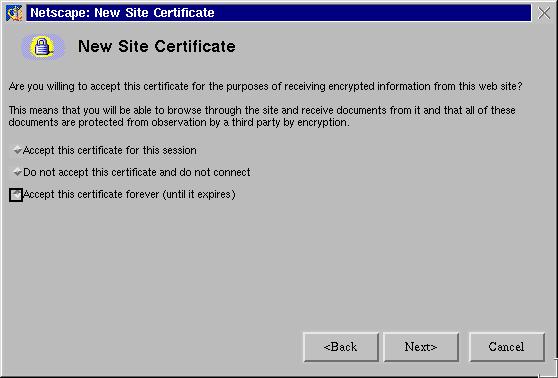
Figure 3. netscape-cert4
Then it offers you the option of being alerted whenever you submit information. This can be useful, but this also can be extremely annoying. I usually ignore the warnings and don't let them pop up, so click "Next" to continue the process.
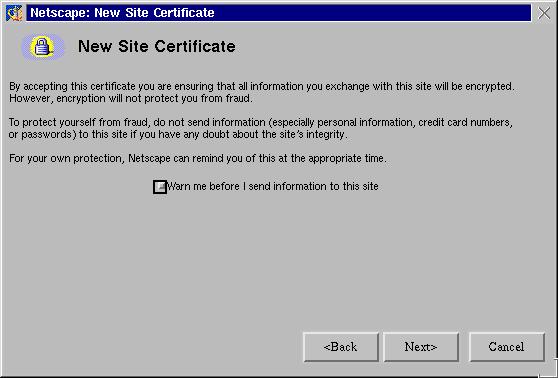
Figure 4. netscape-cert5
And now we can finish the process by clicking "Finish".
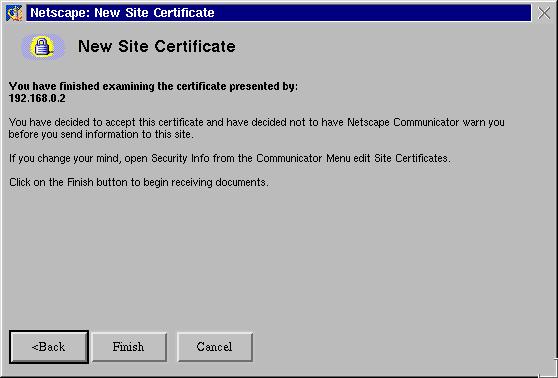
Figure 5. netscape-cert6
I often get this next popup, since the site name that is on the certificate and the one that I am actually connecting to don't match (as I'm not running a real Internet server here). I just click "Continue" and accept the certificate.

Figure 6. netscape-cert7
We know we have a secure connection because of three things. First, we have a URL that starts with https://, rather than http://

Figure 7. secure-2
And we have two indicators in the browser that the connection is secure, as well. The button bar at the top has a highlighted security lock, and the lock in the bottom left of the browser is closed and highlighted, too:

Figure 8. secure-1

Figure 9. secure-3
Should this not occur, you need to diagnose the problem and try to remedy it. You can look in several places. First, make sure that you are listening on both ports 80/TCP and 443/TCP for normal and SSL web connections. Secondly, make sure that the SSL engine is turned on in the directives for the web server. Otherwise you'll never complete a connection with the server; your browser will just hang. Lastly, make sure that you are indeed connecting. Use netstat on the server to show that you are connecting to the server, and check the logs from Apache, both the access_log file and the error_log file, for any entries. The SSL server is pretty verbose about what went wrong, and the mod_ssl documentation also is good at helping diagnose a problem.
You can test your PHP4 installation with a simple PHP file. Simply create the file test.php in your htdocs/ directory for your web server with the following very simple content:
<?php phpinfo() ?>
This will show you all of the information about your PHP installation if it comes up. Make sure that you have IMAP support, for one, or your webmail solution won't work. If you get prompted to download the file, make sure that you added the directives above for PHP files to the server configuration file, httpd.conf. When in doubt, check the documentation for each of the components, Apache, mod_ssl and PHP, as chances are you have encountered a common problem.
Now that we've connected to the server, we are presented with an authentication popup window. This is your usual username and password. They will be sent across the network encrypted using the SSL connection.

Figure 10. aero-auth1
And now you have a fully working secure web server. You can protect a lot of web transactions using this server, like our e-mail connection.
Once we successfully authenticate, the software reads our mailbox and prepares a web page for us. This is done by the PHP software; it connects to the IMAP server, logs in as us and reads the message folder for our inbox. The server then processes the PHP and presents us with a web page, showing us our inbox. This is illustrated in the figures below, showing an inbox containing two messages (you may get more mail than I do):
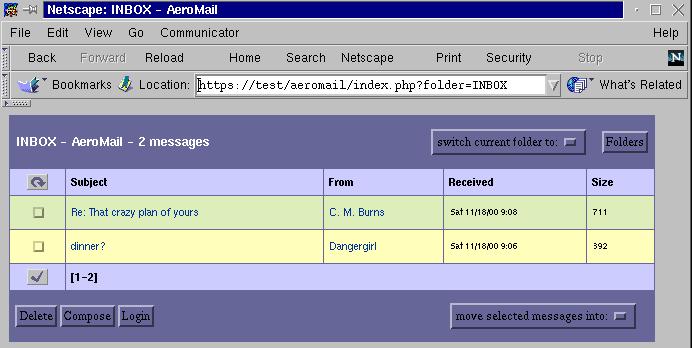
Figure 11. aero-inbox
Messages are sorted in the order of their date received, with the newest messages appearing on top. Shown are the subject of the e-mail, who it was received from, when it was received and the size of the file. The checkboxes to the left of the message are used for selection, either to delete the message or to move it to another folder. The little check mark below that column is used to select all messages on that page. The small circular arrow at the top of that column is used to check for newly received mail. At the bottom of the message listing is the range of the messages shown on the page. If you have more than the number of messages that can be shown in the page, you can select what range to skip to, like this:

Figure 12. aero-more
You can determine how many messages to show per screen by editing the variable $MSG_COUNT in the configuration file config.inc.
One of the strengths of the IMAP protocol is we can manage our mail remotely, on the server, and retain access to those messages. At the top right of the inbox are two folder management selections, allowing us to change from the current folder, in this case the Inbox folder, to another folder, or to list the folders we have. This can be useful for sorting mail from mailing lists, using topics such as work or home matters and the like. Shown below is the folders listing, showing two folders I have created:
Figure 13. aero-folders
This displays all of the known folder and the number of messages in each of them. We can select a few folder by selecting its name, or we can create a new folder in the bottom right.
Back in our Inbox, if we select a message's subject, we can view the message. If you select the sender, it brings up a reply dialogue regarding that message.
Figure 14. aero-msg1
The message view is expanded, showing us not only the name but the e-mail address of who sent us the message, which address it was sent to, the date and the subject and, of course, the message body itself. We can act on this message from here as you would expect, replying to the author or, if multiple recipients were specified, we could reply to everyone, or we could simply delete the message. To go back to the folder which originally held this message, use your browser's "Back" button.
Attachments are handled pretty well by Aeromail as well. In the folder view, such as your Inbox, the message subject is followed by an at sign, @.

Figure 15. aero-attatch
When you view the mail, the attachment can be shown inline if it is a graphic that your web browser knows about, such as a JPEG, a GIF or a PNG graphic. Note that the graphics are shown at the end of the mail, so one can't illustrate their e-mail this way.

Figure 16. aero-attatch3
Files or archives are not displayed, but a link is provided to them. If it is an archive, you can download it and save it locally. If it is a flat text file, you can display it as plain text in another window.

Figure 17. aero-attatch2
The composition window is pretty straightforward. You can edit the message recipients, of course, and even attatch local files using your browser. No fancy features, like spell checking, can be done, though. Simply click on the "Send" button in the top right hand corner when you are ready to send your e-mail.
Figure 18. aero-compose
Simply put, Aeromail may not be feature rich, but it is fully functional and very easy to use. You can customize the color schemes in the themes/ directory of the installation, and be sure to update your configuration in config.inc to chose the new one. Speaking with the author of the software, they plan to have address book support in version 2.0, but probably won't add any more features. The goals have been met: a functional webmail client in a small package. This differs from many other packages which have many more features, at the expense of simplicity or weight.
So far, you've set up a small, secure webmail client. This should give you access to your e-mail from almost anywhere in the world. Furthermore, it may wind up being more reliable than various free on-line webmail solutions. Your friends may start asking for accounts, too.
Several other webmail packages exist, often with more features, but also with added complexity in installation. Here's a short list of some that have become popular.
SquirrelMail: www.squirrelmail.orgIt uses PHP4, IMAP and HTML 4.0 without Javascript to be a rather feature-rich e-mail client. It's pretty lightweight, too, and can integrate into a large organization's e-mail directory using LDAP.
IMP: www.horde.org/imp/IMP is a powerful webmail system that is quite feature-rich and very usable. It features great on-line help, a large language set that it can work with and great scalability. Installation, however, can be a bit difficult for the uninitiated. The biggest selling point for it is integration with a variety of mail server types. Because of its complexity, you may be tempted to install from precompiles and configured RPM packages.
PIMP: prometheus.zerodivide.net/apps/pimp/This is a project from a former IMP developer, which strives to be feature-rich without expecting fancy work on the client end. No cookies are used, nor Javascript or frames, and it utilizes a large database for preferences. MySQL is required, and LDAP is not supported at this time.
TWIG: twig.screwdriver.net/TWIG isn't only a webmail client; it can also work as a groupware setup. It features calendaring, messaging and Usenet support, and great usability. It's also very easy to install.
A larger annotated list can be found at www.cru.fr/http-mail if you would like to check out other solutions.
PHPPHP is a powerful scripting language, as you can well imagine. It works on UNIX and Win32 web servers and provides massive connectivity features. It's also very well documented.On-line manuals: www.php.net/docs.phpSeveral books are also out there on PHP, including web applications:
Development with PHP 4.0, by Tobias Ratschiller and Till Gerken
Professional PHP Programming, by Jesus Castagnetto, Harish Rawat, Sascha Schumann, Chris Scollo, Deepak Veliath
ApacheApache is also see, a powerful web server that supports a multitude of options. It can also work on Win32 in addition to UNIX-based systems.On-line manuals: httpd.apache.org/Several books also are available regarding Apache:
Apache: The Definitive Guide, by Ben Laurie & Peter Laurie
Administering Apache, by Mark A. Arnold, Jeff Ameida, Clint LeMon Miller III, James D. Sheetz, Gwen R. Rhine
SSLUnderstanding SSL may be useful, either for debugging your SSL server or for working up for a larger project. The mod_ssl documentation is a good place to start, as is Netscape's site on SSL:
On-line manuals: www.modssl.org/docs/
Netscape's SSL 3.0 specification: home.netscape.com/eng/ssl3/
SendmailMost webmail packages use the Sendmail SMTP daemon for delivery. In fact, to get mail delivered to your machine you will have to set up sendmail. Most Linux distributions ship with it almost completely configured. Still, you may want to change some configuration items.Homepage and documentation: www.sendmail.orgSeveral books are available regarding Sendmail, varying in complexity.
sendmail for Linux, by Richard Blun et al.
Sendmail, 2nd edition, by Bryan Costales and Eric Allman
Copyright 2002 by Addison-Wesley. All rights reserved. Reproduced by permission of Pearson Education, Inc.
email: mtl@multitool.net
