Getting Started with Java on Linux

August 26th, 2002 by Daniel Solin in

Installing and testing JDK and Resin to set up your own Java application server.

Write once, run everywhere: that's the slogan the Java community uses to propagate their language-of-choice. It's probably true, but only if you first manage to set up the beast on your box. This article gets you started with Java on Linux by showing you how to get the Java Compiler and Virtual Machine installed so you can run core Java programs. It also shows you how to set up a Java web application server. If you follow each step in this article carefully, you will end up with a full-featured Java application server.

For the core Java, we will use Sun's JDK (Java Development Kit), although the IBM equivalent would work equally well. IBM's JDK is even known to be a little faster than the Sun JDK.

Resin will be used for the application server. Resin is both fast and easy to set up. It's also robust and includes all the features that Java developers are looking for, including Servlet/JSP, XML and EJB. For now, we will bother only with the Servlet/JSP portion.

Getting and Installing the JDK

We start by downloading the JDK. For most people, the standard edition of the Java Development Kit (J2SE) will work fine. However, if you need support for EJB (Enterprise Java Beans), you should get the J2EE (Enterprise Edition) instead. In either case, point your browser at java.sun.com/download.html, where you can get both J2SE and J2EE. At the time of this writing, the latest version of the J2SE SDK is 1.4.0 (about 26 Mb). My recommendation is to get the BIN-version of the file, although the RPM-package works if you're using an RPM-based distribution. BIN gives you more control over how and where you want to have your Java-environment installed. And that can be nice when you're dealing with large packages like this one.

The file should be on your local machine, so it's time to start the installation (make sure the file has permissions 755):

root@localhost:~# ./j2sdk-1_4_0_01-linux-i586.bin

As you can see, I choose to execute the file as root. You could do this as a regular user as well, but you would not be able to install it in a system-wide directory.

After you've read the license agreement, you will be asked

Do you agree to the above license terms? [yes or no]

Type yes and press Enter. The file-extraction process will begin now, placing all the files in a sub-directory below your current working directory (cwd). The most common location for Java installations is /usr/local, so we'll go with that:

root@localhost:~# mv j2sdk-1_4_0_01-linux-i586.bin /usr/local

Personally, I think it's nice to always have JDK installed in /usr/local/jdk but still be able to easily see what version is used. To accomplish this, you can simply do:

root@localhost:~# ln -s /usr/local/<REPLACE> /usr/local/jdk

This creates a symbolic link, /usr/local/jdk, pointing to the /usr/local/jdk1.4.0_01 -directory. If you ever upgrade your JDK, all you need to do is update the symbolic link, and the Java compiler (for example) will still reside in /usr/local/jdk/bin, saving you from the work of changing your PATH variable and/or updating scripts that use files in /usr/local/jdk. Executing a ls -als in /usr/local should output something like this:

root@localhost:/usr/local# ls -als
   4 drwxrwsr-x   17 root     staff        4096 Aug 13 18:31 ./
   4 drwxr-xr-x   14 root     root         4096 Aug  1 14:29 ../
   4 drwxr-xr-x    2 root     staff        4096 Jun 13 21:15 bin/
   4 drwxr-xr-x    8 root     staff        4096 Aug 13 18:31 j2sdk1.4.0_01/
   0 lrwxrwxrwx    1 root     staff          24 Aug 13 18:31 jdk ->/usr/local/j2sdk1.4.0_01/
   4 drwxrwsr-x    6 root     staff        4096 Aug  1 14:28 lib/
   4 drwxrwsr-x    6 root     staff        4096 Oct 22  2001 man/
   4 drwxrwsr-x    2 root     staff        4096 Jun 13 21:17 sbin/
   4 drwxrwsr-x    9 root     staff        4096 Mar  5 13:31 share/
   4 drwxrwsr-x    2 root     staff        4096 Apr 15  2001 src/

Speaking of the PATH variable, that is also something we need to take care of--if you want to be able to access the executables in /usr/local/jdk/bin, that is. As a Java developer, you will need to access these files quite often, so it's generally a good idea to set it up.

Fortunately, editing the PATH variable is a simple task. All you have to do is to add the line below to your /etc/profile (or whatever file holds your global shell variables).

export PATH=$PATH:/usr/local/jdk/bin

This means set the variable PATH to the previous value of PATH, and add /usr/local/bin/jdk to it. Then, reload your /etc/profile by issuing:

root@localhost:~# source /etc/profile

You can then test to see if your shell can find the Java compiler simply by typing javac. If everything is okay, you should see something like:

root@localhost:~# javac
Usage: javac <options> <source files>
where possible options include:
  -g                        Generate all debugging info
  -g:none                   Generate no debugging info
  -g:{lines,vars,source}    Generate only some debugging info
  -O                        Optimize; may hinder debugging or enlarge class file
  -nowarn                   Generate no warnings
  -verbose                  Output messages about what the compiler is doing
  -deprecation              Output source locations where deprecated APIs are used
  -classpath <path>         Specify where to find user class files
  -sourcepath <path>        Specify where to find input source files
  -bootclasspath <path>     Override location of bootstrap class files
  -extdirs <dirs>           Override location of installed extensions
  -d <directory>            Specify where to place generated class files
  -encoding <encoding>      Specify character encoding used by source files
  -source <release>         Provide source compatibility with specified release
  -target <release>         Generate class files for specific VM version
  -help                     Print a synopsis of standard options

If you get a command not found message instead, make sure your PATH variable is set up correctly, and then try again.

In addition to PATH, another variable needs to be defined. JAVA_HOME defines where on your filesystem the JDK base directory can be found. In our case, this is /usr/local/jdk. Other applications that use Java (such as Resin, which we will look at a little later) use this variable to find the JDK. Add this line to your /ets/profile:

export JAVA_HOME=/usr/local/jdk

And reload /etc/profile:

root@localhost:~# source /etc/profile

Time for testing.

Testing Your JDK

You should now have a working Java development environment. To test this, we will try to compile and run a simple Java class. Enter the following code into a file named Test.java:

import java.lang.reflect.Array;
class Test
{
        public static void main( String argv[] )
        {
                System.out.println( "Arguments:" );
                int i = 0;
                while( i < Array.getLength(argv) )
                {
                        System.out.println( argv[i] );
                        i++;
                }
        }
}

Then, try to compile it with the following command:

root@localhost:~# javac Test.java

And finally, execute your class by issuing this command:

root@localhost:~# java Test argument1 argument2 argument3
Arguments:
argument1
argument2
argument3

As you see, this simple program prints the command-line arguments given and then exits. If this worked, it's safe to say your installation was successful.

Getting and Installing Resin

Resin (from Caucho Technology) is a web and application server that's fast and easy to get running. We'll begin by downloading and unpacking the Resin source distribution. This can be found at www.caucho.com/download/index.xtp. At the time of this writing, the latest version of Resin standard is 2.1.4 (there's an enterprise version too, but you don't have to worry about that for now).

When the file is on your local machine, unpack it in /usr/local:

root@localhost:~# resin-2.1.4.tar.gz /usr/local
root@localhost:~# cd /usr/local
root@localhost:/usr/local# tar xvfz resin-2.1.4.tar.gz

As with the JDK, it would be nice to make a symbolic link for Resin so you always are able to access it in /usr/local/resin:

root@localhost:/usr/local# ln -s resin-2.1.4 resin

Because we're going to run Resin as a standalone web server, we need to change the port on which the server will listen before we start it. This can be done by changing a line in /usr/local/resin/conf/resin.conf. Open resin.conf in an editor and locate the following line:

<http port='8080'/>

A common way of using Resin is to let it coexist with Apache, letting Resin take care of only the requests to JSP/Servlets and leaving the rest up to Apache. This is why Resin by default listens to port 8080 instead of 80, which is the standard port for web servers. We are going to let Resin take care of all requests to our server (for which it is very capable). So, change the HTTP port in resinf.conf to 80, save and exit. Then, start Resin by executing the following:

root@localhost:~# /usr/local/resin/bin/httpd.sh

You should get output the looks something like this:

Resin 2.1.4 (built Fri Aug  2 14:16:52 PDT 2002)
Copyright(c) 1998-2002 Caucho Technology.  All rights reserved.
Starting Resin on Tue, 20 Aug 2002 14:02:27 +0200 (CET)
[2002-08-20 14:02:29.982] initializing application http://localhost/
[2002-08-20 14:02:29.984] initializing application http://localhost/java_tut
[2002-08-20 14:02:29.985] initializing application
http://localhost/examples/basic
[2002-08-20 14:02:29.986] initializing application
http://localhost/examples/tags
[2002-08-20 14:02:29.987] initializing application
http://localhost/examples/tictactoe
[2002-08-20 14:02:29.988] initializing application
http://localhost/examples/navigation
[2002-08-20 14:02:29.989] initializing application
http://localhost/examples/xsl
[2002-08-20 14:02:29.990] initializing application
http://localhost/examples/templates
[2002-08-20 14:02:30.001] initializing application
http://localhost/examples/login
http listening to *:80
srun listening to 127.0.0.1:6802

Resin is up and running. You can test it out by pointing your browser at http://localhost. The page shown in Figure 1 is what you should see.

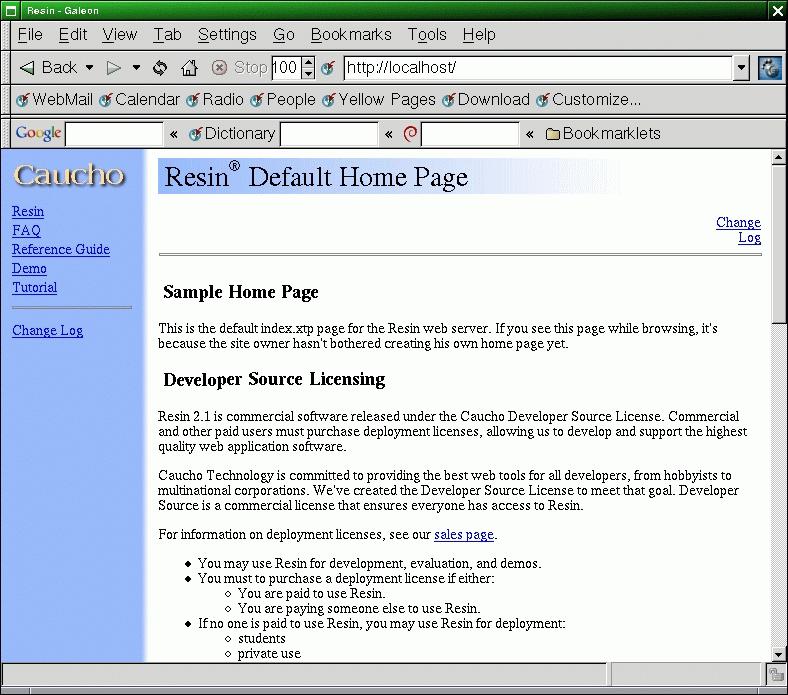
The Sample Resin Home Page

Testing Your Resin Installation

It also would be nice to test the server with a simple page of our own. The base document directory for Resin by default is /usr/local/resin/doc, so let's create a page called test.jsp and place it in this directory. test.jsp could look something like this:

<html>
<head>
        <title>
                My First JSP Page
        </title>
</head>
<body bgcolor="#FFFFFF">
        <h3>
                The value of 'par' is:
        </h3>
        <h2>
                <%= request.getParameter("par") %>
        </h2>  
</body>
</html>

This JSP prints out the value of the parameter par. So to avoid error messages, we need to define this variable in the URL when calling this page. Point your browser at http://localhost/test.jsp?par=mysecretvalue, where you should see something similar to Figure 2.

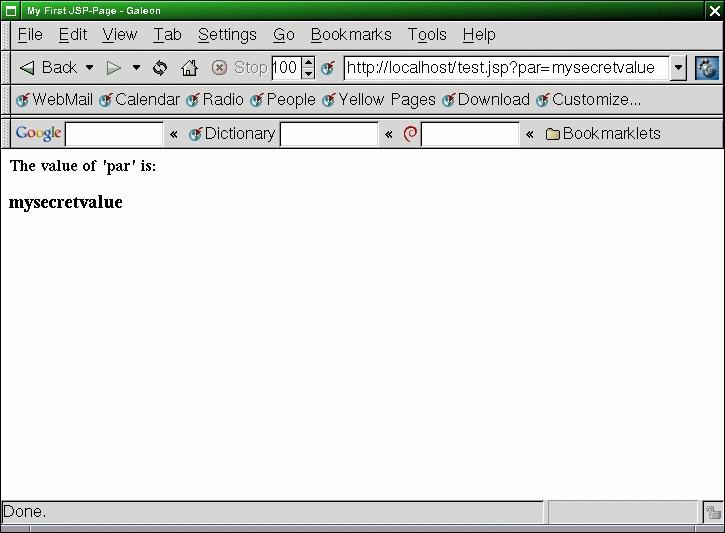
A Simple JSP Example

Now we're talking; looks like we've got our own Java application server working.

Summary

This little tutorial has gotten you started with your Java adventure on Linux. Using Resin as your web and application server gives you all the possibilities that the not-so-cheap alternatives do, including XML/XSL processing, JSP/Servlet support and load balancing. If you choose Resin-EE, you also receive EJB (Enterprise Java Beans). For a detailed description of what you are allowed to do with Resin, read the Caucho Developer Source License. It comes with your Resin installation, in /usr/local/resin/LICENSE.

Resin also offers almost endless tweaking possibilities, which can be used to configure the functions of your server and also to improve performance in some setups. The complete Resin configuration reference can be found at www.caucho.com/resin/ref/config.xtp.

If you have no plans to use Java for web development, you still have a working Java development environment for standalone applications. A good starting point for all Java programming is java.sun.com/docs. There you'll find the complete standard API reference, as well as documentation on other interesting Java technologies, including APIs for programming 3D, SSL, Speech and others.

__________________________


Special Magazine Offer -- 2 Free Trial Issues!
Receive 2 free trial issues of Linux Journal as well as instant online access to current and past issues. There's NO RISK and NO OBLIGATION to buy. CLICK HERE for offer

Linux Journal: delivering readers the advice and inspiration they need to get the most out of their Linux systems since 1994.

Sorry, offer available in the US only. International orders, click here.

Comment viewing options

Select your preferred way to display the comments and click "Save settings" to activate your changes.

Re: Getting Started with Java on Linux

On August 19th, 2004 Anonymous says:

i am getting such result after typing javac at home directory
kindly , give me some solution for the problem
[jdk1_3_1_12 is stored in /usr/local]

/usr/local/jdk1.3.1_12/bin/i386/native_threads/javac: error while loading shared libraries: libstdc++-libc6.1-1.so.2: cannot open shared objectfile: No such file or directory
[root@localhost home]#

may be you should store at

On October 31st, 2006 praveen (not verified) says:

may be you should store at ./usr/local/jdk

I think you don't have file l

On October 4th, 2005 Lukaash (not verified) says:

I think you don't have file libstdc....... Try to find some .rpm that contains that file. I had the same problem, but I don't remember name of the .rpm.

Re: Getting Started with Java on Linux

On September 16th, 2004 Anonymous says:

I really Donot know about this! sorry

Re: Getting Started with Java on Linux

On August 25th, 2004 Anonymous says:

me too....somebody please help..

Re: Getting Started with Java on Linux

On January 28th, 2003 Anonymous says:

This document has two parts. The first explains how to install just the Java software development kit. The second part explains how to install the Sun One Studio (previously known as Forte). This is how it worked for me. Any risk in using this information is yours (don't whine to me, I ain't got no money anyway).

How to install Java JDK:

1. Decide on a directory to hold the jdk folder (I used /usr/local) and change to it using:

linux:~# cd /usr/local

2. Download the "j2sdk-1_4_1_01-linux-i586.bin" from ww.java.sun.com into the current directory.

3. Change the permisions on the file using:

linux:/usr/local# chmod 755 j2sdk-1_4_1_01-linux-i586.bin

4. Run the binary:

linux:/usr/local# j2sdk-1_4_1_01-linux-i586.bin

. This will create a new subdirectory, j2sdk-1_4_1_01, and install the sdk into it after you have scrolled through the license agreement and answered "yes" to "Do you agree to the above license terms? [yes or no]"

5. Enter:

linux:/usr/local# ln -s /usr/local/j2sdk-1_4_1_01 /usr/local/jdk

This creates a symbolic link, /usr/local/jdk, to the j2sdk-1_4_1_01 directory. This way you can have the jdk directory in the path, and upgrade your versions merely by installing it to its own directory and then changing the symbolic link again.

6. Append to /etc/profile:

export PATH=$PATH:/usr/local/jdk/bin

to make sure the /usr/local/jkd/bin directory (but really the

/usr/local/j2sdk-1_4_1_01/bin directory ) is in your path.

7. Reload the /etc/profile by:

linux:~# source /etc/profile

8. Enter

linux:~# javac

to check that it is properly installed.

9. Append to /etc/profile:

export JAVA_HOME=/usr/local/jdk

to tell your system where the JDK base directory can be found.

How To Install Sun One Studio:

1. Download the "j2sdk-1_4_1-s1studio_ce-rul-bin-linux.bin" file. Make sure downloaded file is the same size as indicated on the Sun web page.

2. To change permisions run:

linux:~# chmod 777 j2sdk-1_4_1-s1studio_ce-rul-bin-linux.bin

3. Decide on a directory( eg. /usr/local).

4. Run:

linux:~# chmod 777 j2sdk-1_4_1-s1studio_ce-rul-bin-linux.bin

The installer will start up, ask if you agree to the license terms, and if you say yes, it will ask which directory to install to (I chose /usr/local/s1studio4_1_1). There is no need to be currently in that particluar directory at the time. It will create a new directory tree in /usr/local/s1studio4_1_1 with subdirectories _uninst, j2sdk1.4.1, and s1studio.

5. The installer will put focus on the finish button when it's done. When you press it, a small message box comes up saying that to start the program, you must run runide.sh in /~/s1studio/bin to start the IDE.

6. If you HAVE NOT previously installed the jdk then append to '/etc/profile':

export PATH=$PATH:/usr/local/s1studio4_1_1/j2sdk1.4.1/bin

If you HAVE previously installed the jdk but want to use the new one, then edit '/etc/profile' to remove the export PATH line that contains your old jdk or j2sdk directory and append the new export PATH command to the profile file.

7. Append the next line to /etc/profile:

export PATH=$PATH:/usr/local/s1studio4_1_1/s1studio/bin

Save profile and exit the editor.

8. Reload the /etc/profile by:

linux:~# source /etc/profile

9. The only way I figured the following out, was by reading the runide.sh file. I found no documentation, no hint or clue elsewhere.

To start the IDE, runide.sh needs to know where the jdk is. The installation leaves it no clue, so you have to pass it a command line argument as shown:

runide.sh -jdkhome /usr/local/jdk

or

runide.sh -jdkhome /usr/local/s1studio4_1_1/j2sdk1.4.1

depending on your choice in part 6.

10. The easiest way I found to get the ide to start was to right-click the mouse on the KDE panel, then click on Add in the menu that pops up. On the next sub-menu click on SpecialButton, and next on Non-KDE Application. This will bring up a file selection box. Browse until you find the runide.sh file, and click on it. This will come up with a Non-KDE Application Configuration data-entry box. In the edit field, enter: -jdkhome /usr/local/jdk. You can click on the icon now to change it, or you can change it at any later time by simply right-clicking the icon on the panel to edit the preferences.

At this point I had an icon on the panel which I could left-click on to start the IDE.

Ron Gesell

Jan 28, 2003

Re: Getting Started with Java on Linux

On May 21st, 2003 Anonymous says:

sorry.. just want to ask how to run java applet(yahoo chess applet) on linux(rh9)

i had already install j2sdk1.4.1.02
i follow all the step above(i manage to compile java prog)... but still can open yahoo chess applet...
what else should i install

or should i install j2re?

just begin to know linux..

I think there is an error

On October 9th, 2002 Anonymous says:

I think there maybe an error in the tute. Although I am a beginner, so maybe I'm mistaken

towards the top there is the command :

mv j2sdk-1_4_0_01-linux-i586.bin /usr/local

I think that this is wrong and in fact should be

mv j2sdk-1_4_0_01 /usr/local

What the point in moving the .bin ?

please correct me If Im wrong but beginners like me try to follow the commands exactly and this is confusing

2cj2

Re: I think there is an error

On October 9th, 2002 Anonymous says:

Yes Its me again

I believe that I was correct before. Also I need to know how to set the path name when Im not in root. These couple of points would I feel be of great benefit in what is a great tutorial !

2cj2

Not The Error!!!!!!!

On March 8th, 2007 DSagar (not verified) says:

Hey dude.. its not Error as we have to move .bin file to /usr/local directory... Its the name of that package for Linux so its same if write jdk_1_4_0 or jdk_...bin ok by by... Correct me if I'm wrong anyway...

Re: Getting Started with Java on Linux

On August 28th, 2002 Anonymous says:

Nice Java Intro.

But -- Resin is not an application server, Resin is a servlet-engine. And -- Linux being open source and all, why not choose an open source appserver for the example? JBoss or Jonas anyone?

Re: Getting Started with Java on Linux

On August 28th, 2002 Anonymous says:

Why use reflection to get the length of an array?

Every array instance has a member .length ....

Re: Getting Started with Java on Linux

On August 28th, 2002 Anonymous says:

yeah, funny. maybe he likes reflecting

this works just as well....

class Test

{

public static void main( String argv[] )

{

System.out.println( "Arguments:" );

int i = 0;

while( i < argv.length )

{

System.out.println( argv[i] );

i++;

}

}

}

Re: Getting Started with Java on Linux

On September 17th, 2002 solle (not verified) says:

Haha.... Yeah, well, I'm a little mystery, I guess :)

Getting started with Tomcat instead of Resin

On August 27th, 2002 Anonymous says:

Just in case someone wants to try out Tomcat instead of Resin, here is a quick&dirty summary:

Download Tomcat binary from jakarta.apache.org

Unpack the binary (I unpack mine in /usr/local

Start tomcat by running /usr/local/jakarta-tomcat-4.0.4/bin/startup.sh

You may need to set the JAVA_HOME environment variable to point to your Java directory before Tomcat will start.

By default, Tomcat starts on port 8080. If you want to change it, edit the server.xml file in /usr/local/jakarta-tomcat-4.0.4/conf. (Just search for port="8080")

When you create the test JSP, put it in /usr/local/jakarta-tomcat/webapps/ROOT.

The URL should be http://localhost:8080/test.jsp?par=mysecretvalue

The Tomcat installation comes with documentation, just point your browser to http://localhost:8080 and you should get the main page for your installation, with links to the docs. If you have JDK 1.4, it is easy to enable SSL with Tomcat as well.

Re: Getting started with Tomcat instead of Resin

On August 30th, 2002 Anonymous says:

Currently I've got tomcat running on port 8080, but would like to be able to run it with apache on port 80. So, has anyone able to get it to work with apache? If so what kind of connector did you use and what are the steps?

Re: Getting Started with Java on Linux

On August 27th, 2002 Anonymous says:

Why use Resin ? Jakarta Tomcat is mature, free, and FREE product.

nedim

Re: Getting Started with Java on Linux

On January 28th, 2003 Anonymous says:

This document has two parts. The first explains how to install just the Java software development kit. The second part explains how to install the Sun One Studio (previously known as Forte). This is how it worked for me. Any risk in using this information is yours (don't whine to me, I ain't got no money anyway).

How to install Java JDK:

1. Decide on a directory to hold the jdk folder (I used /usr/local) and change

to it using:

linux:~# cd /usr/local

2. Download the "j2sdk-1_4_1_01-linux-i586.bin" from www.java.sun.com into the

current directory.

3. Change the permisions on the file using:

linux:/usr/local# chmod 755 j2sdk-1_4_1_01-linux-i586.bin

4. Run the binary:

linux:/usr/local# j2sdk-1_4_1_01-linux-i586.bin

. This will create a new subdirectory, j2sdk-1_4_1_01, and install the sdk

into it after you have scrolled through the license agreement and answered

"yes" to "Do you agree to the above license terms? [yes or no]"

5. Enter:

linux:/usr/local# ln -s /usr/local/j2sdk-1_4_1_01 /usr/local/jdk

This creates a symbolic link, /usr/local/jdk, to the j2sdk-1_4_1_01

directory. This way you can have the jdk directory in the path, and

upgrade your versions merely by installing it to its own directory and then

changing the symbolic link again.

6. Append to /etc/profile:

export PATH=$PATH:/usr/local/jdk/bin

to make sure the /usr/local/jkd/bin directory (but really the

/usr/local/j2sdk-1_4_1_01/bin directory ) is in your path.

7. Reload the /etc/profile by:

linux:~# source /etc/profile

8. Enter

linux:~# javac

to check that it is properly installed.

9. Append to /etc/profile:

export JAVA_HOME=/usr/local/jdk

to tell your system where the JDK base directory can be found.

How To Install Sun One Studio:

1. Download the "j2sdk-1_4_1-s1studio_ce-rul-bin-linux.bin" file. Make sure

downloaded file is the same size as indicated on the Sun web page.

2. To change permisions run:

linux:~# chmod 777 j2sdk-1_4_1-s1studio_ce-rul-bin-linux.bin

3. Decide on a directory( eg. /usr/local).

4. Run:

linux:~# chmod 777 j2sdk-1_4_1-s1studio_ce-rul-bin-linux.bin

The installer will start up, ask if you agree to the license terms, and if

you say yes, it will ask which directory to install to (I chose

/usr/local/s1studio4_1_1). There is no need to be currently in that

particluar directory at the time. It will create a new directory tree in

/usr/local/s1studio4_1_1 with subdirectories _uninst, j2sdk1.4.1, and

s1studio.

5. The installer will put focus on the finish button when it's done. When you

press it, a small message box comes up saying that to start the program, you

must run runide.sh in /~/s1studio/bin to start the IDE.

6. If you HAVE NOT previously installed the jdk then append to '/etc/profile':

export PATH=$PATH:/usr/local/s1studio4_1_1/j2sdk1.4.1/bin

If you HAVE previously installed the jdk but want to use the new one, then edit '/etc/profile' to remove the export PATH line that contains your old jdk or j2sdk directory and append the new export PATH command to the profile file.

7. Append the next line to /etc/profile:

export PATH=$PATH:/usr/local/s1studio4_1_1/s1studio/bin

Save profile and exit the editor.

8. Reload the /etc/profile by:

linux:~# source /etc/profile

9. The only way I figured the following out, was by reading the runide.sh file. I found no documentation, no hint or clue elsewhere.

To start the IDE, runide.sh needs to know where the jdk is. The installation leaves it no clue, so you have to pass it a command line argument as shown:

runide.sh -jdkhome /usr/local/jdk

or

runide.sh -jdkhome /usr/local/s1studio4_1_1/j2sdk1.4.1

depending on your choice in part 6.

10. The easiest way I found to get the ide to start was to right-click the mouse on the KDE panel, then click on Add in the menu that pops up. On the next sub-menu click on SpecialButton, and next on Non-KDE Application. This will bring up a file selection box. Browse until you find the runide.sh file, and click on it. This will come up with a Non-KDE Application Configuration data-entry box. In the edit field, enter: -jdkhome /usr/local/jdk. You can click on the icon now to change it, or you can change it at any later time by simply right-clicking the icon on the panel to edit the preferences.

At this point I had an icon on the panel which I could left-click on to start the IDE.

Ron Gesell

Jan 28, 2003

Re: Getting Started with Java on Linux

On August 30th, 2002 Anonymous says:

Because Tomcat is rubbish. Resin is not that expensive that the licenses price you out of running it, hell, if you're a small company and cant afford it, Caucho will let you off the hook! Go read the license terms.

Seriously, Tomcat is complete rubbish, its slow and cumbersome, and it crashes all the time. Resin is king! Long live resin!

Re: Getting Started with Java on Linux

On September 8th, 2002 Anonymous says:

The above is obviously a troll and should be ignored. Probably a Resin employee giving out dubious advice.

Tomcat is deployed at large companies due to its high regard by the programmers who's jobs would be affected if it wasn't stable. I'll even name one: Universal Studios. Its filling niches where traditional proprietary costs would be prohibitive or overkill.

Its solid, has open source backing (no small thing when you consider the resources this fact brings to bear), and its Free (as in Freedom, not free beer) to use as you please on as many boxen as you please.

And, one final very important point made by another poster here. When the company that makes Resin is long gone, Tomcat will still be there due to its status as an Open Source project. How's THAT for reliability.

Re: Getting Started with Java on Linux

On August 27th, 2002 Anonymous says:

Because Resin is much faster, it automagically reloads the web application when you change a class or the web.xml, etc.

Resin is free for development, you only have to pay a license for your deployment server.

Re: Getting Started with Java on Linux

On August 27th, 2002 Anonymous says:

Because

* Resin is much faster

Give them time, besides, speed isn't everything

* it automagically reloads the web application when you change a class or the web.xml, etc.

Yes, even tomcat does this

* Resin is free for development, you only have to pay a license for your deployment server.

Interestingly enough, aside from the damned sun java requirement, tomcat gives you:

- freedom to use it for whatever purpose,

- freedom to maintain it even if the vendor no longer does,

- freedom to install in as many machines with as many cpus as you wish,

- freedom to resell improved copies (or even giving them away gratis)...

With all of this and you not even have to pay for a license per machine/cpu for your deployment servers... so, tell us again, please, why should an enterprise use resin instead of tomcat?

Featured Videos

Non-linear video editing tools are great, but they're not always the best tool for the job. This is where a powerful tool like ffmpeg becomes useful. This tutorial by Elliot Isaacson covers the basics of transcoding video, as well as more advanced tricks like creating animations, screen captures, and slow motion effects.

Shawn Powers reviews the HP Mini-Note portable computer.

Thanks to our sponsor: Silicon Mechanics

Silicon Mechanics is a leading manufacturer of rackmount servers, storage, and high performance computing hardware. The best warranty offerings available are backed by experts dedicated to customer satisfaction.

From the Magazine

August 2008, #172

There's nuttin like a Cool Project to give you some relief from the summer heat, so get out your parka cuz we got a bunch of em. First up is the BUG, not a bug, The BUG. It's got a GPS, camera and more, in a hand-sized package that's user programmable. The BUG does everything. It's both a floor wax and a dessert topping. Get one now. Need a software version of a Swiss Army knife? Take a look at Billix, and don't leave home without it. Then, chew on this one, an X server on a Gumstix device driving an E-Ink display. Need more storage? How about 16 Terabytes? Can do.

And, of course, we have the usual cast of characters: Marcel, Reuven, Dave, Kyle, Doc, plus the new kid on the block Shawn Powers. But it doesn't stop there: build a MythTV box on a budget, build your own GIS system, set up the tools to monitor your enterprise and more. Finally, remember The War of the Worlds? Now you can play too.

Read this issue