
Webmin: Good for Guru and Newbie Alike
To quote their web site, “Webmin is a web-based interface for system administration for Unix.” I found Webmin a few years ago when I was looking to register the domain webmin.com. I had an idea for a cool control panel to help administer my Linux server farm, and I was annoyed that someone had gotten to the domain first, until I started looking at the software they had for downloading. After that I was hooked.
Webmin's goal of providing a web-based interface is not unique. A number of tools are out there, both open source and commercial, with the same goal. What makes Webmin stand out from the crowd is that it can be useful to both experienced and inexperienced Linux administrators. Before I explain how it fulfills such a difficult task, let's look at how you install the software and what you can do with it.
Before we delve into the feature set of Webmin, I should explain a little about its design. Webmin is basically a large collection of CGIs written in Perl. It runs its own web server on a port that you specify when you install it, allowing you to manage the security of Webmin separately from your real web server. The full list of supported platforms is on the site, and it includes Red Hat, Solaris, Debian, *BSD, HP-UX, IRIX, AIX, DEC, SCO and Mac OS X.
What makes Webmin unique is its modular design. Every service or feature is exposed through a set of modules. This means that if the application you would like to control from Webmin is not supported, you can use the Webmin API to build a new module that will allow Webmin to control it. Webmin ships with 50 standard modules and many more are available, so you have plenty of source code examples to help get you started. Although Webmin itself is distributed under the BSD license, the modules you build can be distributed under any license you choose. This keeps the tool open to submissions from both the Open Source community and commercial vendors.
Installation is a breeze; go to www.webmin.com/webmin and download either the RPM or the tarball. If you use the tarball, you will need to run the setup.sh once you have unpacked it. This program handles the installation for you. One tip if you use the tarball: make sure you unpack it where you want those files to live. After you have installed Webmin, do not delete the Webmin directory you just unpacked or Webmin will not work. If you want to uninstall Webmin later, an uninstall script is included that will remove the initial directory as well as all the other files Webmin puts on your drive.
Now that you have Webmin installed, you need to open a web browser and log in to the IP address/resolvable server name and port (typically 10,000) that you configured Webmin to use when you installed it (see Figure 1). Once you have logged in, you should be greeted by the index page of Webmin, including several category tabs in which the various Webmin modules are grouped (see Figure 2). For example, the “Webmin” tab is where all the configuration settings for general themes, users, modules, etc., are located (the default theme is used in these figures). Other tab groupings include System, Servers, Networking, Hardware and Others.
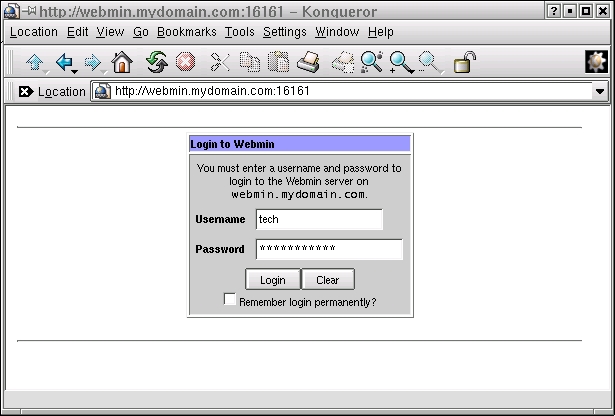
Figure 1. Logging in to Webmin
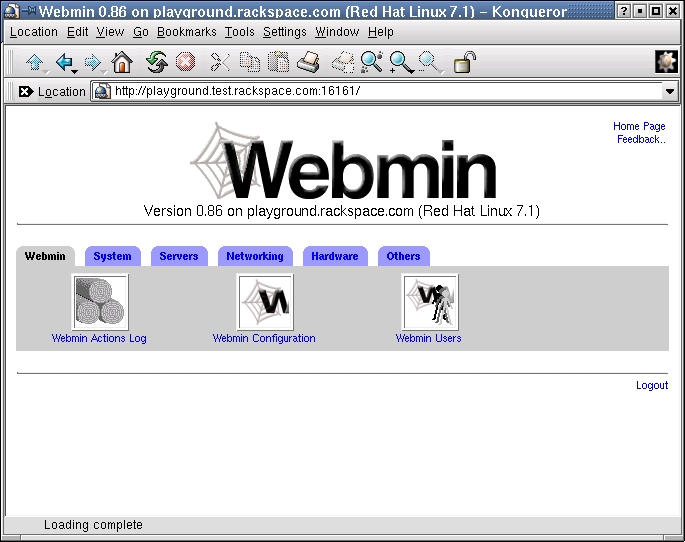
Figure 2. Webmin Tab Groupings
The System tab handles tasks that have to do with managing the computer or server itself. This includes setting disk quotas, setting up NIS, altering PAM, looking at the syslog, adding users, managing cron, setting up NFS and even modifying boot-time services or rebooting the server.
The Servers tab groups all the server service configuration modules together. This is where you will find Apache, BIND, DHCP, sendmail, Squid and a number of other related modules (see Figure 3).
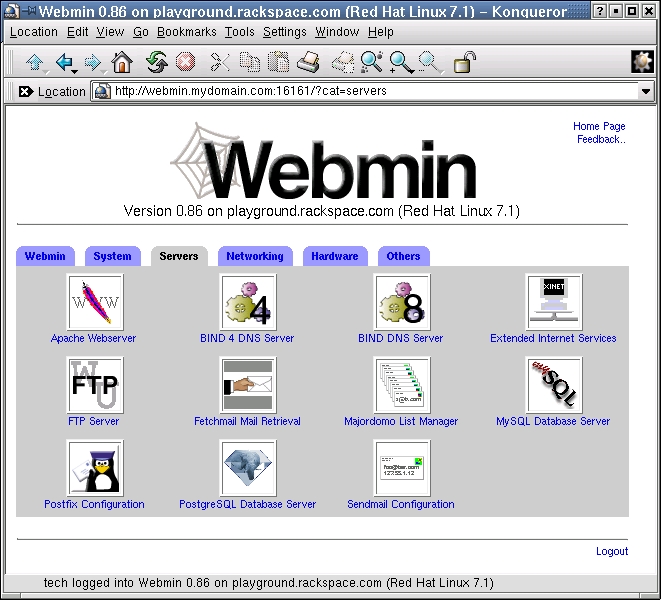
Figure 3. Webmin Modules under the Server Tab
The Networking tab is a new addition, and on Linux it offers a good GUI ipchains configuration module, as well as a subcategory of various network utilities such as ping, traceroute, whois and dig.
The Hardware tab, of course, handles things that are directly hardware-related. This is where you will find information about your disk partitions, system time, network interface configurations, LILO and even software RAID.
The last tab is a potpourri category that has a full Java-based ssh/Telnet client, Java-based file manager, special user-definable module called Custom Commands, system log viewer, Perl modules section, and web-based system and server-status monitoring module. The Custom Commands module lets you build a simple interface to Webmin that allows you to run any command you want. This can be very useful if you need Webmin to do something specific that does not require a full module to accomplish. Figure 4 shows some custom examples that were created quickly and easily.
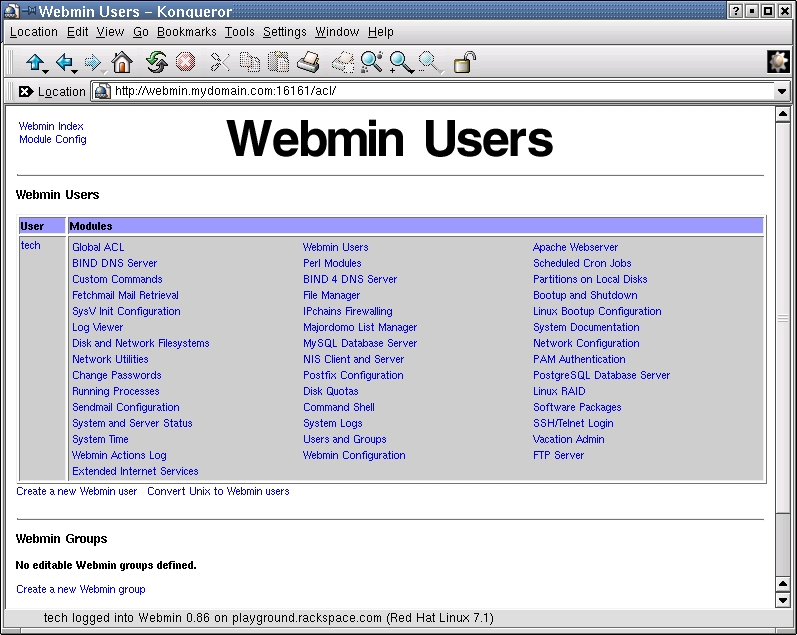
Figure 4. Creating Custom Commands
Here is a step-by-step guide to configuring a new virtual-hosted web site in Apache. This guide will show you how to set up the document root, cgi-bin and logging. It looks a lot more complicated than it is. (I discovered that writing the directions for a point-and-click interface takes a lot more effort than just pointing and clicking.)
For this example, the user ID “dirk” already exists, and the virtualhost/domain we will create is test.com. It also assumes that you are using Wu-FTPd and that the domain you are setting up already resolves in DNS. First create the directories (folders) that will contain the HTML files, log files and CGI scripts for your web site. Go to the main Webmin page and click on the Other tab. Next, click on File Manager.
Use File Manager to navigate to the home directory of the web site's administrator. The administrator's home directory is the directory that the user will go to when using FTP to connect to the server. The home directory of this user is /home/username. Double click on the home directory (folder) in the left column. Double click on the user name of the web site administrator inside the home directory.
Now you need to create the necessary directories for the web site. Click on the New Folder button (the button that says “New” with the folder icon) to create the main directory for your domain (e.g., /home/dirk/test.com). Double click on the directory you created (e.g., test.com) to move inside it. Now, create three folders (htdocs, logs and cgi-bin) in the directory you just created. In our example, we would have created the following directories: /home/dirk/test.com, /home/dirk/test.com/htdocs, /home/dirk/test.com/logs and /home/dirk/test.com/cgi-bin.
Now, go back to the home directory for the user. In the right column, click once on the directory for the web site (e.g., test.com), then click on the Info button at the top of the page. In the Info window, change the user and group to the correct user ID (e.g., dirk). Change the pop-up menu in the “Apply changes to” section to “This directory and all subdirectories”. Click Save.
Go back to the main Webmin page by clicking on “Return to index” at the bottom of the page. Click on the Servers tab, then click on Apache Webserver. If this is the first time you have clicked on Apache Webserver in Webmin, it will ask you to allow Webmin to check the configuration of Apache (just click on Configure).
Now scroll to the bottom of the page, and you will see a form for adding new virtual sites. Enter the IP address for the web site in the Address text field. If you are doing name-based hosting, make sure the “Add name virtual server address” box is checked. The Document Root should be /home/userid/domain/htdocs (e.g., /home/dirk/test.com/htdocs). Enter the name of the web site in the Server Name text field (e.g., www.test.com), and click Create.
Scroll through the Virtual Servers list until you find the web site you created. Click on the Virtual Server for that web site. To set up your cgi-bin folder, click on “CGI Programs” in the “CGI directory aliases” row. In the From text field, enter /cgi-bin/. In the To text field, enter /home/userid/domain/cgi-bin/. This must end with a “/” (e.g., /home/dirk/test.com/cgi-bin/). Click Save.
Click on Log Files. In Access Log Files, enter /home/userid/domain/logs/access_log (e.g., /home/dirk/test.com/logs/access_log) in the text field that has File or Program written above it. If you would like to have a log that contains hits and referrer information, then in the Format column of the “Access log files row”, switch the check box from Default to the check box next to the text field and enter “combined” in the text field. Click Save, and click on “Networking and Addresses”. Enter the e-mail address of the webmaster for this web site in the “Server Admin email address” text field. Then check the box next to the text field, and click Save.
You have now set up the web site, but before it goes live there is one final and important step. In the upper right-hand corner is a link called Apply Changes; click on it to activate your changes.
Webmin offers a number of security features. The first line of defense is a user ID/password authentication system that is completely independent of the user ID list kept in the /etc/passwd file. This means someone can be granted access to Webmin without allowing the user any other OS-level system privileges. Webmin also fully supports SSL. If you have the Perl SSL module installed, all your Webmin sessions can be encrypted to prevent attackers from gaining information about your system from watching them.
Webmin also allows for fine-grained control of the various available modules. You can, for example, grant users control over the entire DNS server without giving them access to Apache configurations or limit them to only the domains they own in the DNS module (see Figure 4). This ability to limit and redistribute control can come in handy if you need to delegate tasks to other administrators. Finally, Webmin also can be configured to log all changes made via the interface, a feature that is extremely useful for troubleshooting.
As you can probably tell, I am a big fan of Webmin. I like that the license lets me get the source code and do what I want. I love the fact that the module system lets me build new things or add modules others have built. I currently am testing the LTSP module for Webmin to help manage some unruly I-Openers. The ability to transfer tasks to less experienced administrators (roommates) and know that they cannot deviate from the area I have provisioned for them, lightens my workload.
If that were all Webmin had to offer, I would be quite impressed. There is one final benefit of the Webmin architecture, however. Webmin works directly with all the files on the system to affect its changes, meaning it does not use a database or other means of storing information that is in any way nonstandard. I can therefore edit the httpd.conf for Apache by hand without worrying that it will cause problems for Webmin. From a support standpoint, this means I can install Webmin on a server and turn it over to someone else. If that person problems I still can use all of my scripts and vi knowledge to troubleshoot the problem.
The command-line friendliness and absence of a master back-end database that pushes the config out to the flat files are things that control panel designers all too often forget. They end up building a system requiring that everything be done via the control panel or it will break. Webmin allows me to mix-and-match administration styles at my convenience. For example, I tend to make my Apache configuration changes directly. BIND, however, is a different story. BIND is notoriously picky, so I use Webmin as a convenient front end to BIND. It offers me all the esoteric options and greatly lowers the risk that a typo will cause a resolve error. To me, the amazing thing is how well Webmin fits into my administration toolbox. I do not have to use it, but it is always there.
New administrators will come to like Webmin because of its depth of features. The point-and-click interface means that you do not have to keep everything in your head, which can prove to be a daunting task for someone new to administering a Linux server. Webmin's core modules expose almost every feature and function of the services they support. This means you easily can add configuration options that you did not previously know existed.
My only caveat to this is that although Webmin is well organized and feature-complete, it is not for absolute beginners. If you do not know what an A record for DNS is, then Webmin will not help you. Webmin maps the underlying Linux to a web interface, so sometimes when you get this much flexibility and power, you have to sacrifice ease of use. Once you know the fundamentals of the services, Webmin can be a great tool—just don't expect it to summarize the O'Reilly book on BIND for you.

Dirk J. Elmendorf is one of the cofounders of Rackspace Managed Hosting and serves as chief technology evangelist. He also serves as a research and development leader, helping to develop and evaluate the new products and services he promotes in his evangelical role.

