
XVScan
XVScan is simply xv, with the added option of scanning in artwork. As a result, everything we discussed about xv last month still holds true this month for xvscan, including the fact that it is commercial software. Licensing is $50 US per-installed computer. So, a work group can install XVScan on the computer with the scanner, and though everyone uses it, only one license is required (site licenses available). To use, type xvscan on the command line. The familiar window with the red fish swimming around appears, and clicking on the right mouse button brings up the control window. Clicking on “About XV” will give you the licensing information. The difference is seen when you click on “windows”: there is now a scanner option. Click on “scanner”, and the window shown in Figure 1 comes up.
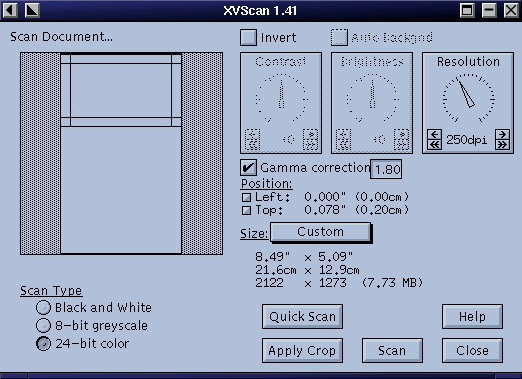
Figure 1. Scanner Control Window
The blank block under the words “Scan Document...” represents the glass portion of your flatbed scanner. The outlined portion is the area to be scanned; you can make this smaller or larger, up to the full size of the glass. I will be scanning a photograph placed at the top right-hand corner of the glass, so I will start out by scanning just the upper portion. This will make the scanning operation faster than it would be if I scanned the entire bed. It's always a good idea to check the gamma-correction button; otherwise, the picture will come out very dark. For the first scan, I just want to determine the exact position of the picture so I can crop it, so ordinarily, I would set the resolution fairly low (the lower the resolution, the faster the scan) and click on “Quick Scan”. The result of my quick scan is shown in Figure 2; I kept the resolution high, so that the picture would be printable.
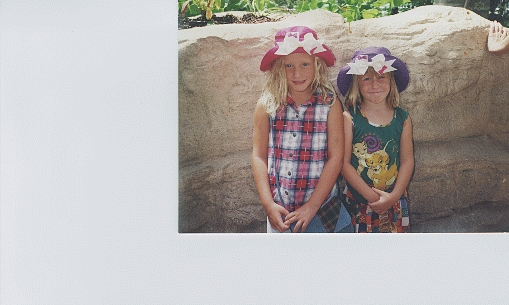
Figure 2. Quick Scan
As you can see, part of the scanner bed was scanned as well as the picture. The area to be cropped is set in the same way as in xv: click the left mouse button in the upper left corner, hold it down while dragging to the bottom right corner, then release. Now click on “Apply Crop”, and the lines delineating the scanning area will decrease to the defined size. In this case, even with the gamma correction set, the picture is still a bit dark, so I turned off the gamma correction and set the contrast and brightness in order to lighten it up. Since the picture will change each time you change the values, I just played with different values until the picture looked right. The numbers I ended up using were +17 for contrast and +21 for brightness. I also clicked on the “sharpen” option under algorithms and added a label, showing that this picture of two of my granddaughters, Sarah and Rebecca, was taken in 1995. The result of all this fiddling is shown in Figure 3.

Figure 3. Final Scan with Labeling
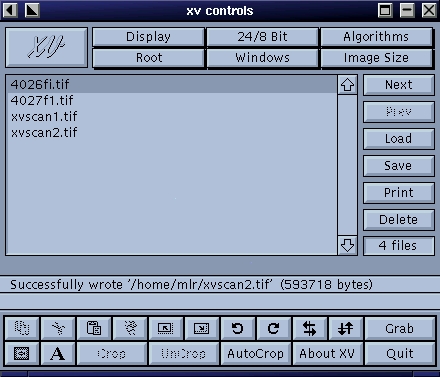
Figure 4. Control Window
For a bit of fun, I clicked on the button in the far left corner of the control window, the one that looks like a small picture of a fish (see Figure 4). This brought up the xv pad window shown in Figure 5. I had no idea what this would do, so for fun, I set it to 50% blue, and the picture turned blue (see Figure 6)--surprise! Well, that certainly showed me what it would do; more experienced photographers and artists would probably know how to use this option to further enhance their pictures.

Figure 5. Color Pad Window

Figure 6. Photo with Blue Padding
So much for fun—that's about all you need to know to run xvscan, once you've learned the basics using xv. The problem is always what resolution to use for scanning. This, of course, depends on how you intend to use the scan. To use it only on your web site, there's no need to scan at any resolution higher than 72dpi, as that's as much as can be displayed on your screen. Scanning at a higher resolution will result in a great big file that will take a great deal of time to download, slowing down your site, and it won't look any better.
If you are scanning for printing purposes, then you want to use a much higher resolution. For photos we intend to print in the magazine, we need 300dpi. So, if an author sends a picture that is 1x1.5 inches, we scan it at 300dpi, as 1x1.5 is the right size for an author photo. On the other hand, book covers are printed at about 2x3, so a 6x9-inch book needs to be scanned at only 100dpi to get the right printing resolution; i.e., 600x900 divided by 300 gives 2x3. Again, we could just scan everything at 300dpi, but would then end up with huge files taking up disk space, and they wouldn't print any better.
When you save, it is a good idea to check the “normal” box; otherwise, the find graphic is smaller than you expect.
Now, you too can get rid of all those bulky photo albums. Just get a Linux-supported scanner and XVScan, and scan away. Not all Linux-supported scanners are supported by XVScan, only those listed on thier web site at www.tummy.com/xvscan/scanners.html. This includes all HP SCSI ScanJet scanners from the IIc to the most recent ones, and two Microtek scanners (E3 and E6 no longer available). Many more scanners are supported by SANE (http://www.mostang.com/SANE/) a free scanner driver that works with the GIMP.
Of course, when you run out of disk space, you'll need to get a CD burner and write them to CD, but that's another Linux story. (See “Creating CDs” by Alex Withers, LJ, October 1999.)

