
xv: the X Viewer
Most of the graphics printed in this magazine come to us electronically, and the first way we look at them is with xv, an interactive viewer for the X Window System. This program was written by John Bradley and has many pages of documentation. The man page tells you only the name of the documentation file, namely xvdocs.ps; you have to find out where it was installed (perhaps /usr/local/lib/). The program is quite simple and intuitive to use, and you can figure out its basic uses whether you read the manual or not.
xv will display just about any type of graphics file you happen to have: GIF, JPEG, TIFF, PBM, PGM, PPM, X11 bitmap, BMP and many more. It will even display PostScript by calling up Ghostview to help it out. It is available by anonymous download at ftp://ftp.cis.upenn.edu/pub/xv/ and has a home page at http://www.trilon.com/xv/. xv is a shareware program that is free for personal use. There is a $25 US registration fee, and site licenses are available.

Figure 1. Main Window
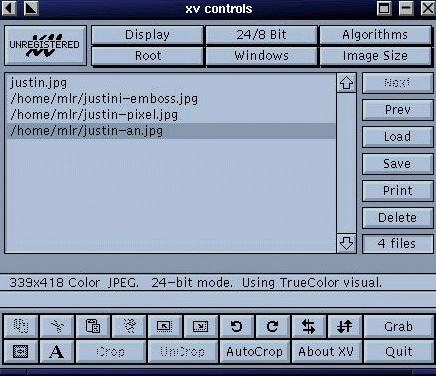
Figure 2. Control Window
Typing xv alone at the command-line prompt brings up a window containing the xv title page with bright red fish swimming through the air (see Figure 1). Clicking the right mouse button in the window brings up the control window (see Figure 2), while pressing the letter q quits the program.
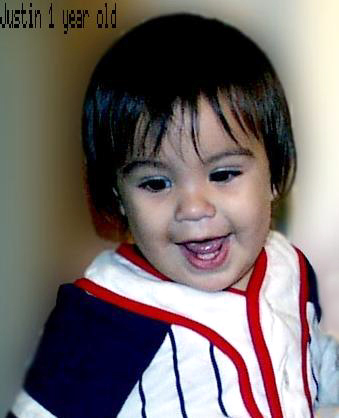
Figure 3. Justin
To load a picture, click on “Load”, and a window will come up showing the contents of the current directory. Double-click the image file you want to view, and that image replaces the red fish in the main window. Alternatively, you can type the file name on the command line:
xv 3964f3.jpg
This command displays the picture of my youngest grandchild, Justin, shown in Figure 3. Wild cards are recognized, so typing xv *.gif will load every GIF file in the current directory, displaying one after another each time you press the space bar.
Looking at Figure 2 again, you'll see that there is a double row of buttons across the top of the control window. Clicking on any of these buttons causes a menu to drop down, showing various options. Options not available will be grayed out. For example, if I click on “Display” while viewing Justin's picture, I am given the options of “raw” and “smooth”, but “dithered” is grayed out. Also, “Use standard colormap” is checked and all other options are grayed out.

Figure 4. Image Info Window
In the menu obtained by clicking on “Windows”, you will find “About XV”, which you tells you about registration fees, and “XV Keyboard Help”, which tells you how the program will react to certain key and mouse presses. The most useful options in this window are “Color Editor” and “Image Info”, the latter in particular. I use the Info option for every image I display to determine if the picture is high enough resolution to print well. The image information for Justin's picture is shown in Figure 4. Looking at this information, we see that the image is in JPEG format and has a resolution of 339x418. This will give us a picture that would print reasonably well as an author photo. It's a bit grainy at the larger size we are showing here. Any smaller, and our Associate Editor Darcy Whitman would be writing for a new picture. The resolution is also shown toward the bottom of the control window.
The menus for “Image Size” and “24/8 Bit” are fairly self-explanatory. Image size is nice in that it gives you many choices for resizing the picture, including setting it yourself or as a function of percentages of current size or pixels. The “Root” menu I leave alone—the name is enough to deter me from using it. The “Algorithms” menu can provide some fun, although not as much as you might have with programs such as the GIMP. Figure 5 shows an embossed image of Justin, while Figure 6 is a pixelized version. The oil painting option was not pretty—it looked like sections had been scraped off with a knife.
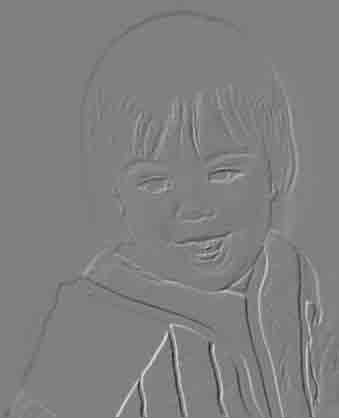
Figure 5. Embossed Image
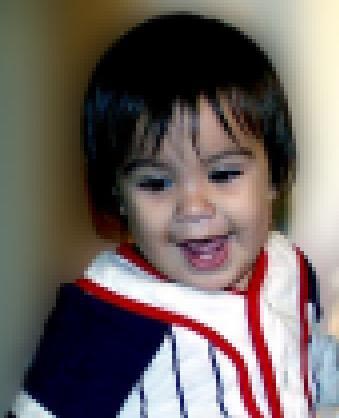
Figure 6. Pixelized Image
The buttons down the right side of the control window will allow you to “Save”, “Print” or “Delete”, as well as load images. Delete will let you delete from the viewing list, or from the list and the disk both.
Rows of buttons along the bottom allow you to rotate the image 90 degrees (right or left) or turn it upside down, if you wish. Play with them—it's fun for a minute or two. The “A” button gives you the ability to annotate the picture as I did for Figure 3, which can be quite useful in remembering when a photo was taken. I use the “Crop” button quite often; in fact, this picture of Justin is cropped from one in which I was holding him (see Figure 7). Clicking and holding down the left mouse button as you drag it in the window draws a frame which defines the area to be cropped.
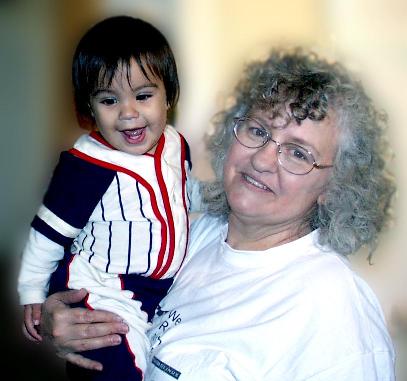
Figure 7. Uncropped Picture
I also use the “Grab” button quite frequently in order to make screen shots. Click on this button, set a delay time (e.g., 1 second), click on “Autograb”, put your cursor in any window, and that window will appear in XV's main window. Or you can use “Grab” and define the area you wish to view by holding down and dragging the left mouse button.
XV is truly a useful program and one that I use on a daily basis. Try it; I think you'll like it.
Marjorie Richardson is Editor in Chief of Linux Journal, the best job in the universe. She loves all her grandchildren equally, even though she used only Justin's picture in this article.
