
Video Production 101: Making a Movie with Kdenlive
By profession, I'm a music teacher. Four times a year, my students perform a show at a local coffeehouse called Coffee Amici. The room hosts regularly scheduled performers, open-mic nights and various community events. My students love to play there. It's a great opportunity for them to show their stuff for an attentive crowd, and eventually, they asked about the possibility of doing video recordings of the shows. I looked into the affordability of the requisite gear, the extent of Linux support for recommended hardware, and the availability of software that would help me produce a simple DVD from my recordings. I was happy to discover that the project was well within my price range and that my software choices included more than one adequate solution.
This article describes how I recorded a student show with an inexpensive camcorder and how I produced a movie from that footage with Kdenlive, a non-linear editor (NLE) for Linux. Kdenlive is a powerful program, but my project was simple, and the methods I describe here should be usable in other Linux NLEs.
First, I needed a video camera. My research and my budget led me to the Samsung SC-D382 miniDV camcorder (Figure 1). For about $100, I got a camera with a remote control, a DV interface (IEEE 1394, aka FireWire) and advanced settings that can be configured for a relatively good-quality recording. It's lightweight, and I found it easy to operate and control. Obviously, more money gets more camera, but I intended to keep expenses as low as possible without compromising the quality of the basic material.
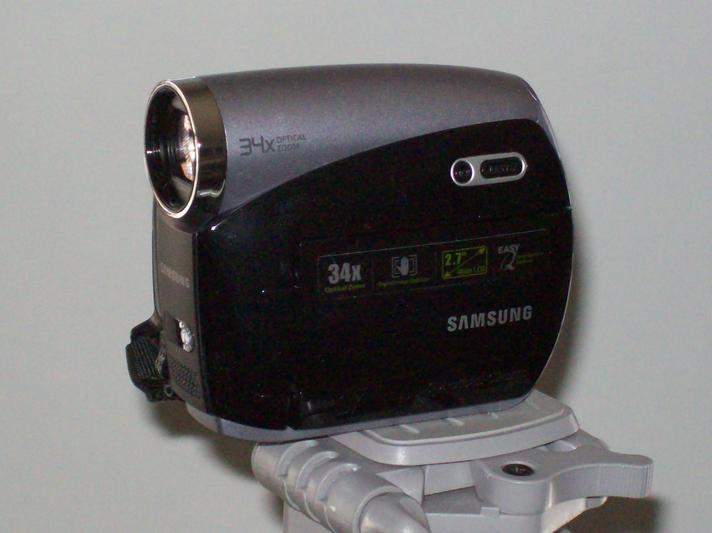
Figure 1. Samsung SC-D382 miniDV Camcorder
By default, the camcorder produces video in an NTSC 4:3 display format, commonly associated with the square screen of a television in North America. The default audio setting appears to be with a sample rate of 32kHz with a resolution of 12 bits. The camera's advanced settings allow me to set the preferred display format to NTSC 16:9, also known as widescreen, and to increase the audio bit resolution to 16 bits. Alas, the audio sample rate is fixed, so CD-quality sound is not possible with the Samsung, a limitation I overlooked when purchasing the unit.
Of my two studio machines, only one has an integrated IEEE 1394 connection. I planned to use both boxes for video work, so I bought and installed an inexpensive PCI board that added three IEEE 1394 ports to my main machine. If you plan to make a connection with a FireWire-enabled camera, check for a port on your motherboard and make sure you have an available slot for an extension board if you need one. And by the way, even the cables need attention. FireWire cables have a variety of pin configurations, so be sure you have the right connectors on both ends of the cable. For example, my camcorder wants a 4-pin connector, and the ports on my machines require a 6-pin adapter.
I also bought a carrying case for the cameras and a good tripod with bubble levels and a variety of gizmos to position the camera in just about any direction. I've been especially happy with the tripod, and I advise anyone interested in amateur video recording to invest in a decent stand for your camera. Yes, you can solve a lot of problems in your edit stage, but you'll save time and energy if your basic material is centered correctly from a stable position.
I drew the line for my expense account at lighting. The camera provides autocorrection for lighting and focus, and my project didn't need a dedicated light system. I was ready to consider my software requirements.
I had two primary concerns on the software side. I needed to ensure that the kernel versions included the IEEE 1394 modules and that I would find a video editor user-friendly enough for a total newbie. The modules issue was non-problematic. My main box runs 64 Studio 2.1, a by-now old Debian-based system running on a 2.6.21 kernel compiled for 64-bit hardware and real-time operation, while my secondary 32-bit machine runs a more-modern Ubuntu Jaunty system with a 2.6.29 kernel optimized for real-time performance. Both systems provide the required modules—raw1394, ohci1394, ieee1394—all of which are autoloaded when the machines go through their hardware discovery during the boot process.
The process of finding the right video editor consisted of trying out the available NLEs for Linux to determine which one offered the most amenable work flow. During the process, I wrote a series of profiles on Linux NLEs that you can read at LinuxJournal.com. I worked on a simple project in each editor, and I found that more than one program could serve my purpose. I finally decided that Kdenlive (Figure 2) provided the tools I needed in a layout that was easy for me to understand and operate. For the project described in this article, I used Kdenlive 0.7.6, but since then, I've been building the program from the latest SVN codebase. By the time you read article, this minitutorial Kdenlive should be available in a shiny new version 0.7.7.
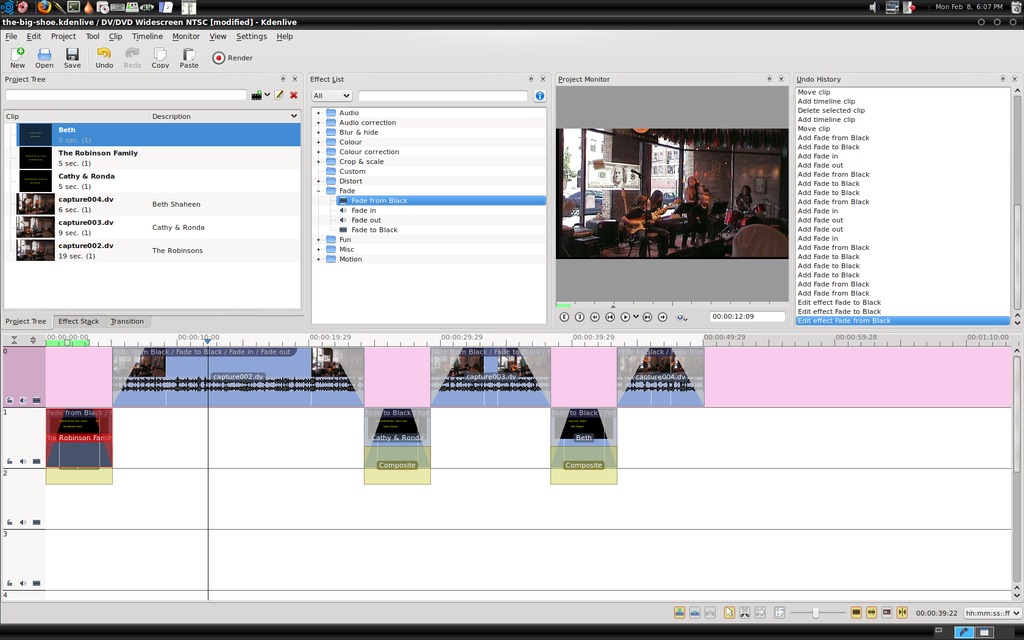
Figure 2. Kdenlive, a Video Editor for Linux
The coffeehouse is a single room with good acoustics and lighting that poses no special problems for a video recording. Coffee Amici also has an excellent in-house sound system manned by co-owner Craig Allen, so I knew the original sound source would be well balanced. I planned to perform with most of the students, so I needed to position the camcorder where I could operate it remotely. I also needed to get a good shot of the performance area and a good audio level. Fortunately, I had no problems with my setup, and the shoot was trouble-free.
Incidentally, I learned that the camera's battery will last just long enough to record a complete 60-minute miniDV tape. The student shows routinely last at least that long and often longer. Wherever possible, I plan to use the camcorder's power supply, but now I know how long I can expect the battery to perform before I need to switch it out for a recharge.
Kdenlive records real-time video over a FireWire connection or from a Video4Linux (V4L)-compliant Webcam. The program also utilizes the RecordMyDesktop software for capturing on-screen actions, such as mouse movements, window placement, program controls and so forth. I used Kdenlive's Record Monitor panel (Figure 3) to transfer the videotape recording to my computer. The panel provides full transport control of my camcorder, and I quickly searched for and found the sections I wanted to transfer to disc. I clicked on the Record control when I wanted to transfer the video, and I clicked it off until the video reached the next interesting point.
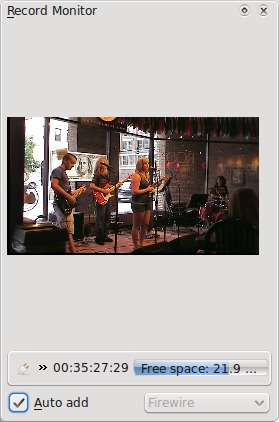
Figure 3. Kdenlive's Record Monitor Panel
When I was finished with each transfer, Kdenlive asked if I wanted to import the resulting DV file. I said yes, and my transferred video appeared in the Kdenlive Clip list. When my clip collection was complete, my project was ready for the editing stage.
I dragged and dropped my clips along the timeline in the multitrack display. I wasn't concerned with their accurate placement yet, because I had three main jobs to do first as an editor:
Trim excess footage.
Add audio and video fades to the start and end of each clip.
Create title clips to introduce each performance clip.
Kdenlive's Scissor tool made quick work of the excess footage. The fade-ins and fade-outs are drag-and-drop effects with user-definable lengths and auto-sync between the audio and video fades, a handy default action. The material had no need for color correction or other repair, so I proceeded to create my title clips.
The name and length of the title clip can be redefined at will, and a titling editor is provided for adding text, images and background colors to the clip. The editor has a number of amenities, including some handy positioning tools and animation effects. However, I intended to use the title clips only for introducing each performer's footage, so I kept things simple again with a yellow text against a basic black background.
After editing my title clips, I could then drag and drop them as needed. Thanks to Kdenlive's Snap function, they aligned themselves instantly when I placed them near their respective footage, yet another friendly default action. I added fades to those clips too, and I was effectively done in the edit room.
Kdenlive's Render button opens a dialog for preparing your movie for its eventual output format (Figure 4). I selected the DVD option from the Destination list, named the output VOB file, and defined the format as NTSC. I set the encoder for a 2-pass rendering to a widescreen display, ticked the option to open the DVD Wizard after rendering, and clicked the Render To File command. Next I made some coffee (it seemed the appropriate thing to do) while Kdenlive did the rest.
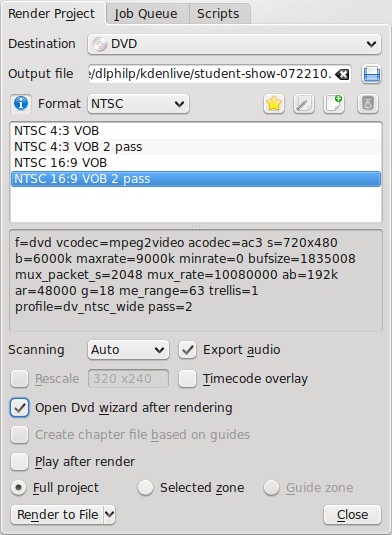
Figure 4. Kdenlive Render Dialog
The DVD Wizard (Figure 5) stepped me through the process of preparing an ISO image to burn to disc. I selected my files, defined the disc chapters and made a basic menu. The menu builder can set the background to a color, an image or a video file. I selected an image of the coffeeshop at night and added a text overlay of menu items. Each item is linked to a particular target—that is, one of the chapters defined during the Wizard's configuration. The whole process was uncomplicated enough to bring me quickly to the final stage of creating the DVD image. I clicked on the Create ISO Image and again let Kdenlive do the rest while I finished that coffee I brewed earlier.
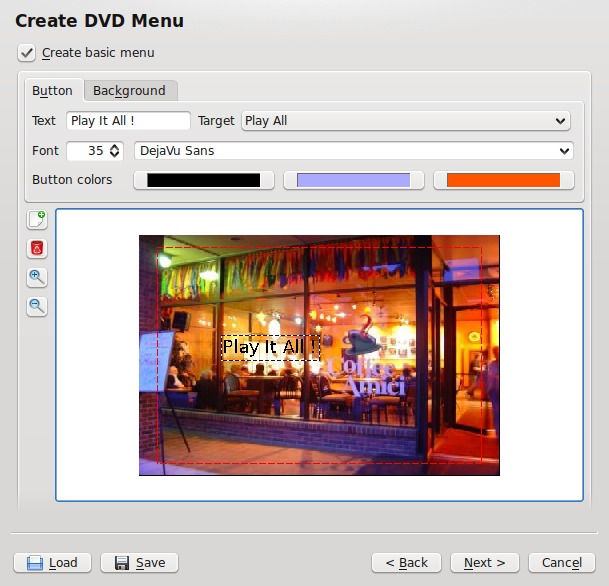
Figure 5. Kdenlive's DVD Wizard
The ISO image creation dialog includes an option to start a disc-burning program when the image is ready. I selected the K3B option and followed that program's instructions until I had successfully burned the number of discs I needed. Some discs were specially prepared media for use in my laptop's Lightscribe drive. Templates for making detailed CD/DVD labels are available for various Linux graphics programs, and the Lightscribe technology will burn the label graphics directly to the surface of the special discs, giving them a professional appearance.
Simplicity and ease were my prime directives throughout this project, so when I wanted to make inserts for the disc jewel cases, I availed myself of the services of Avinash Chopde's cdlabelgen, an on-line insert creation utility. I selected a background, added titles, songlists and credits, and saved the output as a PDF file to be printed as needed (Figure 6).
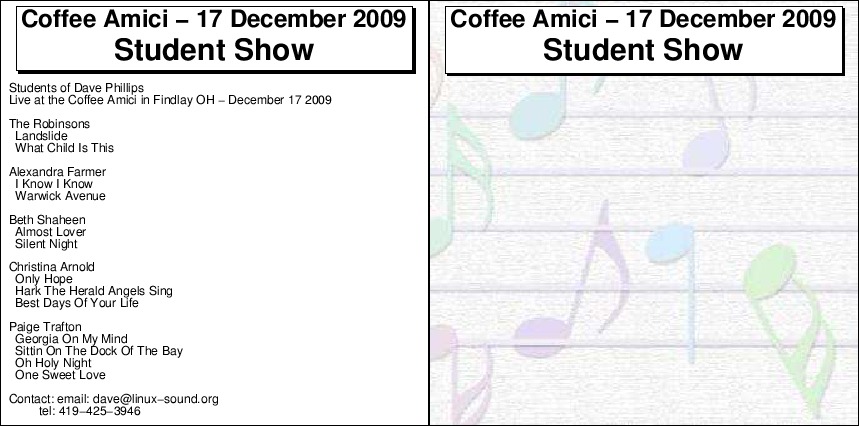
Figure 6. A CD Insert Produced by cdlabelgen
I'm definitely an amateur in the video domain, but I'm having a lot of fun learning about it. I've benefited from the advice and suggestions from many people far more knowledgeable, so in keeping with the spirit of sharing helpful information, I've assembled the following notes in the hope that they might benefit other newcomers.
First, take the time to learn about your hardware. You need to know exactly what to expect from it during and after the shoot. Buy an extra battery and keep it charged. Buy a good stand and extra tapes.
On the set, set up your shoot carefully and take extra care for camera position and lighting. Record your audio and video at the highest quality your camera allows. Record your audio at a strong level, but avoid clipping. Normalize audio only as a last resort. Bear in mind that normalization raises the level of the noise floor along with all other sound in the normalized track.
Be generous when transferring your video from camera to computer. Approximately 13GB of storage space is required for 60 minutes of DV-formatted video, but massive storage is cheap these days. Restrict your edits to simple functions. Avoid fancy transitions and don't get distracted by effects. Yes, effects are great fun, but unless they truly add something to the final product they are best left for another project.
Know your target destination (disc, stream, file), and format your rendering options accordingly. Two passes are better than one, but life is short. Do what you can with the time you have, then move on.
I felt that I had done my homework, that I had made my choices as wisely as possible. Nevertheless, I was a newbie at video production, and I expected surprises. As my work progressed, I was surprised indeed, but only at how easily the entire process flowed along. My hardware behaved as expected, Linux provided the necessary low-level support, and the applications software worked without troubles throughout the process.
Kdenlive was a special pleasure. I had no problems with its interface, and its tools and utilities were easy to learn and apply. Since my first project, I've learned more about Kdenlive, and I continue to work with it as my primary video production software. There's far more to the program than the few features presented in this article, so if you're interested in affordable video production with Linux, be sure to check out Kdenlive.
I hope you've enjoyed this little introduction to amateur video production with Linux. I've had a lot of fun making my own movies with my little setup, and I hope to improve its capabilities in the future. It may be some time before I can afford a better camcorder, but in the meanwhile, I can look forward to new releases of Kdenlive to keep me busy.
Resources
Kdenlive: www.kdenlive.org
K3B: k3b.plainblack.com
cdlabelgen: www.aczoom.com/tools/cdinsert
Kdenlive Profile: www.linuxjournal.com/content/kdenlive-meets-studio-dave
Dave Phillips has been using Linux for sound and music since 1995. He is one of the original founders of the Linux Audio Developers/Users groups and has been the maintainer of linux-sound.org for more than ten years. He is the author of The Book Of Linux Music & Sound and has written many sound-related articles for various Linux publications. His other activities include playing in a blues band, reading Latin literature, playing with his shar-pei Maximus and spending time with his beloved Ivy. You can hear Dave's music at linux-sound.org/ardour-music.html.

