
Building A Dashcam With The Raspberry Pi Zero W
I've been playing around with the Raspberry Pi Zero W lately and having so much fun on the command line. For those uninitiated it's a tiny Arm computer running Raspbian, a derivative of Debian. It has a 1 GHz processor that had the ability to be overclocked and 512 MB of RAM, in addition to wireless g and bluetooth.
A few weeks ago I built a garage door opener with video and accessible via the net. I wanted to do something a bit different and settled on a dashcam for my brother-in-law's SUV.
I wanted the camera and Pi Zero W mounted on the dashboard and to be removed with ease. On boot it should autostart the RamDashCam (RDC) and there should also be 4 desktop scripts dashcam.sh, startdashcam.sh, stopdashcam.sh, shutdownshutdown.sh. Also create and a folder named video on the Desktop for the older video files. I also needed a way to power the RDC when there is no power to the vehicle's usb ports. Lastly I wanted it's data accessible on the local LAN when the vehicle is at home.
Here is the parts list:
- Raspberry Pi Zero W kit (I got mine from Vilros.com)
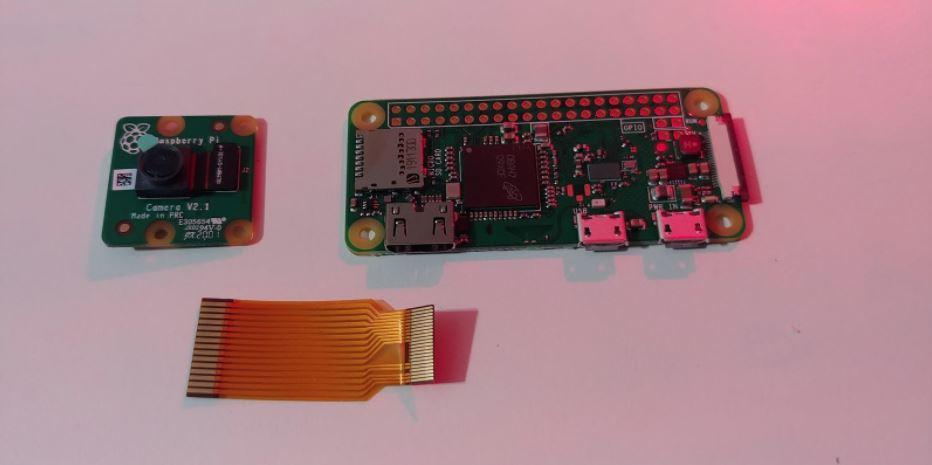
- Raspberry Pi official camera
- Micro SD card, at least 32 gigs
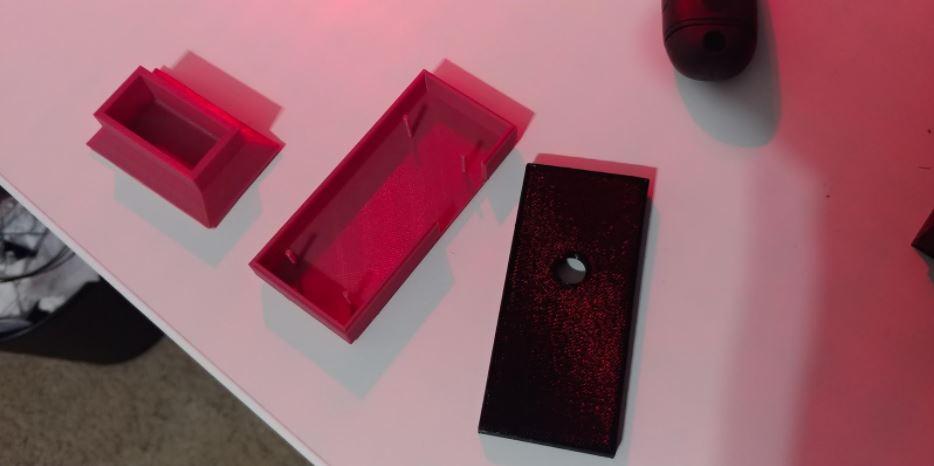
- A 3d printed case from thingverse.com
- Portable charger, usually used to charge cell phones and tablets on the go
- Command strips, it's like double sided tape that's easy to remove or velcro strips
First I flashed the SD card with Raspbian, powered it up and followed the setup menu. I also set a static IP address.
Now to the fun stuff. Lets create a service so we can start and stop RDC via systemd. Using your favorite editor, navigate to "/etc/systemd/system/" and create "dashcam.service" and add the following:
[Unit]
Description=dashcam service
After=network.target
StartLimitIntervalSec=0

[Service]
Type=forking
Restart=on-failure
RestartSec=1
User=pi
WorkingDirectory=/home/pi/Desktop
ExecStart=/bin/bash /home/pi/Desktop/startdashcam.sh

[Install]
WantedBy=multi-user.target
Now that's complete lets enable the service, run the following: sudo systemctl enable dashcam
I added these scripts to start and stop RDC on the Desktop so my brother-in-law doesn't have to mess around in the menus or command line. Remember to "chmod +x" these 4 scripts.
startdashcam.sh
#!/bin/bash

# remove files older than 3 days
find /home/pi/Desktopvideo -type f -iname '*.flv' -mtime +3 -exec rm {} \;

# start dashcam service
sudo systemctl start dashcam
stopdashcam.sh
#!/bin/bash

sudo systemctl stop dashcam.service
dashcam.sh
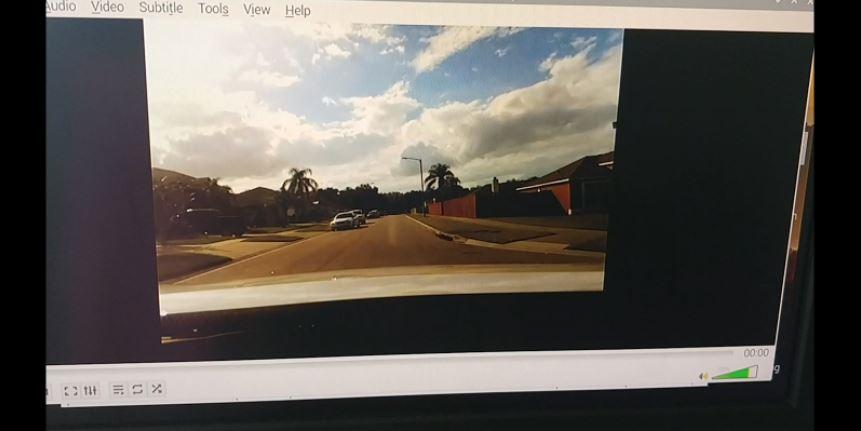
#!/bin/bash

# set variable form the date when=$(date)

# make sure dashcam.log is present touch dashcam.log

# mv the current video to the same name but with the date added  mv dashcam.flv $(date+%F-%H:%M).dashcam.flv

# log to dashcam.log every time the service is started echo "Started at: $when" >> dashcam.log

# record at 1024x760 with a Desktop preview window of 640x480, pipe to ffmpeg and output dashcam.flv raspivid -t 0 -w 1024 -h 760 -fps 25 -b 5000000 -p 0,0.640,480 -vf -o - | ffmpeg -i - -vcodec copy -an -f flv -r 25 -pix_fmt yuv420p dashcam.flv -y
shutdown.sh
#/bin/bash

sudo shutdown now
Now we can start the dashcam service:
sudo systemctl start dashcam
Next I set a cronab to restart the RDC every 6 hours, so it's not one continuous video. I set crontab as follows:
0 */6 * * * /home/pi/Desktop/startdashcam.sh >/dev/null 2>&1
Ok, so we're all set with the software side. Scrolling through thingiverse.com I found the perfect case (https://www.thingiverse.com/thing:2797816). It stands upright on a base and can accommodate the Pi Zero W, camera and enough space for the heatsink as well. I fired up my 3d printer and printed the three pieces. It came out quite nicely.
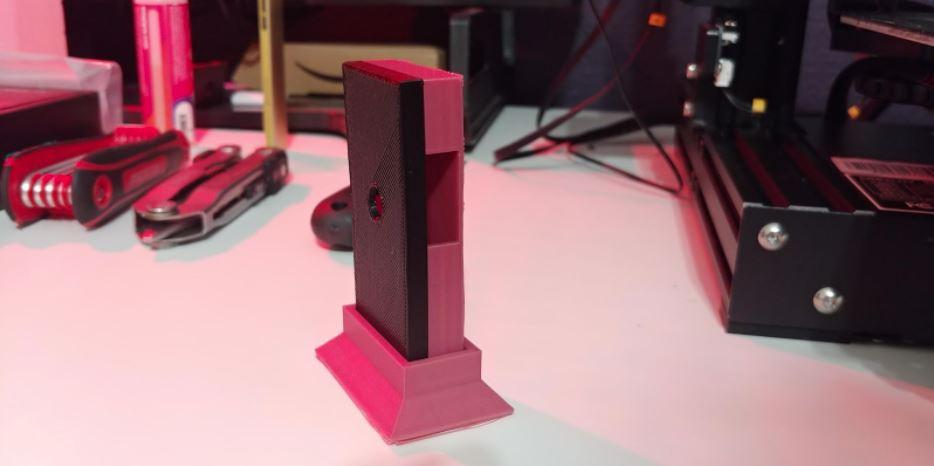
My next step was to place the Pi Zero W and camera into the casing and mounting it in my test vehicle. I affixed the base to the dashboard with the command strips or Velcro. Next I connected the pi to the usb port in the vehicle, If you don't have a USB port or want to power it via a battery I used the portable charger. The one I used has 15000mAh of power and will keep the Pi Zero running for at least 12 hours.
Now that we have everything set I advised my brother-in-law on how to use it. The primary way to connect it is to a display with hdmi inputs. Power it up and wait for the desktop to load, you should see a window with the video recording. To stop it click the stopdashcam.sh. Next click the network interface on the top right and connect to your wifi and set a static IP address. That's it.
Now when you're parked at home you can access your RDC via an sftp client from your phone or tablet (Android/ Admin Hands or iPhone/ FTPManager) using the IP address and password you set on the pi.
They're is still room for improvement but this should get you going. Think about adding GPS or 5g accessibility or even syncing the data automatically when it connects to the home network.

Recent Articles


