
VirtualBox: Bits and Bytes Masquerading as Machines
As our home computers become more robust, we can do more powerful things with them. Virtualization isn't new; it's almost as old as computers themselves, but the ability to run virtualization platforms on a typical home computer is relatively new and becoming more exciting every day.
For the uninitiated, virtualization in the context of this article refers to the ability to run a full-blown operating system within an application running on an existing computer. For example, virtualization allows us to run Windows XP in a window on a Linux desktop, a full-blown LAMP server on a Windows machine, or BSD inside a Mac OS machine. The combinations are endless, and any relatively modern personal computer is likely to be beefy enough to handle it.
So why would you bother? Well, only those who haven't been exposed to virtualization generally ask this question. Once the benefits and neato factors of desktop virtualization become apparent, it's hard to stop the ideas from flowing. In my opinion, the two major benefits of virtualization are ease of backups and host system stability. If I want to figure out how to set up a LAMP server, I have two choices: get my hands on another physical machine or do it in a virtual machine. Either way will leave me with a fully functional LAMP server, but the virtual machine costs me nothing and is set up on my existing computer without making any system changes to it.
Once my LAMP server is happily humming away, it would behoove me to have some off-site backups of it. With a physical server, I would need to have yet another machine of some kind perform off-site backups, and bare-metal restores can be tricky if the entire machine melts down. With a virtualized LAMP server, all I have to do is copy the files that the virtual machine is composed of, burn them to CD/DVD and chuck it in a drawer—cheap and easy.
Virtualizing requires two distinct components: a host machine and a guest. The host machine is your desktop or laptop where the virtualization software is installed. The more common virtualization applications on the market these days are VMware, Win4Lin (Windows virtualization only), VirtualBox and Parallels, with more offerings appearing every day. Although many of these products also provide enterprise-level server virtualization, in this article, I focus on the home enthusiast with a typical Linux computer to get things rolling.
It makes the most sense to use innotek's VirtualBox, because unlike the other virtualization offerings, VirtualBox has a GPL'd Open Source Edition (OSE). The closed-source edition has dual licensing, in that it is gratis for personal and evaluation use but fee-bearing for enterprise use. The OSE is licensed under the GNU GPLv2 but is missing some well-thought-out functionality that is available in the non-GPL'd editions. The missing functionality from the OSE includes:
No RDP support—you cannot connect to VirtualBox virtual machines from a remote location.
No USB support—USB devices won't work in the virtual machine.
No USB-over-RDP support (I guess that makes sense given the first two limitations).
No shared folders—you will not be able to share data between the host and guest machines.
No iSCSI initiator—SCSI disks cannot be used as virtual disks.
VirtualBox downloads are available for Windows, OS X and a wide variety of Linux distributions. I am running Ubuntu Gutsy Gibbon on my Dell Inspiron 9400 (1.83GHz Core Duo with 1GB of RAM), so I installed the 13.6MB virtualbox_1.5.2-25433_Ubuntu_gutsy_i386.deb. Note that the OSE is available only in a tarball, but because I am installing VirtualBox for personal and evaluation use, I am lazily installing the Debian binary (Figure 1).
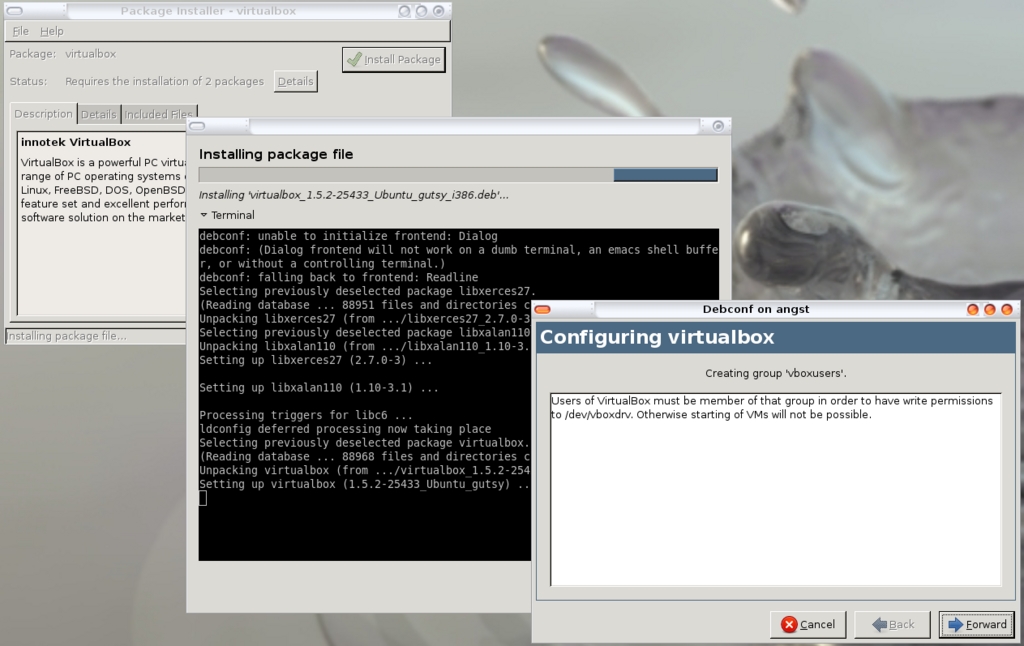
Figure 1. Installing the VirtualBox Gutsy Gibbon .deb Package
The Gutsy Gibbon VirtualBox has some dependencies, which Synaptic took care of for me. If you run into dependency problems, ensure that you have libxalan110 and libxerces27 installed. Also note that at the end of the VirtualBox install, a dialog box containing instructions on how to set the permissions of the /dev/vboxdrv file is displayed. Pay attention to those instructions as you will need them later.
After installation, I found VirtualBox under my Ubuntu Menu→System Tools slot.
Because I opted for the personal evaluation binary, I had to accept the PELA and fill in a quick registration at first launch.
There are two parts to creating any virtual machine: the creation of the virtual machine container and then the installation of the OS into that container. To do the first part, start VirtualBox and click the New icon. This opens up the New Virtual Machine Wizard (Figure 2).
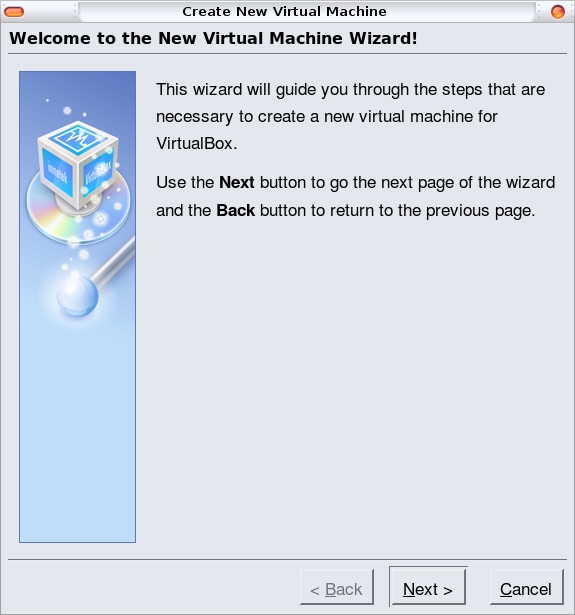
Figure 2. The VirtualBox New Virtual Machine Wizard
First, you must name your virtual machine. I know from experience that I will create many, many virtual machines, so I have opted to name them each as the OS and then its function. In this case, I want to see whether I can run our podcasting rig out of a VirtualBox virtual machine, so I'm going to install dyne:bolic into my virtual machine. Therefore, I name this virtual machine Dynebolic-Podcasting and select the Linux 2.6 kernel OS (Figure 3).
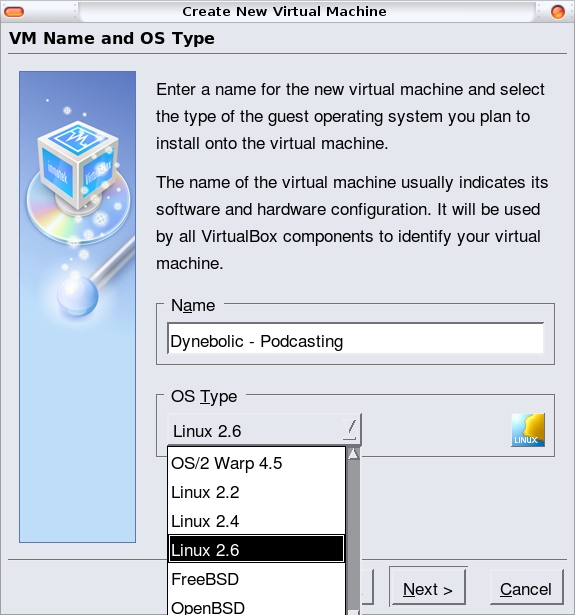
Figure 3. Select the virtual machine OS and set the name.
Like a physical machine, a virtual machine needs some RAM. On the next screen, the wizard suggests 256MB of RAM. However, because I know that crunching a big Ogg file can take a system to its knees, I allocate 512MB to this virtual machine (Figure 4).

Figure 4. Setting the RAM of the Virtual Machine
What does the virtual machine need next? Well, just like a regular machine, it needs a hard drive. I know from experience that I can use a CD/DVD ISO file (like my friendly dyne:bolic ISO) as the bootable hard drive, but VirtualBox's new machine wizard doesn't allow for that. I will be able to add my ISO later on, but not right now. So, as counter-intuitive as it seems, simply click the Next button without setting up any disks and acknowledge the error dialog that tries to stop this folly (Figure 5). Click Finish, and voilà, you have a shiny new dyne:bolic virtual container.
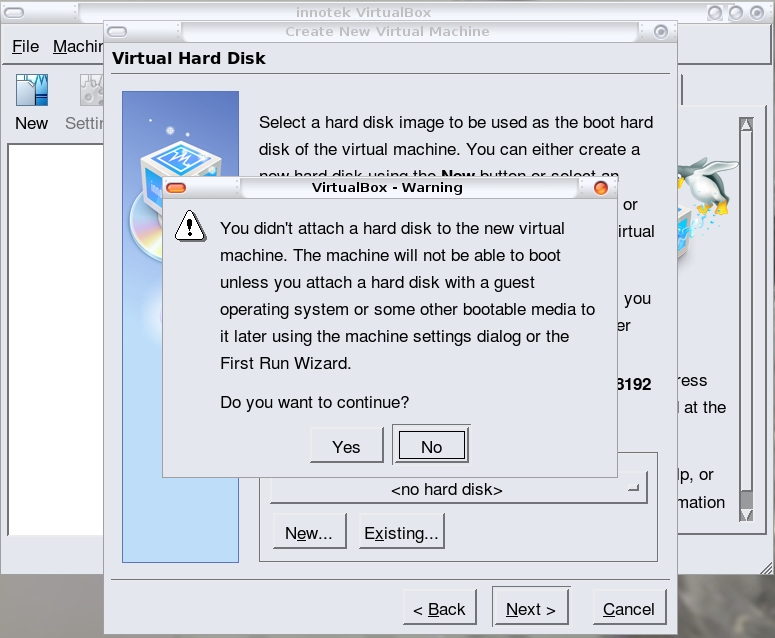
Figure 5. VirtualBox's Caution Dialog about Not Creating a Hard Disk
Sadly, this virtual machine will not boot, because I still don't have a hard drive or other bootable media. I want this thing to boot the dyne:bolic ISO image I have stored on my hard drive, so I have to mount a virtual CD/DVD drive into my virtual machine. This is one area where virtual and physical machines differ. If this were a physical machine, I would not only have to attach a CD/DVD drive to the machine, but I also would have to insert my dyne:bolic CD into the drive for the machine to boot in to it. With a virtual machine, I merely point to the ISO image, and VirtualBox is smart enough to understand that it is to boot from it. To accomplish this rather unintuitive task, follow these steps from the main VirtualBox screen:
Highlight the virtual machine you just created.
Click the blue CD/DVD-ROM label in the right column.
Click the Mount CD/DVD Drive check box (Figure 6).
Click the ISO Image File check box.
Click the file folder browse icon next to the ISO Image File drop-down list box.
Click the Add button and browse for your ISO image (Figure 7).

Figure 6. Create a Virtual CD/DVD ROM Drive

Figure 7. Use an ISO file from which to boot the virtual machine.
Note that the screen from Step 2 above also provides the interface to add all sorts of ports and storage devices to the virtual machine. I'm happy running my dyne:bolic as a live CD, but if I wanted to install it into this virtual machine, I would have to create a hard drive into which to install it.
There are two types of hard drives in the virtual world: those that take up all the space they are allocated right off the bat, and those that can grow into their maximum allocated size as needed. I'm a big fan of the second type, because it allows me to allocate large amounts of disk space to my virtual machines without fearing that I will lose all that space from my host machine right away.
To create a growable hard disk, get yourself back to the main VirtualBox interface and ensure that the virtual machine is shut down. Then, follow these steps:
Highlight the virtual machine to which you want to add a drive.
Click the blue Hard Disks label in the right column.
To add a primary master drive, select the Primary Master check box.
Select the file folder browse icon next to the Primary Master check box.
Click the New button.
Select the Dynamically expanding image check box, unless you have a reason to select the Fixed-size image, and click the Next button.
I recommend naming your disk file(s) with the same name as the virtual machine to which they belong. There are instances where you might want to share disks between virtual machines, and therefore this naming convention might not make sense, but for the most part, the “one-disk-one-machine” philosophy works well.
Use the Image Size slider, or type in the desired disk size (Figure 8).
Click the Next button and the Finish button, and you now have a disk for your virtual machine.
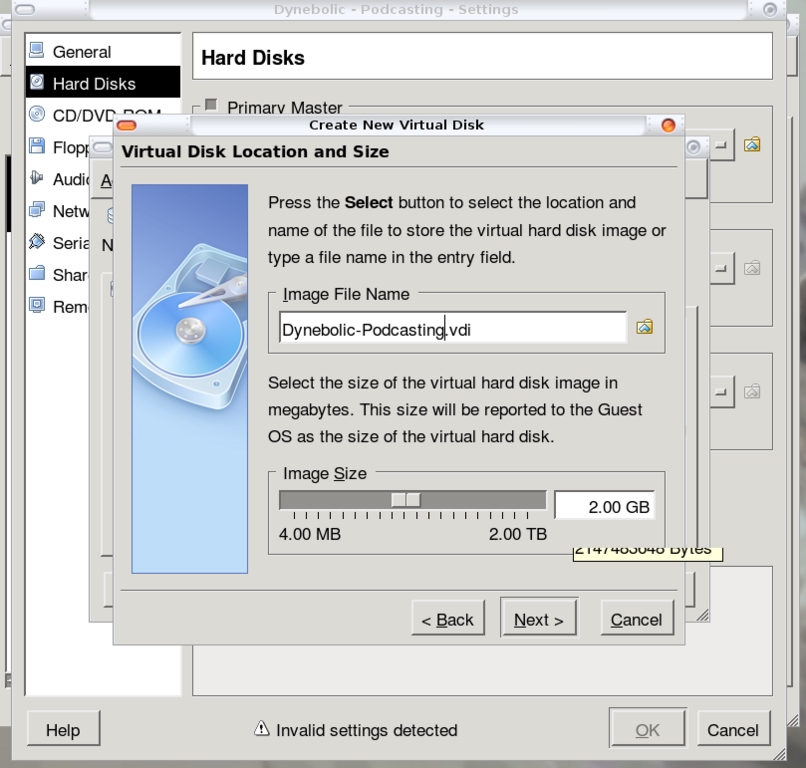
Figure 8. Add a hard disk to the virtual machine.
If you've done everything right, the main VirtualBox screen will show your ISO under the CD/DVD-ROM label (remember, I didn't actually create a hard disk for my machine, so it doesn't show in my screenshot—Figure 9).

Figure 9. Newly Created Virtual Machine Overview
Let's turn this baby on and see what happens. To turn on your new virtual machine, highlight it in the left pane of the VirtualBox interface, and then click the Start button in the toolbar. Note the Auto capture keyboard notification dialog. Essentially, it is notifying you that once you click anywhere inside your running virtual machine, all your keyboard keystrokes from that point on will be sent to the virtual machine rather than to the host machine. This may not seem like a big deal, but trying to shut down your machine or even resize a window when you have no keyboard or mouse control of the host machine is really quite difficult. In order to free your mouse and keyboard from the confines of your virtual machine, you have to press the right-Ctrl key. You can specify a different Auto capture escape key by going to File→Preferences→General→Input, if the default right-Ctrl key doesn't suit you.
Your mileage may vary, but the next thing I encountered was another dialog box full of doom and gloom. This one informed me that my logged-in user (jdw) wasn't part of the vboxusers group and therefore could not access the /dev/vboxdrv file. It would seem intuitive to me to add the user that is installing VirtualBox to the vboxusers group to avoid this error message, but that isn't part of the installation process. To do it manually on my Ubuntu box, I simply edit my /etc/group file to add jdw to the vboxusers line and relog in (Figure 10).
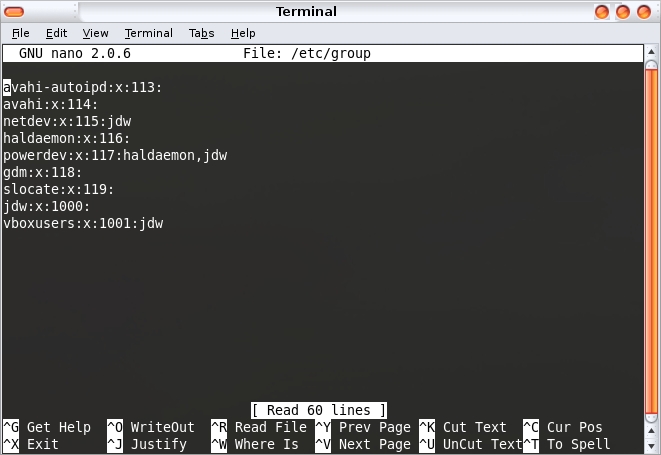
Figure 10. Adding My User to the vboxusers Group
My new group membership is all I need to launch my virtual machine successfully, and I am now running dyne:bolic in VirtualBox on my Ubuntu Gutsy machine (Figure 11). I have good reasons for wanting to run dyne:bolic in a virtual machine—primarily because dyne:bolic doesn't like my actual video card, an ATI x1400, but it has no problems with the innotek virtual VGA driver. I also get the added benefit of not having to boot my system in dyne:bolic, so I retain access to my host machine while I'm using it.
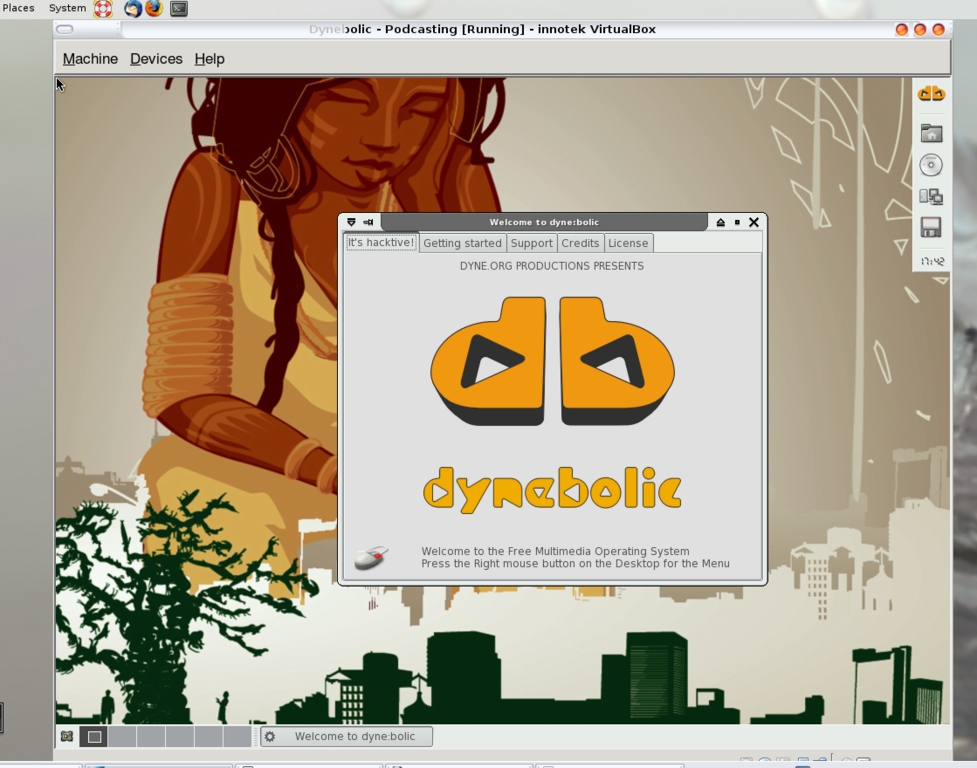
Figure 11. Dynebolic Running in a VirtualBox Machine on a Gutsy Gibbon Desktop
VirtualBox provides some applications called Guest Additions. If you've ever used VMware, you've likely stumbled across VMware Tools. Guest Additions are much the same thing in that they are installed into the guest machine and provide some functionality, such as arbitrary window size and better mouse control, to the guest session. You certainly can run a VirtualBox virtual machine without Guest Additions installed, but the experience is better with them.
Guest Additions are installed into the virtual machine itself rather than onto the host machine. Therefore, for every virtual machine you have, you'll need to install the Guest Additions through the machine's handy Install Guest Additions menu option in the Devices menu.
Earlier, I mentioned that one of the great benefits of using virtual machines over physical machines is that a complete bare-metal backup is as easy as file copy. There are other benefits in this area as well though, such as snapshotting.
When a virtual machine is running, select Machine→Snapshot to take a quick restore point for the machine. This is invaluable when you're installing new software, reconfiguring the virtual machine or doing something else dangerous. If you muck it up, you simply can shut down the virtual machine, select the Snapshots tab and restore the machine from any of the snapshots you've taken. To restore the machine to a previous snapshot, right-click the desired snapshot and select Revert to Current Snapshot (Figure 12).
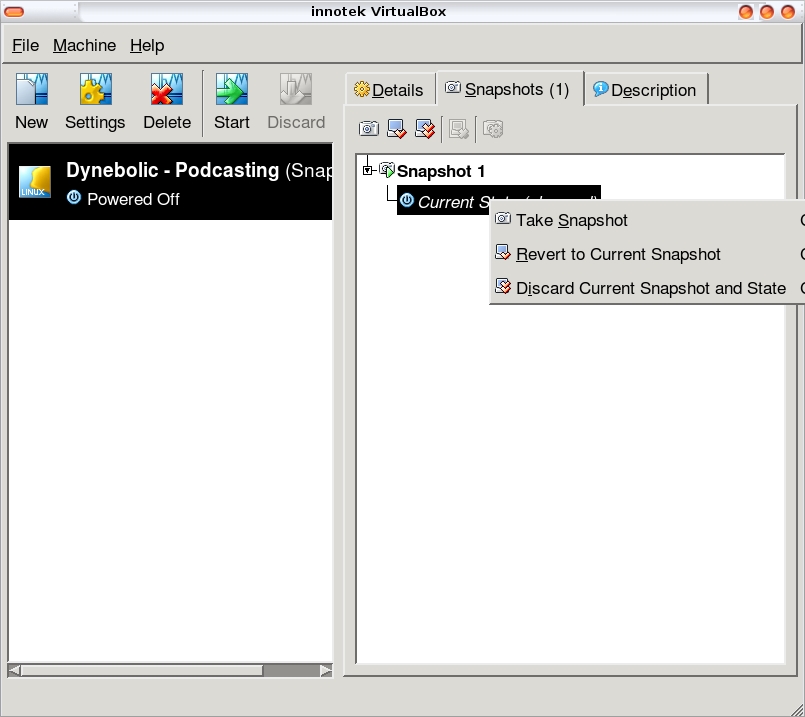
Figure 12. Select a snapshot to restore.
VirtualBox comes with a surprisingly complete help manual. Pressing F1 on any screen brings up the VirtualBox manual, although it isn't context-sensitive. The help manual is well laid out and easy to understand. There also are forums, IRC and a mailing list on the VirtualBox site as well as a public bug tracker.
Additionally, there's a complete set of technical documents available on the VirtualBox Web site that is aimed at developers and those who want to contribute to the OSE version of the product.
Although the most common use of virtualization technologies is still certainly in the enterprise space, there are enough desktop virtualization applications out there now that a home user can join the fun. Whether you need an OS to study for a certification, want to run an OS that your host machine can't run directly (like me), want to run a server but don't have another physical machine to use, or just plain-old want to experiment, VirtualBox is a quick-and-easy way to jump into the fray.
Resources
Open Source VirtualBox and Other Editions: www.virtualbox.org/wiki/Editions
Downloading VirtualBox: www.virtualbox.org/wiki/Downloads
VirtualBox Community: www.virtualbox.org/wiki/Community
Jon Watson is a CompTIA Linux+ certified Linux integration consultant. Jon lives in a 143-year-old house in the beautiful Canadian maritime province of Nova Scotia with his wife Kelly and their two dogs.


