
Cooking with Linux - Still Searching for the Ultimate Linux Distro?
What distribution are you loading up today, François? MCNLive? Very nice, and compact too. When you get a chance, you should copy it to your USB key. That way, you always can carry a live Linux distribution with you. Quoi? You're not sure if this is the one? I see. Yesterday, you were running OpenSUSE 10.2, and the day before you installed Debian Etch in the morning and Kubuntu Feisty in the afternoon. Last week, you managed Fedora Core 7, CentOS 5, Mandriva Corporate Desktop 4.0, Slackware Linux 12 and a half-dozen others. Are you having trouble finding something you like? You like them all but you just can't choose, eh?
Well, mon ami, I hate to interrupt this voyage of discovery, but I need that wine list I sent you a couple of days ago. What do you mean, you don't have it? It was on the machine where you are installing the distros and you erased the disk? You know, François, there are better ways to try out all these distributions. For the moment, leave what you are doing and head down to the wine cellar. I can see our guests approaching the restaurant now, and they will be here any second. Bring back the George du Beouf Cuvée Saint Valentin from the East wing. There are three cases right next to that old suit of armor you brought in last year. Vite!
Welcome, everyone, to Chez Marcel, where fine wine meets great Linux and open-source software. Please, sit down and make yourselves comfortable. I've already sent my faithful waiter on a quest to retrieve the perfect wine for tonight's menu. While we wait, I'm going to introduce you to an impressive parade of Linux distributions, courtesy of system virtualization. Best of all, you can keep running your current system while you take these others out for a spin.
Ah, glad to have you back, François. Please, pour for our guests while I introduce the first item on tonight's menu.
Fabrice Bellard's QEMU is a free, open-source, machine emulator and virtualizer. The reason for this distinction is that QEMU can emulate different machine types and hardware, but the performance, although not bad, can be greatly improved upon. Virtualization is achieved by using a kernel module that executes code on your system processor rather than emulating the processor. Another reason this is an important distinction to make is that QEMU also can emulate different processor architectures. For instance, if you wanted to run a SPARC or a PowerPC machine on your Intel processor, you could. Fabrice's Web site has a nice table showing the various processors that can be emulated. There also are some prebuilt QEMU images of different operating systems ready for download—you even can get FREEDOS and Minix if you like. What we're going to do though, is install Linux, lots and lots of Linux distributions.
Most modern Linux distributions come with QEMU, but the latest source always is available from fabrice.bellard.free.fr. The virtualization kernel module, however, usually requires that you download it from the site and build it yourself. Although you don't need it specifically, the performance improvements are dramatic and well worth the effort. Because this is a kernel module, you load it with the modprobe kqemu command.
Let's take a look at how QEMU works. For this first demonstration, I'm going to install Puppy Linux from an ISO image downloaded from the Puppy Linux Web site. Because Puppy is a cute little distribution with minimal space requirements, I create a relatively small disk image (a virtual hard disk) for it to live in. This is done with the qemu-img command:
qemu-img create puppy216.img 256M
The above command creates a raw format disk image by default. There are a few different image formats, most notably qcow2, which is a more portable image format, useful if you want to install that other OS—you know, the one from Redmond. Our next step is to install Linux into this disk image, which I do using this command:
qemu -cdrom ../isos/puppy-2.16.1-seamonkey-fulldrivers.iso \
   -hda ./puppy216.img -m 256 -boot d
Several interesting things are happening here, and I'll describe each one briefly. For starters, the -cdrom parameter is, in fact, the path to the CD-ROM image from which you are installing your distribution. If you were using a physical CD-ROM, that path would likely be something like /dev/cdrom. The next parameter, -hda, defines the path to the disk image we just created. This is followed by the -m switch, which, in this case, allocates 256MB of RAM to the running session. Finally, we have -boot, which identifies the boot drive (our CD image), the so-called D drive. As soon as I press Enter, the Puppy Linux install starts (Figure 1).
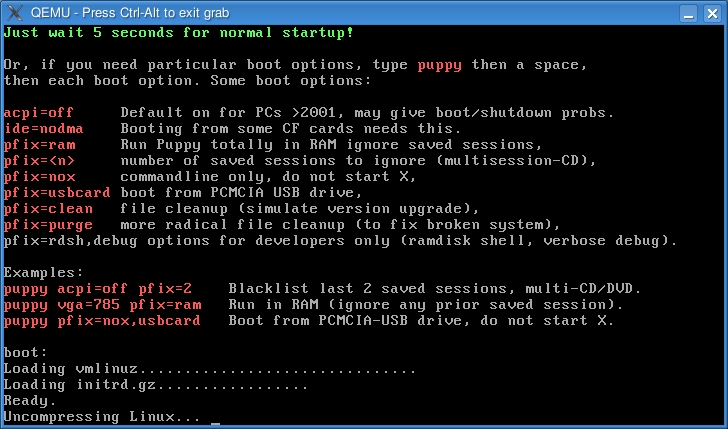
Figure 1. QEMU boots a Puppy!
From here, you simply follow the steps for a Puppy Linux installation (or those of whatever distribution you are installing). Before I show the result, I'd like to share one more parameter with you—the -std-vga parameter. This tells QEMU to simulate a standard VGA card with Bochs extensions. You also can use the -localtime parameter to tell QEMU to run your session using the local machine time, as opposed to the default UTC. Remember the kernel acceleration? Try using -kernel-kqemu. This is only a small sample. There are network parameters, USB parameters, file-sharing parameters (SMB), devices parameters and more. I'm covering only the basics here, so make sure you check out the man page for the qemu command. Remember also that my settings for this example imply a very small footprint distribution. To run something slightly larger, such as MCNLive (a great live distribution based on Mandriva), I would create a larger disk image (see Figure 2 for a shot of MCNLive in action).

Figure 2. A Lovely Graphical Desktop, Courtesy of MCNLive and QEMU
When you start working in a QEMU session for the first time, you may find yourself wondering why you can't mouse out of the session. This is the first and most important lesson you will learn about QEMU keyboarding. Once you click in a QEMU session, it takes control of your mouse. Pressing Ctrl-Alt releases control so you can work on your master system. To return to the QEMU session, simply click anywhere on the window. The second most important keyboard command is Ctrl-Alt-F, which switches to and from full-screen mode.
Now, Puppy Linux and MCNLive are live distributions, but both offer an install icon on the desktop. Once a distribution is installed, starting the session is a little different, mostly because you won't be booting from the CD-ROM ISO image. In this example, I simply identify my hard disk image for QEMU and select the amount of RAM I want to use:
qemu -hda ./mcnlive.img -m 384
All this command-line work is easy enough, but there are dozens of qemu command parameters, not to mention tons of possible options or combinations of those. That's why we are going to look at some great graphical tools for working with QEMU, starting with Erik Meitner and Linas Zvirblis' Qemu Launcher.
Qemu Launcher provides a front end to basic as well as advanced features of the QEMU command suite. There are three tabs: Configurations, Launcher Settings and About. Most of the action takes place under the first tab. For starters, you can create a set of configurations based on existing QEMU images simply by entering a configuration name, a file location for your hard disk (the image created by qemu-img) and defining the memory you want to allocate. Click the Save button, and you are ready to start your virtual machine by clicking the Launch button on the lower right of the Qemu Launcher interface. In Figure 3, I've added a profile for Debian Etch 4.0 to launch with 384MB of RAM.

Figure 3. Adding an existing QEMU image under Qemu Launcher is easy.
I entered the path to the Debian Etch image, but I also could have clicked the New button next to the Hard disk 0 label and created an image using the pop-up dialog. My next step would have been to click the Use CD-ROM check box, select CD-ROM from the Boot disk drop-down list, and continue normally from there. As you can see, the Configurations tab is also a multitabbed affair that allows you to access other QEMU settings. Under Linux boot, you can specify an alternate kernel image or pass kernel parameters. The Network tab offers control over your network card (the default is to use a pass-through to your main system) and also provides access to a Samba share—useful should you want to run Windows. From the Hardware tab, you can choose an alternate video device, set the clock, define your hardware or turn on system sounds to name a few options. Finally, the Emulator tab gives you control over the QEMU session itself.
Incidentally, a recent alternative to QEMU is KVM (Kernel Virtual Machine), which works by taking advantage of processor-based hardware virtualization technology. On the Intel platform, this is known as VT, which AMD processors call their hardware virtualization, Pacifica. This means you can take advantage of Linux KVM to run your virtual machines with substantially better performance than you can with straight software virtualization. The catch, as you might expect, is that not every machine out there supports hardware virtualization. To find out whether your system is a candidate, execute this little snippet of code from a terminal window or shell:
grep -E '^flags.*(vmx|svm)' /proc/cpuinfo
If you see the string vmx or svm returned, your processor is ready. If not, you'll have to stick with the software-based virtualization provided by QEMU. The KVM commands are pretty much interchangeable with those of QEMU, as are the install and operating system images. In fact, KVM is based on QEMU.
The next item on tonight's menu isn't as sophisticated or flexible (you can't create images), but those of you with a soft spot for Ruby may want to check out Mathieu Mast's Qemu Supervisor, a front end based on, you guessed it, the Ruby programming language. Aside from Ruby itself, you also need to have the Ruby GTK2 bindings, the libgtk2-ruby package and its dependencies. Once these prerequisites are met, it's only a matter of extracting the Qemu Supervisor source and running a make install from the source directory. To run the program, execute the command qemu-supervisor. From the interface that appears (Figure 4), you can choose to add QEMU images for launch.
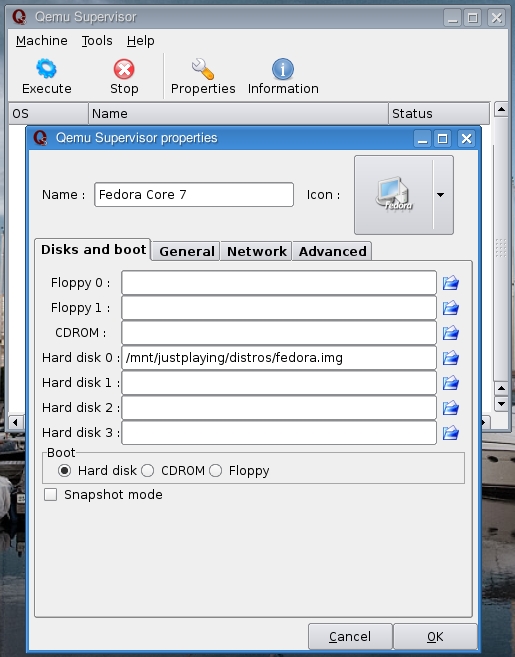
Figure 4. Now you can Ruby-up your QEMU sessions with Qemu Supervisor.
The final item on tonight's menu, Rainer Haage's Qemulator, is a must-see stop on your search for the ultimate QEMU front end to all your ultimate Linux (virtual) boxes. This impressive and feature-rich application covers pretty much every aspect of QEMU's operation, including creating disk images (Figure 5), installing distributions, monitoring running instances and so much more.
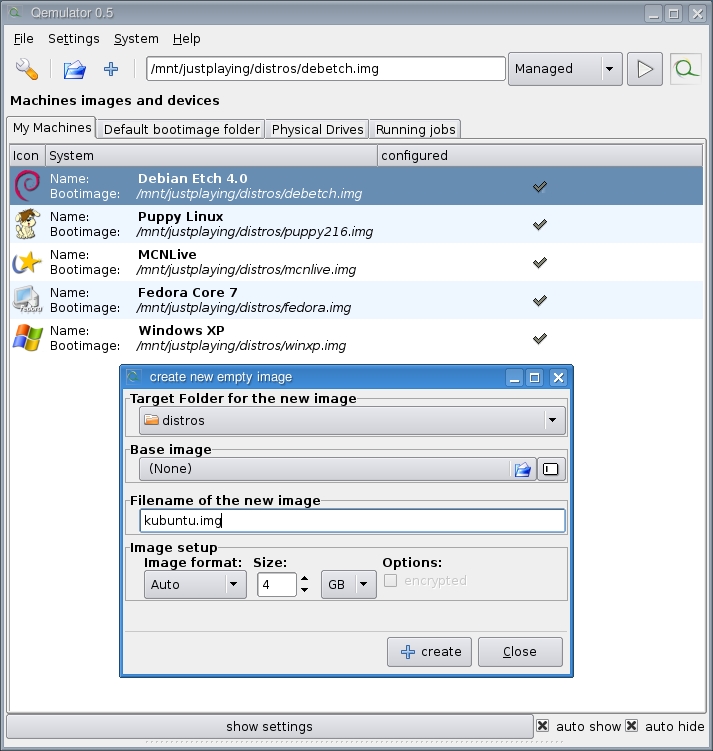
Figure 5. Qemulator makes QEMU easy with tools for image creation and more.
Like the other programs featured here, Qemulator provides easy access to existing QEMU images. Click the Plus sign at the top of the main window, enter the basics and save. To run a virtual machine, simply click the run arrow at the top right. The main window lists existing images under the My Machines tab. Each of these machines can, in turn, be configured or changed by clicking the Show Settings button at the bottom of the main window (Figure 6). The tabbed view provides access to image settings, disks and other hardware, network settings and more. Several machines can run simultaneously (given adequate resources) with access to each under the Running Jobs tab.
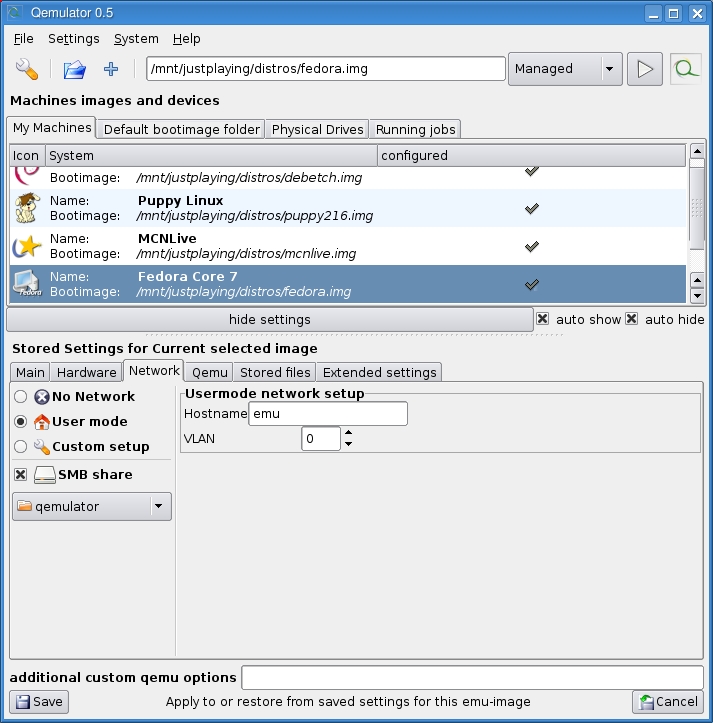
Figure 6. Easy access to all QEMU settings are a click away.
There are some nice, somewhat hidden features as well. For instance, right-click on a machine in the My Machines list, and a small pop-up menu appears. From that menu, you can select Show command line—perfect for the curious who want to find out exactly what the qemu command is doing once all those settings have been tweaked. From that same menu, you can get information on the image itself, change settings and more.
To round things out, Qemulator even provides an Install Wizard to take you through the steps of loading up yet another distribution. Simply click System on the menu bar and select Install system.
Looking around the restaurant floor, I see that many of you are already discovering a downside of running all these virtual machines. Virtual or not, each instance of Linux (or whatever else) that you run, requires processor time and system memory. The more VMs you choose to run, the more resources you will be drawing on. I run a second distribution happily on my dual-core notebook, but a third is pretty much out of the question for this machine. The more resources you can provide, the faster your virtual machines will run and the more virtual machines you can run.
Ah, if only we could find some way to run multiple instances of our award-winning wine cellar. But then, François and I might not have the pleasure of sharing ours with you, mes amis. And now, sadly, the time has arrived, and we must head back to our non-virtual homes. However, we here at Chez Marcel would never dream of sending you off without a final glass of wine. François, please take a moment to refill our guests' glasses one last time. Raise your glasses, mes amis, and let us all drink to one another's health. A votre santé! Bon appétit!
Resources
QEMU: fabrice.bellard.free.fr/qemu
Qemu Launcher: https://gna.org/projects/qemulaunch
Qemulator: qemulator.createweb.de
Qemu Supervisor: rubyforge.org/projects/qemu-supervisor
Marcel's Web Site: www.marcelgagne.com
The WFTL-LUG, Marcel's Online Linux User Group: www.marcelgagne.com/wftllugform.html
Marcel Gagné is an award-winning writer living in Waterloo, Ontario. He is the author of the all-new Moving to Free Software, his sixth book from Addison-Wesley. He also makes regular television appearances as Call for Help's Linux guy. Marcel is also a pilot, a past Top-40 disc jockey, writes science fiction and fantasy, and folds a mean Origami T-Rex. He can be reached via e-mail at mggagne@salmar.com. You can discover lots of other things (including great Wine links) from his Web site at www.marcelgagne.com.


