
Tech Tips
Many of us like to compile our own kernels. In my case, I compile my own kernels for two reasons. First, stock kernels include initrd images that tend to discover my SCSI devices in the wrong order. You can fix the initrd to discover devices properly (I explained how to do that with Ubuntu/Kubuntu in a previous installment of Tech Tips). But, I prefer to avoid the problem by compiling the drivers into the kernel rather than loading them as modules. Second, I just like to run the latest stable kernel available.
I've been playing with synthesizers with a USB/MIDI connection. Much to my dismay, I couldn't seem to make the USB/MIDI connection work with my own compiled kernel. I couldn't find any information on the Web that would point me to the problem, but I eventually stumbled on the answer quite by accident.
The solution turns out to be quite simple and obvious once you look through enough of the kernel configuration options. One problem is that the kernel drivers are organized in such a way that it wasn't obvious (at least it wasn't obvious to me) which drivers to include to make this work. I picked all the MIDI sequencer drivers, so why wasn't it working? The USB driver you need actually resides within the tree for sound drivers, not USB drivers. Select the following from “make menuconfig” (or whichever method you prefer for kernel configuration): Device Drivers→Sound→Advanced Linux Sound Architecture→USB Devices→USB Audio/MIDI driver.
Although, as I said, I generally compile my drivers directly into the kernel, I recommend that you compile this particular one as a module, instead. There's no point in having the module loaded during those times when you're not using the synthesizer keyboard.
Select the above driver as a module, and it creates a module called snd-usb-audio. The module name was the source of my confusion. I found the snd-usb-audio module when I tried to track down what made the stock kernel work, but I dismissed this module as a possible candidate for fixing this problem due to its name. It didn't occur to me that snd-usb-audio had anything to do with MIDI until I stumbled across the label “USB Audio/MIDI” in the kernel configuration. The module name itself makes it seem like the module is meant for an external sound source, not an external MIDI source.
By the way, I was inspired to set this up after getting my daughter a Korg X50, a very affordable and excellent synthesizer keyboard. The latest Korg keyboards don't seem to require any special configuration in order to connect the USB/MIDI port. However, I later discovered that the Yamaha keyboards aren't quite as friendly. You have to change some MIDI settings on the Yamaha Motif ES keyboards to make the keyboard work with the computer via the USB port.
This may seem self-evident, but the trick is to follow the instructions in the Yamaha Motif ES manual for connecting the USB/MIDI to the computer. Well, duh, right? RTFM, or more politely, read the fine manual. But when you encounter problems, it's sometimes tempting to look for tips on the Web to make the keyboard work. Be warned that you should not follow many of the instructions you'll find on the Web. These instructions are generally for Windows and the Mac, and they'll tell you how to configure the Yamaha keyboard to send the MIDI signals through the computer and echo them back to the keyboard. It's probably possible to set up the Linux driver and/or patch dæmons (such as jackd) to make Linux applications work with this configuration, but that's not how Linux behaves by default. So, this is definitely a case where you should avoid the Web and RTFM instead.
Maybe you can't afford even the Korg X50, but you want to try your hand at composing music or even just playing MIDI files. The problem is most soundcards that work with Linux do not come with a very impressive collection of MIDI sounds (such collections are usually referred to as soundfonts). Free soundfonts are available, but they don't sound as professional as some of the ones you can purchase. For example, SONiVOX MI sells a fantastic General MIDI (GM) soundfont, and it's available for just under $100 US. If you want to use a keyboard to record MIDI sequences, you can purchase one of many cheap MIDI keyboards that do nothing but send MIDI signals (they have no synthesizer included). These keyboards sell for well under $100 US depending on the quality that you'll find satisfactory.
Here's how to use the SONiVOX soundfont. First, purchase the font from the URL listed below. It has been too long since I've purchased my copy for me to recall whether the file you download is a ZIP file or a Windows executable. Even if it's a Windows EXE file, you should be able to unpack it with Wine.
Now, download and install fluidsynth and the Qsynth front end (it's as simple as an apt-get install fluidsynth qsynth from Debian and many Debian-based distros). You may have to load the ALSA sequencer drivers manually or specify the module in a file like /etc/modules. The module you want to load is snd-seq, and the command to load it is modprobe snd-seq.
Start up Qsynth, and you'll see a window like the one shown in Figure 1.
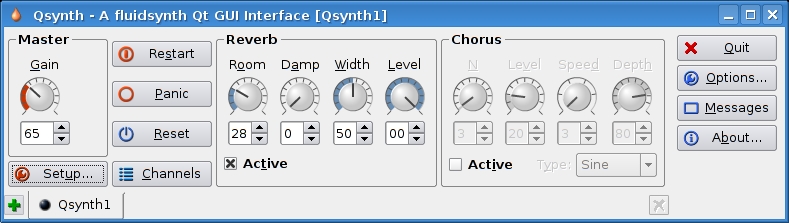
Figure 1. The Qsynth Front End to fluidsynth
Press the Setup button. You may have to configure Qsynth with the MIDI and Audio tabs depending on the distribution and setup you use.
Now, click on the Soundfonts tab (Figure 2), and click the Open button to navigate to the SONiVOX soundfont you downloaded and installed. Click the Open button in the file picker, and you're done. Click OK on the window, and you should be ready to go.

Figure 2. The Soundfont Setup Tab in Qsynth
SONiVOX 250MB GM Soundfont: www.sonivoxmi.com/ProductDetail.asp?Item=GMWavetable250Meg
On most PCs, you can start more than one X session and switch between them with Ctrl-Alt-F7 and Ctrl-Alt-F8, for example. Why would you do this? Well, some X applications don't really need a full-blown window manager gobbling up your precious RAM and CPU. For example, VMware Workstation and Stellarium are two applications that I use (rarely simultaneously, by the way) that don't need anything but a display. I don't need cut and paste with Stellarium, and VMware is basically a display manager in itself. In addition, just playing with X in this way makes you understand the interrelationships between X, your window manager and your applications.
Start your X engine (aka implicit xinit). You probably just use startx, and it reads your .xinitrc file and, doing what it's told, thereby launches X on the first available console, complete with window manager. This is probably display :0.
Start your X2 engine (aka explicit xinit). From a terminal, you can launch another X server on your machine:
xinit /opt/vmware/workstation/bin/vmware
 ↪-display :1 -- :1 &
The first argument taken by xinit is the path for the client that will be launched. It must be an absolute path starting at /. Everything after the -- is passed to the X server. Read the xinit(1) man page a bit for more fine examples.
It's often extremely frustrating or time consuming to run an xterm on a remote host just to fork your programs from that remote machine. Why not simply run your window manager there, even though you're not on its console? The window manager is just another X application after all, isn't it?
Fire off your local X server:
xinit /usr/bin/xterm -- :1 &
This yields a vanilla X session with merely an xterm running—no window manager. Now, you need to add permissions to this window session for the remote host. You can tunnel the connection through SSH if your network is insecure, but there's a distinct performance hit. If your network is secure, you can simply do xhost +remotehost and spray directly to your X server.
For tunneled SSH:
ssh -fY remotehost /usr/bin/wmaker
For spray directly:
xhost +remotehost
ssh -f remotehost /usr/bin/wmaker
 ↪-display localmachine:1
The first option, if your remote SSH server supports it, uses a locally defined DISPLAY that then gets tunneled to your local side over SSH. The second option allows remotehost to send X data directly to your local display, then runs Window Maker there but displays it locally. Now, all your desktop actions are done on the remote machine, not locally.
Nicholas Petreley is Editor in Chief of Linux Journal.
Bill Longman is NIS Manager at Sharp Laboratories of America.
Linux Journal pays $100 for reader-contributed tech tips we publish. Send your tips and contact information to techtips@linuxjournal.com.

