
Digital Photography and Linux
This article presents a basic overview of some of the programs available for Linux to create and work with digital images. The programs discussed here are those that were installed by default or by the package management programs of SUSE and Kubuntu on my systems. They are fairly standard and should be available for the major distributions. My preferred desktop environment is KDE, so the choices are slanted in that direction, though I indicate where a program also works on GNOME, or where there is an alternative. This is becoming less of an issue, as it is possible to run GNOME applications on KDE and vice versa. In fact, as the screenshots show, I did all my work in KDE. To bring some organization to the article, the programs are introduced in work-flow order. See the on-line Resources for versions of software used.
To convert images in a nondigital format, it is necessary to scan the image and capture the output into a digital file. The software of choice for this is SANE (Scanner Access Now Easy). SANE takes care of connecting to the physical devices (the scanners) and passing information to and from them. Any one of a number of front ends handles the user interface for the scanner. The two covered here are Kooka and XSane. Kooka is an official part of the KDE Graphics Package, and as such, is found in the KDE menu. XSane is an independent project. Support for scanners is provided by the libraries from the SANE Project, so if you need to determine whether your scanner will work, go to the SANE Web site (see Resources). To scan, open Kooka from the KDE Graphics menu item (Figure 1).
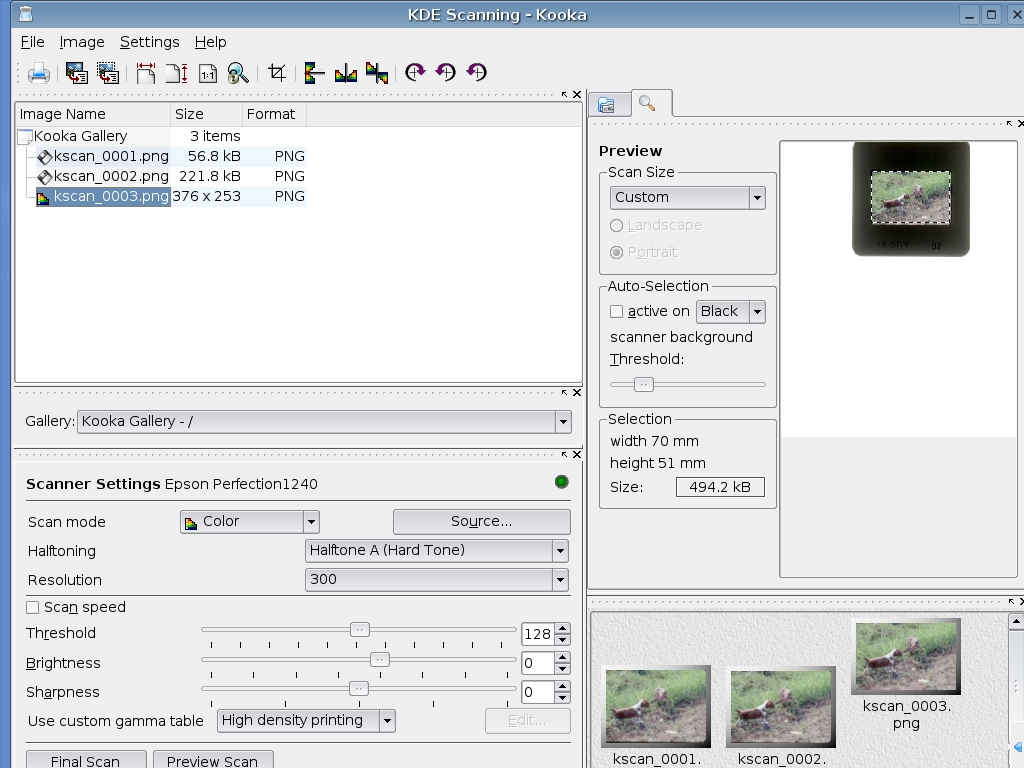
Figure 1. Kooka Showing a Preview with an Area Selected for the Final Scan
Scanning a color photograph entails selecting a Scan mode of color and the appropriate resolution. The Source item also may need to be selected (for instance, I use a Epson 1240U that has the choice of a flatbed scanner or transparency unit). Select Preview Scan. This generates an image in the preview box to the right. It is then possible to use your mouse to select the portion of the preview that you want to scan. Select Final Scan. At the end of the scanning process, a dialog box pops up, asking you in which format to save the scanned image. Saving the image creates a thumbnail image in the box at the bottom right and adds the image to the Kooka Gallery at the top left. For further work with an image, select the Image menu item and then Open Graphic Application to use the image editor you prefer.
XSane can be run either in KDE or GNOME. To open XSane, again go to the Graphics menu item and select XSane. One immediate difference you will notice is that XSane opens a host of windows (Figure 2). I generally have the Standard Options, Advanced Options and Preview windows open in addition to the Program window. This can be controlled by clicking on the Window menu item in the Program window and selecting or deselecting the appropriate items.

Figure 2. XSane with the Preview Image and Final Scan Image
The information in the Advanced Options window will vary according to the capabilities of the scanner you are using. To start a scan, go to the Program window and select the necessary values. To scan a print, select Viewer, Color, flatbed, full color range and 300 in descending order for the output, image type, source, color range and resolution choices. If the output is going to an inkjet, in the Advanced Options section, set the Color correction to Inkject Printers.
With the settings taken care of, click the Acquire preview button in the Preview window. The preview scan displays in the Preview window, and you can use the mouse to select an area for the final scan. Clicking on the Scan button in the Program window initiates the scan with the resulting image displayed in an image viewer. The viewer has some limited abilities as far as editing the image, but its primary purpose is to proof the scan. Selecting the File menu item accesses the Save image menu item. From here, you can save the image in any one of a variety of formats.
A side note—for my scanner, in the Advanced Options section, there is the ability to focus on the glass or 2.5mm above the glass. For negatives in the the film holder or slides in thick mounts, the 2.5mm setting is best. You may want to experiment with this setting to see what works best.
XSane also works as a plugin to The GIMP. This means if you are using The GIMP for your image-editing chores, you can go to File→Acquire→XSane→Device Dialog from The GIMP and call up XSane directly. The final scanned image will be loaded directly into The GIMP for further editing.
For working with pre-existing digital images, we look at two applications, digiKam for KDE users and F-Spot for GNOME users. Both serve as clients for the gPhoto2 libraries. gPhoto2 is an open-source project that has created a software interface for digital cameras. At the time of this writing, it supports approximately 600 cameras (see Resources). digiKam is found in the Graphics menu item on the KDE start menu. Clicking on the program opens a single window (Figure 3).
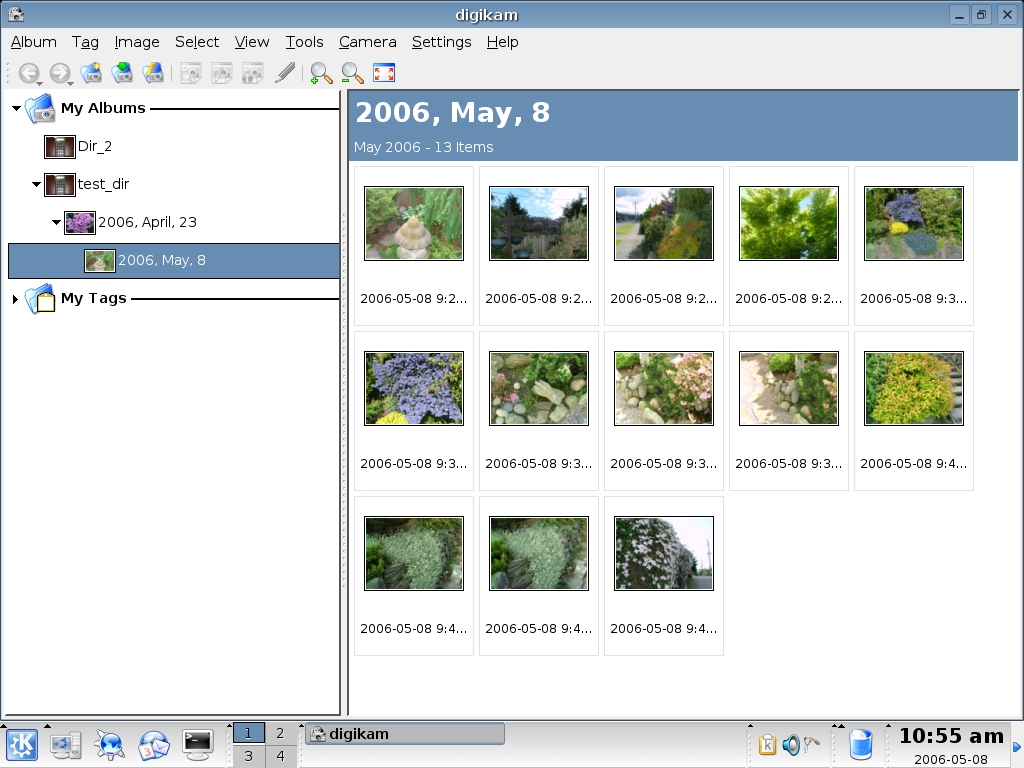
Figure 3. digiKam Showing Downloaded Images
When you open digiKam the first time, you need to set up the camera. Make sure the camera is plugged in to the computer and turned on. Select Camera→Add Camera from the menu bar. First try Auto-Detect. If this does not work, click Add, and browse the list for your camera. Many cameras don't show up in the list but instead fall under the generic category of mass storage devices. Do not despair. When you hook up the camera to the computer and turn it on, it should show up on the desktop as a removable storage device. If this is the case and you cannot find the camera in the list, go to the right side of the window and select the port type (most likely USB) and camera mount path. The easiest way to find the mount path is to right-click the removable storage icon on the desktop and look under Properties.
Once you set up the camera, the fun begins. From the Camera menu item, select the camera or Directory Browse if it is seen as a storage device. This opens a window with the pictures stored on the camera. From here, you can use the buttons across the bottom to work with the images. When you download, you have the option of creating a new directory or storing to an existing directory. The pictures will show up in the right panel of the digiKam window. Opening an image loads it into an image viewer.
One stock capability of note found in the Fix menu item of the image viewer is Red Eye Reduction. The capabilities of the image viewer, as well as digiKam in general, can be extended by installing plugins. digiKam uses the KIPI (KDE Image Plugin Interface, see Resources) to manage plugins. The plugins include a module to work with RAW images. See the sidebar for information on RAW. It is possible to convert a RAW file to a JPEG, TIFF or PPM format. In versions 0.8.1 on, 8-bit RAW files can be opened in the image viewer, with 16-bit support promised in version 0.9.0.
F-Spot serves the same role in GNOME as digiKam does in KDE. It is not as far along in the development cycle as digiKam, so it is not quite as feature-rich. However, it does work well for pulling pictures from a camera and organizing them on your hard drive.
Opening the program presents a single window with a couple panes (Figure 4). In the right pane are thumbnails of the pictures that have been downloaded. Right-clicking on an image brings up a menu that, among other things, allows you to tag the image. There is a set of predefined tags, and you can create your own tags using the menu bar item Tags. The tag labels are listed in the left pane, and selecting them filters the thumbnails accordingly.
An interesting feature of the thumbnail browser is the time-line bar across the top. It represents a visual indication of the number of pictures by month and year. Use the mouse to move the slider (as you do so, you will see a date appear above the slider) to the month and year you are interested in.
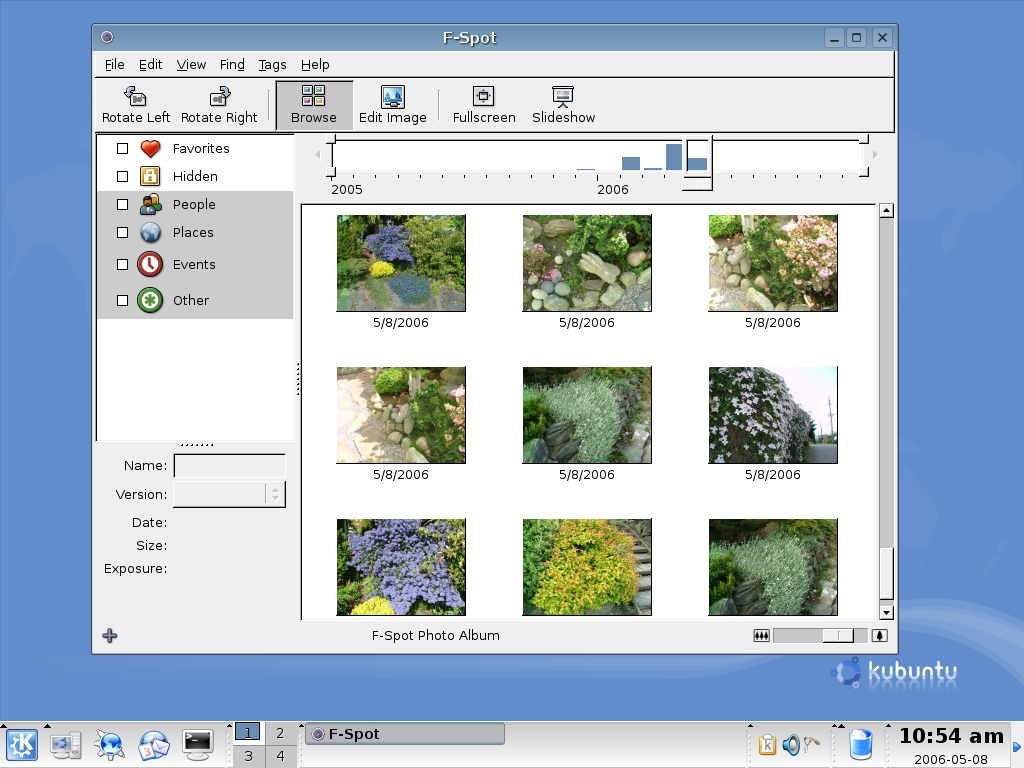
Figure 4. F-Spot showing downloaded images—note the time-line bar across the top.
The discussion to this point has been concerned with getting pictures into the computer from an external source. Some mention has been made of manipulating images. Kooka, XSane, digiKam and F-Spot all can change the imported images to some degree, but to do more in-depth editing, it is necessary to use a dedicated image program. For this task, we look at The GIMP and CinePaint. The GIMP (GNU Image Manipulation Program) has been around since 1995 and is probably the most widely known open-source image program. CinePaint started as a fork of The GIMP in 1998, known as Film GIMP (also Hollywood GIMP and GIMP16) and acquired its current name in March 2003.
The GIMP follows the multiple window paradigm we saw earlier with XSane (Figure 5). The program window contains the toolbox. Placing the cursor over a tool icon brings up a help tip, and selecting an icon loads the tool options into the bottom half of the window. Once a tool is selected, moving the cursor over the image window shows the cursor pointer along with the tool icon, and left-clicking the mouse causes the tool action to take place. For example, selecting the eraser icon erases the area under the cursor according to the parameters selected in the tool options box (Figure 6).
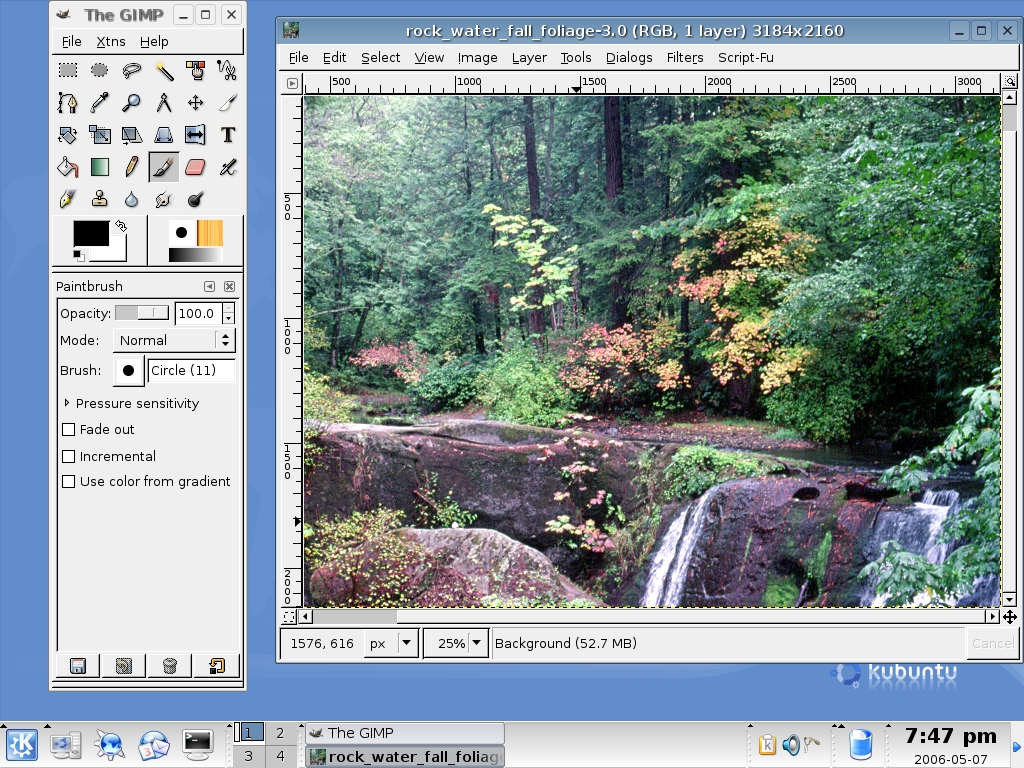
Figure 5. The GIMP with an Open Image
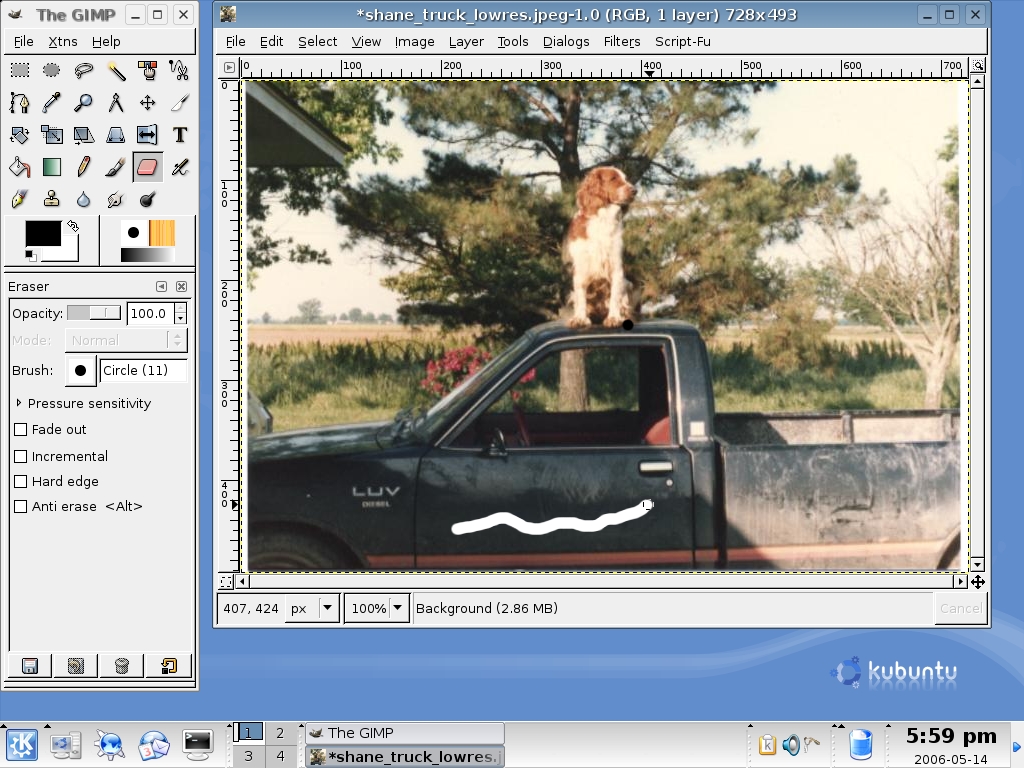
Figure 6. Using the Eraser
Space does not permit a full exploration of the features in The GIMP, so I point out those I have found particularly useful. First, in an open image window, select Tools→Color Tools→Levels. A new window opens (Figure 7). Look for the Auto button, click on it and the image color levels are adjusted automatically (Figure 8). Often this is all you need to do to improve a picture. If the Auto correction does not work, next to the Auto button is a row of eye dropper icons representing the black point, grey point and white points of the image. Use one of the eye droppers to select a “known” color point in the picture, and the picture adjusts accordingly. You can undo your changes by clicking on Reset, so experiment away.

Figure 7. The GIMP—Auto-Adjust, Before
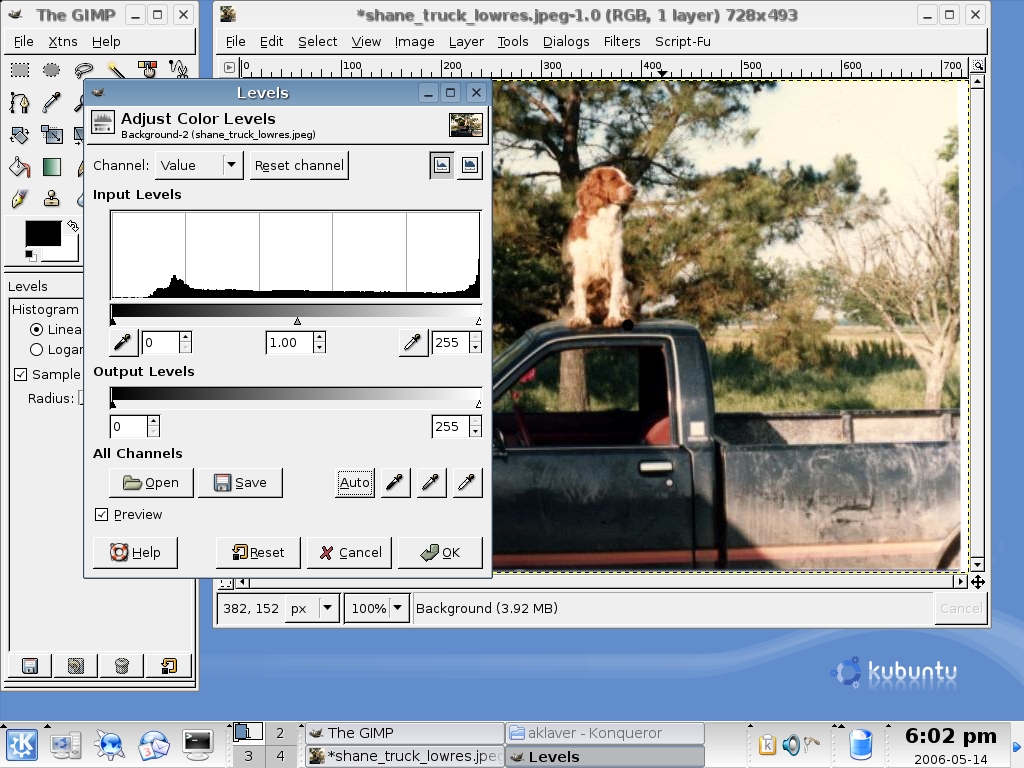
Figure 8. The GIMP—Auto-Adjust, After
This leads me to another often-used feature of The GIMP: Ctrl-Z—the undo command. The extent to which you can undo is set in the Preferences item of the File menu. The two main parameters are the minimal number of undo levels and the maximum undo memory. The first specifies the number of undos to save, regardless of memory usage. The second causes undo to drop items once they exceed the memory limit, except those exempted by the first parameter. The undo command has some other limitations; see the manual for a full rundown, but it does allow you to experiment with relative impunity.
This is good place to insert a practical tip learned in the school of hard knocks. Do not work with your original image. The first step when working with an image is to create a copy and work with the copy. That way, when you paint yourself into a corner or commit an unrecoverable act, you still have the original to start over with.
The real flexibility comes through the plugin architecture of The GIMP. The program comes with a series of default plugins, and you can extend these by downloading others (see Resources). Plugins can show up in many areas, so the best way to identify what is available is to use the plugin browser located in the Xtns menu item of the program window. One optional plugin I have found particularly useful is UFRAW (see Resources). It allows you to get around the 8-bit limitation current versions of The GIMP have on RAW files. Basically, it loads a RAW file into its own viewer at its native bitrate and allows you to adjust the image (Figure 9). After the image has been changed in the plugin, clicking OK mixes it down to the 8-bit format of The GIMP and opens a window for further work in The GIMP.
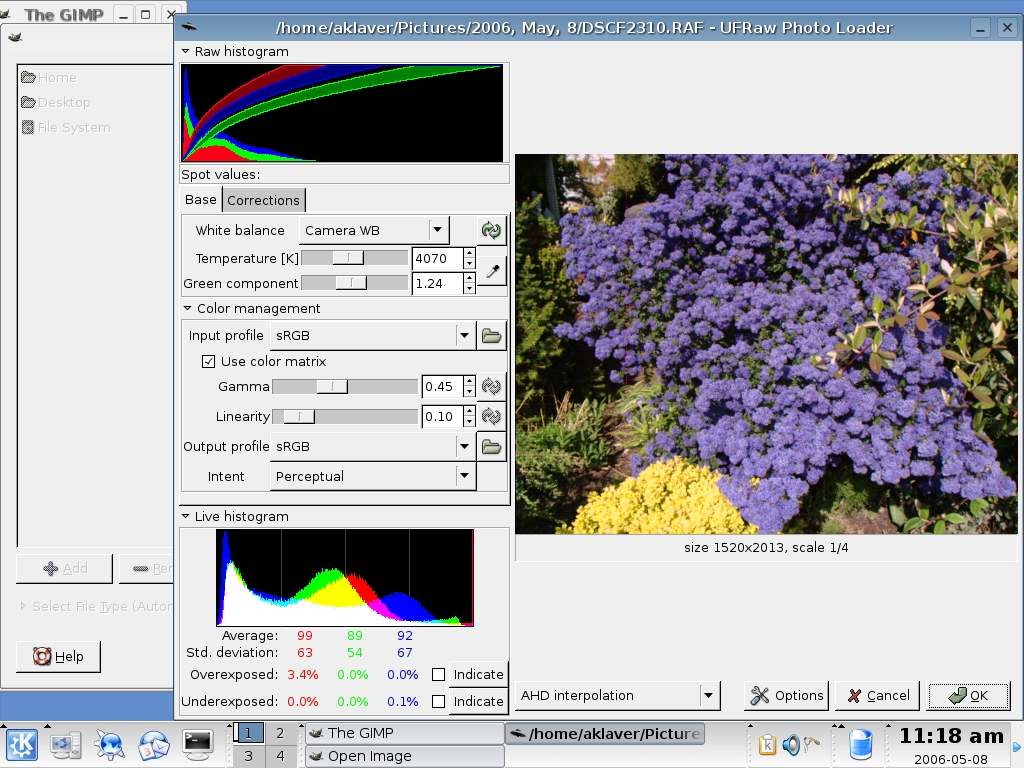
Figure 9. UFRAW Plugin for The GIMP
As mentioned previously, CinePaint is a fork of The GIMP. The program was developed to meet the needs of image retouchers in the movie industry. One of the requirements was the ability to work with high-resolution images. Consequently, CinePaint has native support for RAW images and other high-bit formats. The trade-off is the inability to use GIMP plugins. There is work in progress to correct this, but it is in the development branch of the project. Still, the program shares many features with The GIMP, so if you are looking for some fairly advanced editing of high-bit images, it is a simple step up (Figure 10).
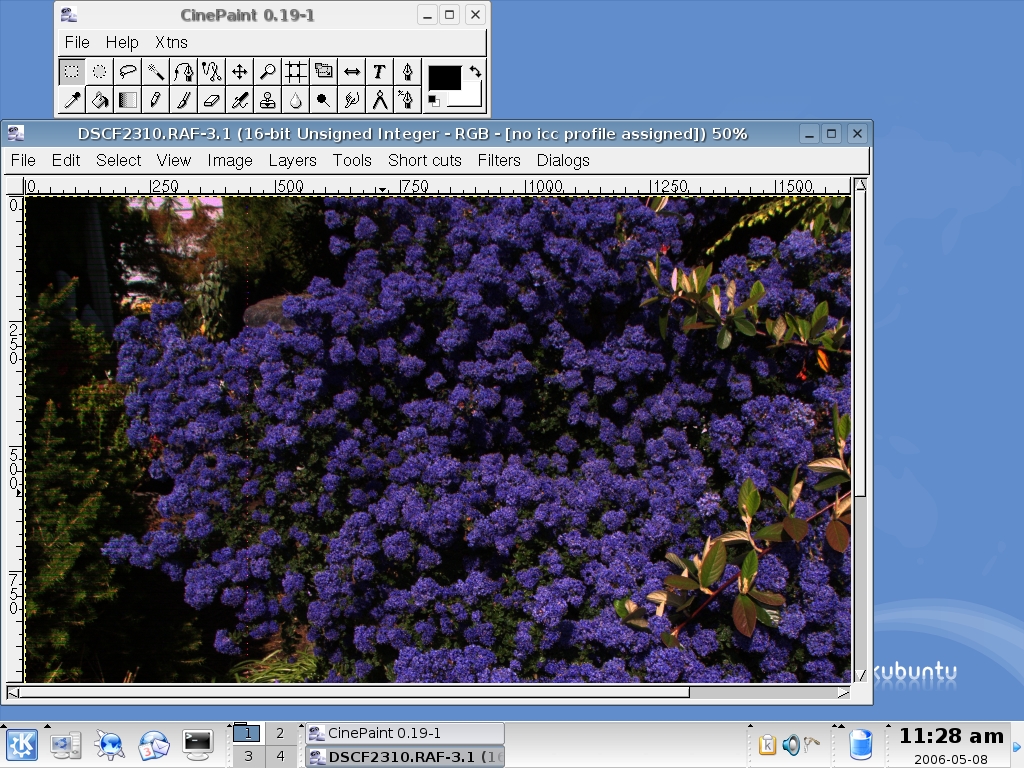
Figure 10. CinePaint with Same Image as Shown in Figure 9
It is possible for a relative beginner to work with digital images in Linux. The tools exist, and if not installed by default, are readily available. My personal work flow is to use XSane for scanning my print and slide collection, digiKam for bringing in images from my digital camera and The GIMP for retouching images. This article has touched on the basics of the programs explored. See the on-line Resources for a wealth of documentation for those who want to delve deeper.
Versions of Software Discussed in This Article
The GIMP 2.2.8
CinePaint 0.19-1
digiKam 0.7.2
F-Spot 0.1.3
Kooka 0.44
XSane 0.97
gimp-ufraw 0.5
The Lowdown on RAW files
RAW images are, in essence, digital negatives. They represent the uncorrected output of the digital camera sensor. As such, they contain more photo information than a processed JPEG. For instance, a RAW will have bit depth of 12–14 per color versus that of 8 for a JPEG. The result is an image that allows for more editing opportunities. The downside is that this information increases the size of the files, so fewer images will fit on a memory card.
Resources for this article: /article/9196.
Adrian Klaver is a Linux enthusiast with an interest in photography and a desire to make the former work with the latter.

