
Moving to Blog-City
One combination free/pay blog site available on the Internet is Blog-City.com. This site runs on a farm of Dell PowerEdge Blade servers, each with six dual-CPU blades running Red Hat Linux 9. Blog-City.com runs Java's JDK 1.4.x underneath BlueDragon (www.newatlanta.com/products/bluedragon). BlueDragon is the same ColdFusion Markup Language (CFML) application that runs MySpace.com. MySpace.com is the fifth largest Web site in the world.
Blog-City offers no static content. It dynamically constructs every page as it is requested by pulling it from a MySQL 4.1.x database that is replicated for both backup and administrative purposes. Blog-City uses MySQL 5.0 for a caching server to speed up access time, and it uses MySQL 4.1.x for all of the access and referrer statistics. These separate database servers keep the load for particular types of access from bogging down other types of access.
For Web service, Apache 1.3.x communicates with BlueDragon through mod_backhand (www.backhand.org/mod_backhand) with a Java library the company wrote and then released back to the community to make sure that the load balancing works properly for the application server. The mod_backhand module load balances only the Web server by default. Blog-City uses additional mini-farms to produce RSS feeds and answer search engine queries. There is also custom software for handling spam, denial-of-service attacks and a bug-tracking system. All in all, Blog-City is an operation that is spread over a number of time zones and multiple continents, just like its users.
Before trying to create a blog in Blog-City, try various URLs in the format of word.blog-city.com to see which ones are already in use (for example, kleekai.blog-city.com). Once you find something you think is available, go to www.blog-city.com (Figure 1) and find the Free Signup box. Enter the name you want to use for your blog in the text box. For the above example, you would enter kleekai. Next, click Submit to open the Create New Blog dialog box (Figure 2) and walk through the rest of the blog creation process.
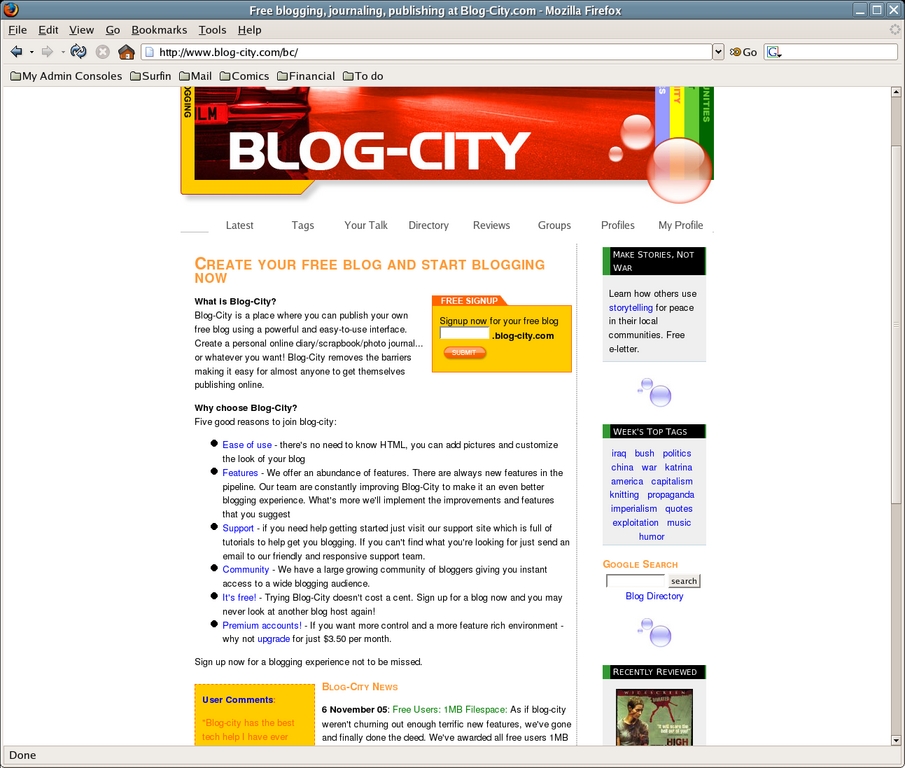
Figure 1. The Blog-City Home Page
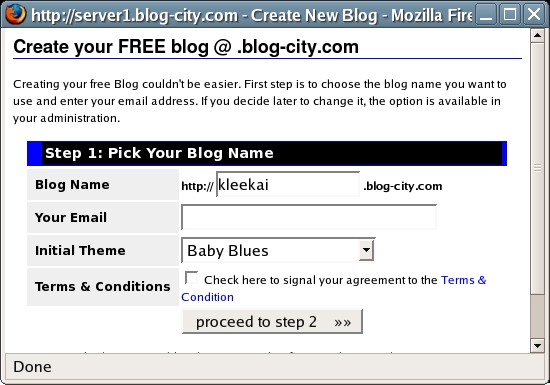
Figure 2. The Blog-City Create New Blog Dialog Box
Go to your blog's URL to log in to your blog for the first time. You also can click through one of the links on the creation page or click one of the links in your confirmation e-mail. When you do, you will see your initial blog page (Figure 3).
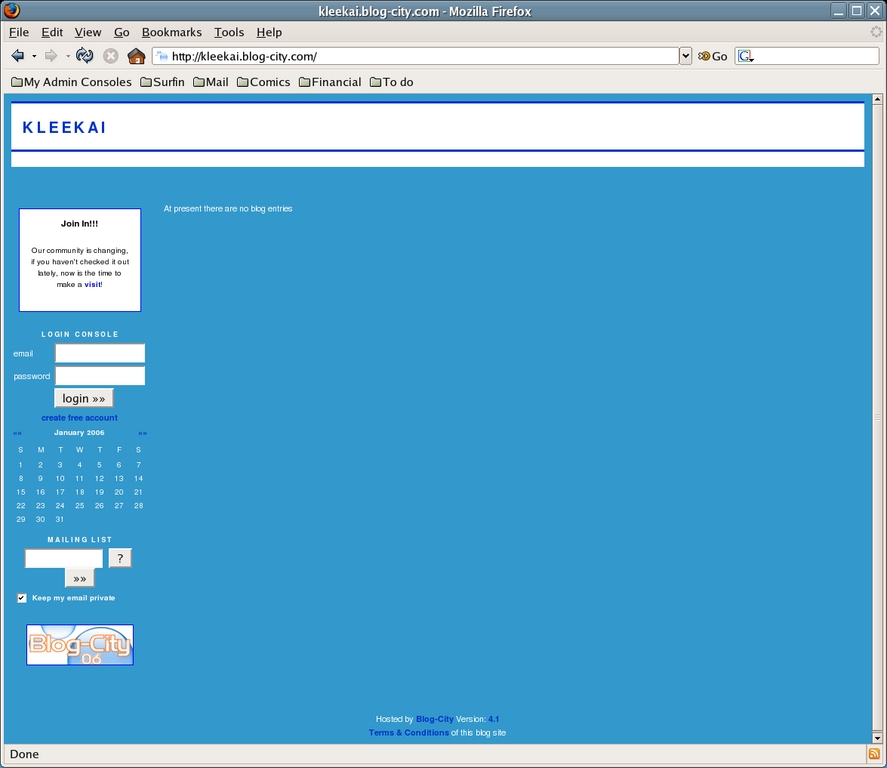
Figure 3. The Initial Klee Kai Blog Page
Enter your e-mail address and password in the Login Console text boxes, and then click Login. Once you reach the Main Administration page (Figure 4), bookmark it. This is where you need to go whenever you want to change something on your blog or check your statistics. Much like UNIX, there is often more than one way to get to a particular option through this interface. This article focuses on one path for each.
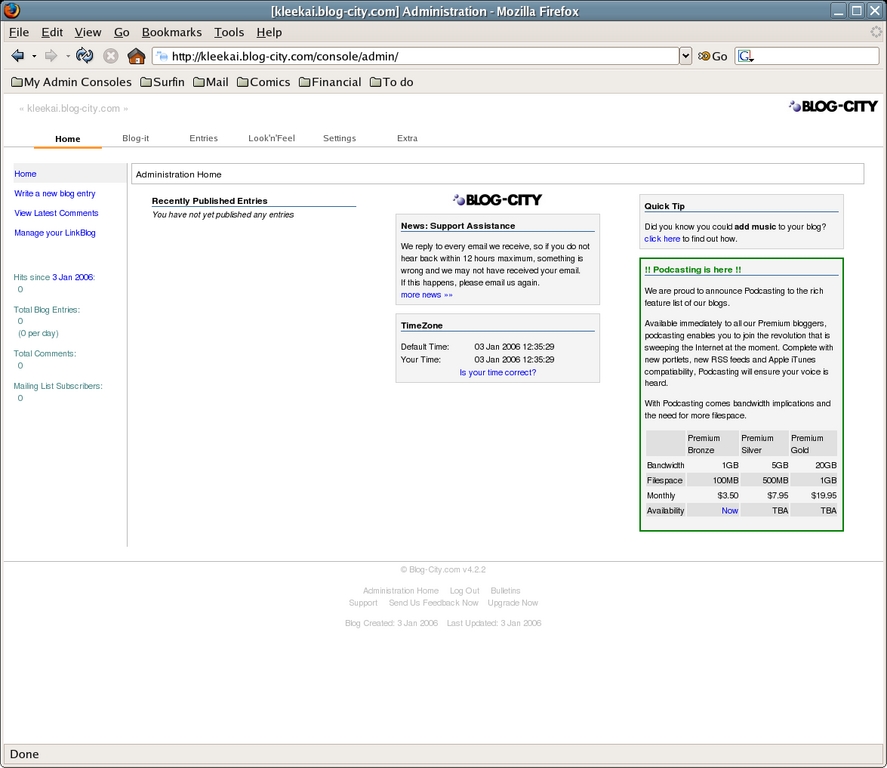
Figure 4. The Blog-City Main Administration Page
The tabs across the top of this page lead to:
Home: view Main Administration page.
Blog-It: create a new blog entry.
Entries: view and delete existing posts, and see how many times each item has been read and commented on. Blog-City supports a variety of entry types, including regular blog posts, reviews, photo albums, events and podcasts.
Look'n'Feel: control your blog's layout, themes, headers, menus and more.
Settings: alter your personal and blog settings.
Extra: access statistics, account details and more.
Along the left, what you see depends on whether you have a premium (paid) account or not. The top grouping of links leads to:
Home: the Main Administration page.
Write a new blog entry: the blog entry creation page.
View Latest Comments: the most recent comments made to your blog, the entry to which they were made, when they were made and the ability to delete, reply or report them as spam.
View Latest Trackbacks: premium-only—rather than replying in comments, some people create trackbacks, which are essentially replies made on their own blogs. By clicking this link and then Change Your Trackback Options, you can tell Blog-City to send you an e-mail whenever a trackback is made.
View Latest Statistics: premium-only—takes you to your Statistics page, where you can view the most-read blog posts, the most-commented, how many hits you have had per month and within a month, the browsers that have been used to access your blog, what pages referred people to your blog and which are your top podcasts.
View Podcast Statistics: premium-only—see which are your most popular podcasts.
Manage Your LinkBlog: a LinkBlog is a list of links with comments displayed for each. This link lets you create a LinkBlog and manage its contents. It also provides the URL and RSS feeds where you and others can find the content.
Beneath this group on the left are:
Hits since date: date is either when the blog was created or the last time you reset the hit counter. To reset the counter, click the date and then click OK. This action does not reset any other statistics.
Total Blog Entries: how many posts you've made on your blog, and a statistic of how many posts that makes per day.
Total Comments: how many comments people have posted.
Mailing-List Subscribers: how many people have signed up to receive e-mail notifications when you put up a new post. Click through the link to see non-anonymous subscribers.
There are many more items in the Main Administration page, including:
Recently Published Entries: the last five blog entries you published.
Entries not yet published: entries you saved as drafts rather than publishing.
My Notes: any notes you have created (go to Extra -< Your Notes to do so).
News: the most recent News posting from the Blog-City staff.
TimeZone: your local time for you to check.
Quick Tip: a tip that may tell you how to do something you didn't know you could do.
Additional information: includes pricing and availability of new features, such as podcasting.
You'll find additional options related to RSS, posting by e-mail and more by clicking the Settings tab. Also, note the link to your own blog in the upper-left corner. At any time, you can click this link to view your own blog. Clicking through here makes sure that your test views aren't counted among your viewer statistics, which is a nice way to make sure they don't get artificially inflated.
Most people want to get their blog looking the way they want it before they start to enter content. To do this, click the Look'n'Feel tab to change to the Main Blog Layout page (Figure 5). Here, you see a visual representation of your layout with labels in place. Those that are clickable are items you can change. Those that aren't are for premium accounts.
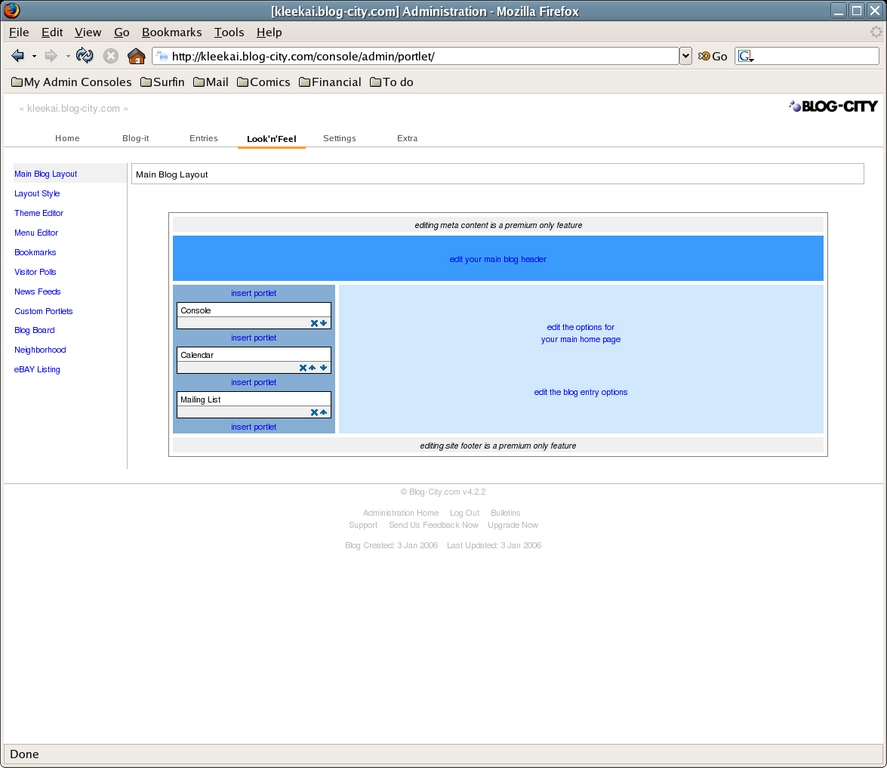
Figure 5. The Blog-City Main Blog Layout Page
The links along the left of this page are:
Main Blog Layout: the layout chart you're looking at now.
Custom Home Page: premium-only—lets you design a new layout chart completely from scratch.
Layout Style—lets you choose how the page should be laid out from a list of templates. Premium users get many more layout options.
Theme Editor: lets you change your page's theme.
Menu Editor: premium-only—lets you create menus to appear on your site that can be used for navigation purposes.
Bookmarks: lets you create bookmarked links and organize them.
Visitor Polls: premium-only—lets you create polls to be added as portlets.
News Feeds: premium-only—lets you set what RSS feeds to subscribe to, and then display it in a subset page (such as kleekai.blog-city.com/newsfeed), or in a portlet.
Custom Portlets: premium-only—lets you create and manage portlets of your own using the HTML editor window.
Blog Board: lets you access your Blog Board (portlet where users can leave quick messages or chat) content, clear it out or set delays on when comments will appear.
Neighborhood: premium-only—lets you create a subpage (such as kleekai.blog-city.com/neighborhood) that contains a list of other blogs you track. You can mark this page to be linked off of your main page.
eBAY Listing: premium-only—lets you show the latest items for sale in particular categories or by particular users.
The links within the chart are:
Edit the blog's META data: premium-only—opens a window letting you set the META tags for your blog.
Edit your main blog header: opens a window (Figure 6) that lets you edit the top of your blog page. Start by changing the Page Title, which you probably want to make a bit more expressive than just the single-word term in your blog's name. Mark how you want the header to behave in the drop-down list box, and then below the formatting buttons, enter the rest of what you would like to appear on the top of each page. This box and its WYSIWYG formatting tools essentially will be the same no matter where you're modifying content for the site. If you prefer to work with raw HTML, click the Source button on the top left. If you want to see the changes, click Save Details and then, on the main page, click the blog name to open your blog as discussed earlier.
Edit the options for your main home page: opens the Home Page Options dialog box, which lets you set particular behavior features for the blog.
Edit the blog entry options: opens the Edit Blog Entry Options dialog box, which lets you set behaviors for all of your blog posts.
Edit your main blog footer: premium-only—opens the Blog Footer window, letting you set what appears at the bottom of every blog page.
Insert Portlet: portlets are the fancy widgets along the side of your blog. Click Insert Portlet to tell the administration console that you want to insert a new portlet at the exact position you chose, and it opens an Insert a new portlet dialog box. If you want to move a portlet up or down, click the up or down button in its box within the chart. To remove a portlet, click the X in its box. Premium subscribers have a much longer list of portlets they can use than free subscribers do.
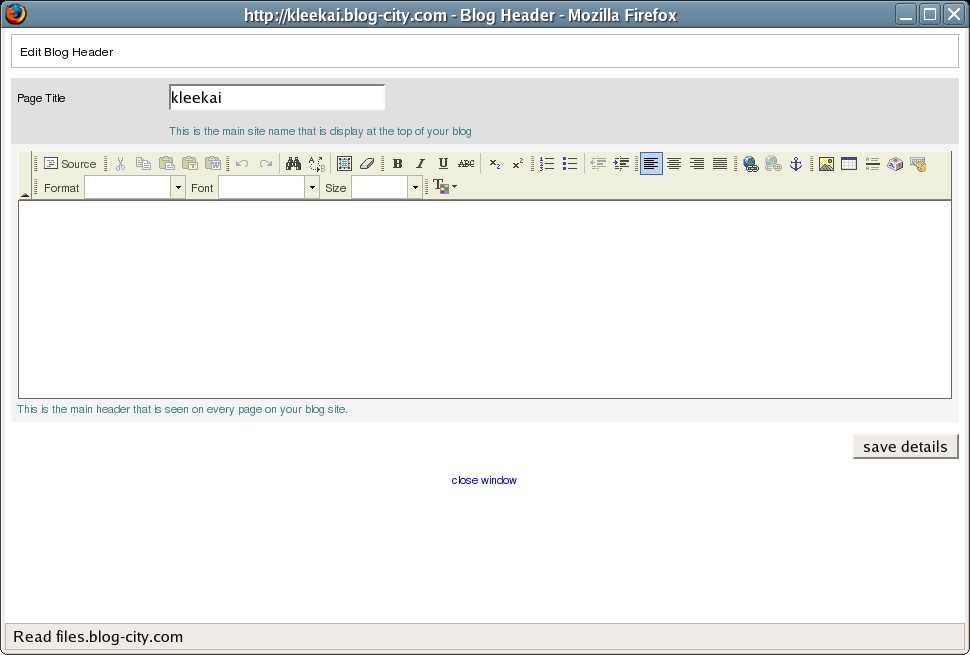
Figure 6. The Blog-City Blog Header Page
Because so many people like to customize blog themes, it's worth discussing how to do so in Blog-City. Choose Look'n'Feel -< Theme Editor to access the proper page. Here, you can preview existing themes available to all Blog-City members by going to the Community Themes section and choosing one of the themes in the list, or you can click the right or left arrows to cycle through the list of themes. If a theme appears as only a white box, it is available, there is simply no preview. When you find a theme you want to use, click Use This Theme. Then, in the Save Theme section above, click the check box for Make this theme my live/public theme, and click Save Current Theme. Load your blog and you will see the new theme has been put into place.
If you want, you can choose a theme to use as a base and then edit its contents. To do this, follow the instructions just given, but then in the Your Themes section, choose the theme from the drop-down list box and click Load Theme. Once you have done this, you will see all of the styles used in this theme along the left of the Theme Editor. Click Preview Theme to see how the theme looks. When you mouse over the preview, you will see pop-ups that show you which of the style tags applies to which of the sections.
To edit a style setting, click it on the left to bring up the CSS settings for the particular style (Figure 7), and then alter the settings. On the left you can type in things directly, or you can use the selectors on the right to choose from listed options. Once your changes have been made, click Update & Preview to see the preview pane with your alterations in place. You can then click Return to edit style to go back and change what you just did.

Figure 7. The Blog-City Theme Editor Style Page for the Jazz Cafe Theme's .pagetitle CSS Setting
When you are finished changing the theme, click save/load at the top of the style listing. This action takes you back to the Theme Management main page. Change the name of the theme in the Current Theme Name, click the box to make the theme your live/public theme, and then click Save Current Theme. When you update your blog, the new settings should be in place.
Now that you have your blog set up, you probably want to post something. Click the Blog-It tab at the top of the page to go to your Create New Blog Entry page (Figure 8), and then fill in the fields:
Title: the title for the post.
Summary: you either can fill this in explicitly or let the software do it for you by pulling out the first 250 characters from your post. As you might imagine, this can end up trailing off in the middle of a sentence.
Link to entry: lets you tell Blog-City to use a specific URL instead of using the title as the URL, which is handy if you need to be able to spell out the link to people later.
The content box: enter the content for your blog.
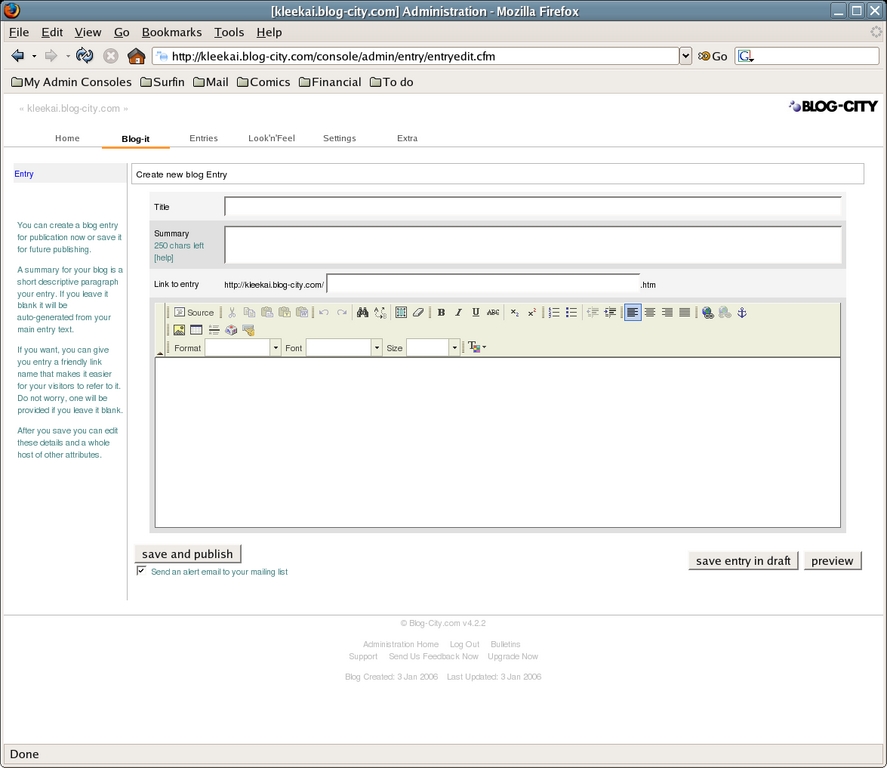
Figure 8. The Blog-City Create New Blog Entry Page
When you're finished, click Save and publish if you're finished with the post and ready to put it up, click Save entry in draft if you're not ready to publish it, or click Preview if you want to see what the post will look like. If you have people signed up for your mailing list (look in Extra -< Mailing List to see how many members—people can sign up right from your front page), you want to have checked the Send an alert e-mail to your mailing-list check box before posting. If you saved the entry to draft, you can post it later by clicking the Home tab, looking in the Entries not yet published section and clicking the entry title, and then clicking Publish Entry to the left of the content.
Click the Entries tab to add other types of content. An Entry generally refers to a blog post, but you also can post reviews, photos and Events. The administration section changes as often as the Blog-City staff adds new features, so be sure to explore it as time goes on, so you don't miss something new and cool.
Happy blogging!
Dee-Ann LeBlanc (dee-ann.blog-city.com) is an award-winning technical writer and journalist specializing in Linux and miniature huskies. She welcomes comments sent to dee@renaissoft.com.
