
Quick! I Need a Book!

Editors' Note: The following article originally was to be included in the authors' book, Multitool Linux: Practical Uses for Open Source Software, published in June 2002 by Addison-Wesley.
Question: My boss called and said that he took the one PDF copy of our new product's technical design manual, and his teenager made a navel ring out of the CD-ROM. We built the specs on our intranet and all the text and illustrations are there in HTML, but he says he needs another PDF document by tonight or I'm fired. Are there any solutions?
Answer: You betcha! Linux offers many document conversion tools and a great many powerful document-generating tools and languages, from old standbys like TROFF and texinfo to tools like TeX and LaTeX, but these are well documented elsewhere. There's one lesser known tool, a bit narrower than TeX, that's perfect for your trifling problem: HTMLDOC.
This may seem like an odd section to include in a chapter about how to use HTML to make on-line or publication-ready documents, but we have our reasons. HTML is a simple markup language that has, over time, been somewhat corrupted from its original design intent. The idea behind markup languages is to provide a taxonomy of content. The markup says what is contained in the tags. How you render that is up to the browser or presentation tool. Unfortunately, when Tim Berners-Lee defined HTML, he included a few tags that described appearance instead of content, and the folks at Netscape and Microsoft each took this unfortunate trend further.
At this point, HTML is a mishmash of content markup tags (like the UL, LI, P and BLOCKQUOTE tags) and appearance tags (like I, B and FONT). This happened because as the Web became more and more publishing and marketing driven, the desire to control layout and appearance become too strong for software companies to resist.
Unfortunately, this means that HTML doesn't really control the layout and appearance nor does it properly indicate the significance of content. There are superior alternatives to HTML, such as a document specification language called the Structured General Markup Language (SGML). HTML is actually written in SGML. An SGML specification is called a Document Type Definition, or DTD. HTML is a single SGML DTD, and there are other DTDs, each with its own purpose. There are DTDs for purchase orders, insurance claims, banking transactions and so forth. One of the buzzwords you hear all over the place these days is XML, which is a subset of SGML.
One of these document types is called Docbook. Docbook is an SGML DTD designed to mark up technical documentation. There are tools for Linux (Debian is a particularly good distribution for this, by the way) that will convert a Docbook conformant DTD into PDF files, HTML files, man pages, Postscript, LaTeX and, indeed, almost any other document format you could possibly want. Docbook makes a much better choice than HTML because it separates content markup from rendered appearance. This is the same separation that XML and XSL aim to bring to the Web.
HTMLDOC is a rather neat little program that converts one or more HTML files into a single HTML file, into Postscript or into Adobe Acrobat's Portable Document Format (PDF), a sort of Postscript on steroids.
Before we go over the use of HTMLDOC, we should briefly mention where you may get programs for Linux that will read, display and print PDF files. Given our stated prejudices for Free Software, you might be surprised to hear us suggest that you might want the download the Adobe Acrobat Reader from Adobe.com. But the truth is PDF is their invention, so their product is "the horse's mouth" when it comes to rendering documents in that format. You will probably want to have this if you plan to use HTMLDOC, so you can be certain that the results you get are the results you want. You may be reasonably sure that if your PDF looks good in the Linux version of the Acrobat Reader, it will look good to users on Windows and Macintosh machines as well. The Adobe Acrobat Reader is free in the "free beer" sense, but the source code is not available.
Acrobat Reader is not your only choice, however. GNU Ghostscript can display and print PDF files, and you can get that from GNU.org. KDE's Konqueror browser/explorer also will display PDF quite nicely. It is available from KDE.org, and both it and GNU Ghostscript are Free Software and open source.

Figure 1. PDF File Viewed in Konqueror
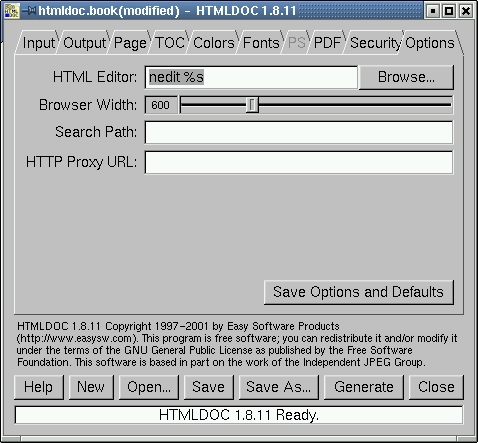
So you do have a number of choices for PDF viewing software. Now, on to HTMLDOC itself. When you start HTMLDOC under X and without arguments, you get a screen that looks like Figure 2.
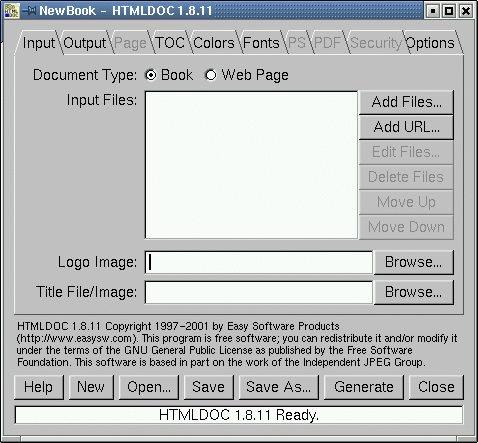
Figure 2. HTMLDOC in X
This should be a fairly familiar user interface by now. You have a series of dialogue boxes, each of which may be brought to the fore by clicking one of the little file-tabs along the top. You start at the Input tag. We'll quickly walk you through each of the tags with a little bit of info on each. As we do so, we also will walk you through building a PDF file out of HTML fragments. What could be more exciting?
Input: This is the dialogue shown in the screenshot in Figure 2. Here you specify the files that will go into your target document when you generate it. Note the buttons on the right: you may add an HTML file, or you may specify a network URL. That's right, you can make PDF files out of on-line content. Be careful about those pesky Copyrights!
We'll use the file-based content. Here's what you see when you click the Add Files... button:

This is a fairly standard file browse-and-select screen. We have selected the HTMLDOC.html file.
After we selected all we were going to select for the example, our Input tab looked like Figure 4.

Figure 4. The Input Tab
We have told HTMLDOC that we want to generate a book, and we have told it which files we are going to use to do it. Let's move on to the next tab.
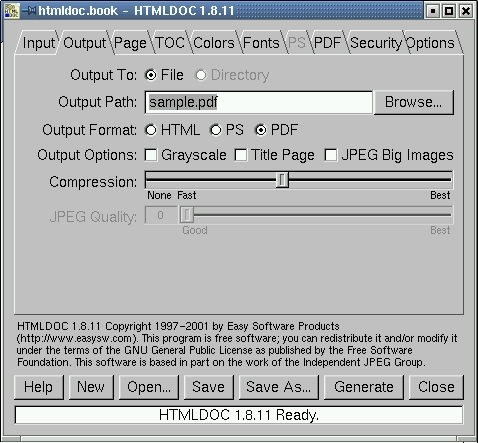
Output: Here we specify the output we are going to produce, in this case a PDF file. We could have specified PostScript here, but we are only covering PDFs. You can explore the other aspects on your own.

Figure 5. The Output Tab
As you can see, you have some choices about how much compression to apply to the output document and how images are to be converted and stored. Different options will grey-out (become unavailable) depending upon your selections. For example, if you had selected HTML or PS output, you could have specified a directory instead of a file, in which case the output would have been written to multiple files, starting at that directory.
Page: This let's you define a number of attributes for the generated pages. If you had selected HTML, this tab would be greyed out and unavailable. But we are, of course, only talking about PDFs.

Figure 6. The Page Tab
As you can see, you can select a page size. We suggest leaving this at the default setting of Universal, which will cause the page to (theoretically) adapt to the local defaults. In other words, your document should print equally well on 8 1/2" x 11" letter-size paper in the United States and A4 paper in the UK. You may select a specific page size of Letter or A4 if you know for certain your document will be used only for the one type.
You may also specify whether the pages should be formatted for two-sided printing or whether the orientation should be landscape instead of portrait. The last section allows you to specify headers and footers on each page by selecting from a range of predefined header and footer elements. The pick lists correspond to their page positions. In other words, the list on the left selects the element displayed on the left-hand side, the center list selects the center and the right selects the right. We find the default selections pleasing, so that's how we left it here.
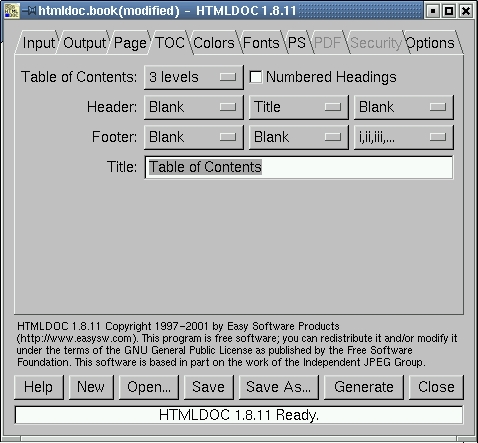
TOC: This allows you to define the Table Of Contents (TOC) should you choose to have one.

Figure 7. The TOC Tab
First of all, you pick a number of Levels, which selects how many levels of HTML header tags (the <H1> through <H5> tags) will be examined to "pluck out" text for the table of contents. You may choose from none to four levels. We chose three. You are also allowed to set different headers and footers for TOC pages. We stayed with the defaults. You can also set a title for TOC pages. We also stayed with the default here.
What exactly does HTMLDOC pluck out for the Table of Contents? Well, basically it takes the text between "Hn" tags, starting with H1 tags and going down however many levels you specified on this screen. If you aren't using the section heading HTML tags, you won't get much of a table of contents.
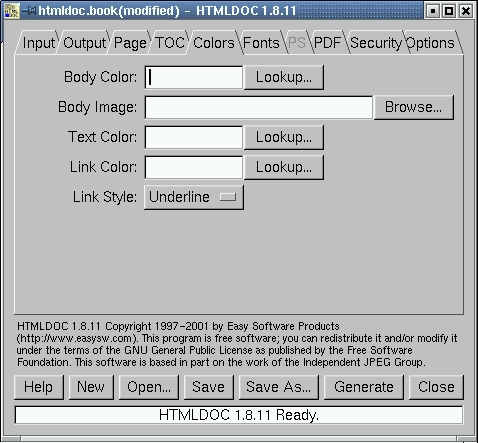
Colors: This tab allows you to set colors for certain parts of the document. The defaults are nice. We didn't set anything explicitly, as you can see in Figure 8.

Figure 8. The Colors Tab
Fonts: The fonts screen allows you to set fonts and sizes. Generally, the defaults look good. We want to call your attention, however, to one detail of this screen. One of the things publishers still seem to want, even in this age of electronic documents, is a double-spaced manuscript. As you probably know, HTML doesn't cooperate in this. With HTMLDOC, however, it can. Not only can you coerce a monospace font such as Courier, but you can set the line spacing to 2, producing a double-spaced manuscript from HTML.
In any case, here's what the dialogue looks like. This is another one where, in general, the defaults look best.

Figure 9: The Fonts Tabs
PS: We thought about extending the joke that "we are only covering PDFs" by including the PS (PostScript) tab screen, but since we actually don't have the room to cover PostScript fully, we won't do that. This tab is greyed out when you're outputting HTML or PDF documents.
PDF: This dialogue controls some options in the generation of PDF files. We stuck with the defaults throughout, but let's cover a few highlights. Take a look at the screenshot in Figure 10.

Figure 10. The PDF Tab
You may select the PDF format version. We chose the default setting of Acrobat 3.0 (PDF version 1.2). You will notice the slide show options are greyed out. If you want a book that turns its own pages, use Acrobat 4.0 (PDF version 1.3) and those options will become available.
You may set an "effect" on page turns. This will cause the change from one page to the next to be accompanied by some sort of special effect, ranging from a fade to an iris in. These effects are not, however, supported by all of the PDF reader software out there. It is also cool for about three page changes, then you want to kill the person who made the document. We would advise you to avoid this, even (or perhaps especially) when making business presentation documents.
Caution! Rant ahead. Between page change effects and all the tedious nonsense one can inject into a presentation with tools like PowerPoint, meetings have become a place where technical workers are made to suffer through a sort of "arms race of the technologically maladapt". You can practically keep score as marketroids make their presentation: "Ah, he found his way to that menu." If you are in marketing, remember, engineers and programmers want you to get to the point. And bring free stuff. We are suckers for free stuff. It is management people who want to see Executive Coloring Books. End of rant.
The other choices here control some aspects of document layout. The Page Mode selection affects how the Acrobat reader behaves when the document is opened. In Document mode, the reader opens showing only the document in the workspace. In Outline mode, the document appears on the right and an outline (basically chapter titles, the text that appeared between <H1> tags in your source HTML) of the document on the left. In Fullscreen your document will fill the entire screen and no other windows or menus will appear. Don't panic! Pressing the escape key will bring back the Acrobat Reader menus, toolbar and window controls. Note that these behaviors may not be supported by other PDF readers.
The Page Layout governs how the pages appear in the work space on the Acrobat Reader screen. When you choose Single, one page appears and when you move to the next page it is redrawn aligned to the top of the workspace. You will never see two pages on the screen at the same time in this mode. When you choose Two Column Left you will see two pages side-by-side in the work space. The first page of the document will appear on the left hand side of the workspace. Scrolling is continuous and pages are not forcibly aligned to the top of the screen. Two Column Right works the same, except the first page will appear on the right hand side of the work space. These behaviors are certain to work only on the Adobe Acrobat Reader.
Finally, the First Page selection governs what page will come up first on the reader. Page 1 will select the title page if you have one, the Table of Contents if not. If you don't generate a table of contents, it will open on the first page of the first chapter. TOC will bring up the Table of Contents if you have one. Chapter 1, the default, will bring up the first page generated directly from your input HTML.
Security: The Security tag works only on PDF documents. PDF allows you to encrypt your document. We actually have no idea how strong this encryption is or if it really is encryption at all. If you are were truly curious, you could delve into the source code for HTMLDOC and find out. Personally, we wouldn't rely on PDF encryption if you are engaged in a major money-laundering scheme or espionage against a superpower. Since the protection appears to consist of a simple password, we don't see how the protection can be very strong. The security screen is shown in Figure 11.

Figure 11. The Security Tab
Basically, you can password restrict any of the capabilities you see here, preventing users from printing, modifying, annotating or copying the document. The resulting file cannot be read by Konqueror, and our copy of GNU Ghostscript returned this message:
          **** The PDF input file uses encryption and cannot be processed.
          **** Please get and install the patch available from
          **** www.ozemail.com.au/~geoffk/pdfencrypt/pdf_sec.ps
          **** On a Debian system you can also install the gs-pdfencrypt
          **** package from the non-US distribution. It can be found at
          **** ftp://nonus.debian.org/pub/debian-non-US
So you can work around this. In any case, since the encryption appears to depend on a very simple password, our guess is that it is quite easily broken. It would keep people from casually ripping off your content, however. If you have material you don't want Joe Average User printing hundreds of copies of and giving away, then this might be for you. We left encryption off.
Options: This is our last dialogue tab. Congratulations on making it through.

Figure 12. The Options Tab
Frankly, we didn't mess with anything here. One thing you may have to use is proxy settings if you are actually retrieving HTML and are behind an HTTP proxy firewall.


So, there is a very brief walk through the configuration of HTMLDOC. We have left a great deal for you to explore. We certainly are not done yet, however; we haven't shown you how to actually generate your PDF file. First of all you should know that you can use those buttons all along the bottom of the screen to load, save and clear all of the settings we discussed. It would really be a lousy program if you had to re-enter all those settings if you fixed a typo in your HTML and had to regenerate your document. The New button will reset all settings to their defaults and let you start a new setup. The Open button will let you read a saved set of settings.
The Save button will save any changes you have made to the current settings. The Save As button will save the current settings under a different name. We don't think we need to kill more trees with screenshots of the dialogue boxes for each of those activities. You are clever people; you can work it out.
Now, we'll show you the magic. The Generate button is where the action happens. When you hit this button, the HTML files will be read, the output layout will be generated and the file written. There's a nice little progress bar for each of these activities. When you are all done, you'll get this exciting announcement:

Finally, the Close button will close the application.
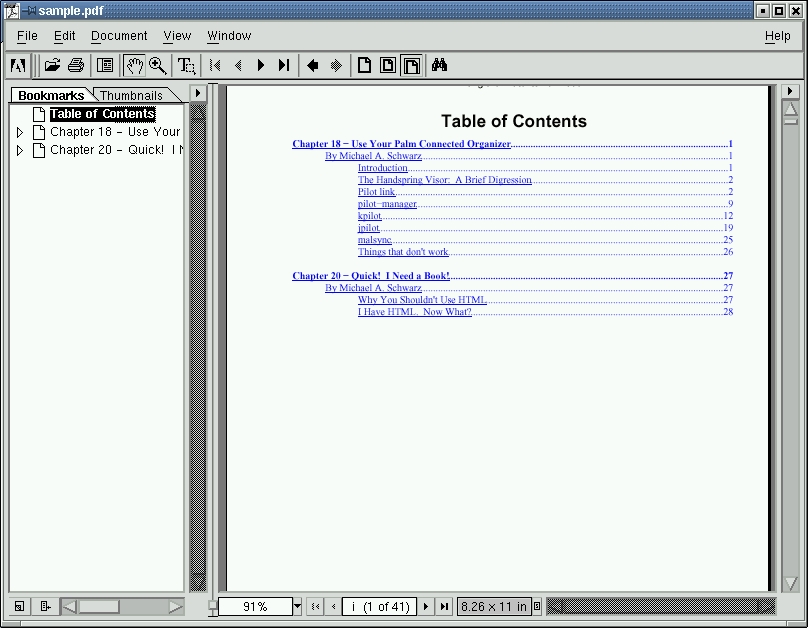
Figure 14. The Book We Made
So, what have we got? We have a tool that will allow you to make publication-quality documents from simple HTML documents. In many ways, it is much easier to produce impressive documents this way than with "more advanced" tools, like word processors.
You now can, using this tool, pull together HTML from your own system, network and the Internet and use it to generate a local web service (by producing HTML output), a printable document (using PostScript) or an e-book of sorts (using PDF output).
We still encourage you to widen your horizons and look at Docbook, SGML, DSSSL and associated technologies to produce documents of greater utility and wider portability, but HTMLDOC is handy tool to have in your arsenal.
Michael Schwarz, Jeremy Anderson, Peter Curtis and Steve Murphy are the authors of Multitool Linux: Practical Uses for Open Source Software.
email: mtl@multitool.net
email: mtl@multitool.net


