
Netatalk, Linux and the Macintosh
Unix workstations, PCs running Windows 3.x/95/NT/Linux, FreeBSD, and other systems must be able to communicate seamlessly and share data whether they are in an engineering, business or home environment. More than one type of computer platform existing on the same network is a fact of life. Fortunately, with programs such as Netatalk it's easy to get Apple Macintosh computers and Linux systems to coexist and share resources. This article describes what Netatalk is, what it does, where to get it, and how to install, configure and test it. We also included a short technical description of how Netatalk works.
If you have a Mac and want to run Linux, you can use MkLinux (see LJ #31, page 55). If you have a PC and want to run MacOS, you can use Executor (see LJ #19, page 40). However, if you have both machines and want to let each do what it does best, use Netatalk. Netatalk lets you keep the operating systems separate while enabling you to transfer files and share printer resources. I paid my dues to wear a Linux T-shirt—I love Linux. I also love my Mac—for entirely different reasons. Since I use the two systems for different purposes, it is often necessary for the two to communicate.
You can transfer small files with a floppy disk (a.k.a. SneakerNet). When the file size exceeds the 1.44MB floppy limit, however, the solution is FTP—fast and efficient, but cumbersome when moving multiple directories containing subdirectories. The ideal solution is to mount the Linux file system on the Mac desktop, then drag and drop files and directories as you do under the normal MacOS. This is exactly the solution that Netatalk gives you. You can also use Netatalk to send print jobs to the Linux printer from the Mac, thereby sharing other system resources.
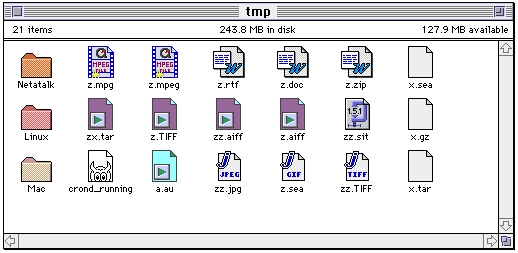
Figure 1. Linux Files and Directories on the Macintosh Desktop
At the time of this writing, the most recent version of Netatalk is 1.4b2. Don't let the beta suffix scare you; Netatalk is stable, especially for the PC platform. Current development emphasizes new platforms (see Table 1) such as FreeBSD and Solaris—hence the beta appellation. The primary Netatalk host site and directory is: ftp://terminator.rs.itd.umich.edu/unix/netatalk/. From that address all you need to do is download the single file netatalk-1.4b2.tar.gz. You can uncompress and untar Netatalk with normal Linux commands such as:
gunzip netatalk-1.4b2.tar.gz
tar xvf netatalk-1.4b2.tar
or:
tar xzvf netatalk-14b2.tar.gz
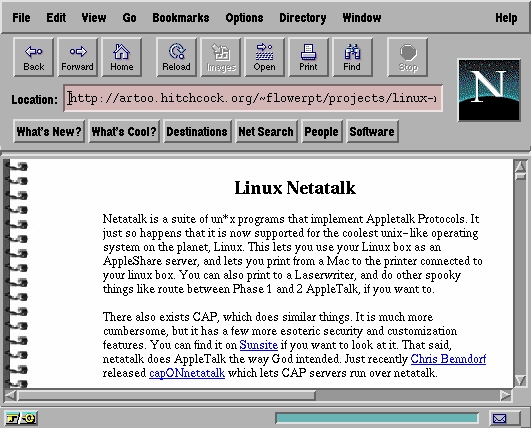
Figure 2. One of Several Netatalk Web Pages
Note that prior to the release of Linux 2.x, installation of Netatalk required that the Datagram Delivery Protocol (DDP) software be integrated into the kernel. Now that DDP is part of the Linux kernel, all you need to do is make sure that you turn on Appletalk during kernel configuration. Do this by specifying the kernel configuration option as:
CONFIG_ATALK=y
You should always use the README files that accompany the Netatalk distribution as the ultimate authority for installation instructions. Since Netatalk is offered for several platforms, as shown in Table 1, there are actually several different README files. Each operating system has its own defaults for file locations. For this reason, the Makefile that comes with Netatalk provides user-defined variables that you can change to alter the installation and ultimately the file structure. For the Linux installation, I used the default values and the installation worked flawlessly.
The DESTDIR variable in the Makefile points to the directory where binaries are placed. The default for this directory is /usr/local/atalk and does not need to be altered. Note that setting DESTDIR causes all installation-relative pathnames to be set correctly. The other important variable is MANDIR, by which you can specify the location of the man pages. The default for this directory is /usr/man, and again does not need to be changed.
Installation to make all binaries begins with the ubiquitous command:
make
To install the binaries at the root of the source tree, type:
make installPretty easy! Now let's go on to configuration.
First, add the contents of the services.atalk file that accompanies the Netatalk distribution to your /etc/services database. The lines to add will look like this:
rtmp    1/ddp   # Routing Table Main Protocol
nbp     2/ddp   # Name Binding Protocol
echo    4/ddp   # AppleTalk Echo Protocol
zip     6/ddp   # Zone Information Protocol
Next, assuming that your physical connection between Linux and the Mac is Ethernet, edit the /usr/local/atalk/etc/atalkd.conf file so that it contains the single line:
eth0This line is automatically changed when the system is placed into service. In my case, when I actually connected to the network, the eth() line (the file configuration) was changed by the Appletalk daemon to:
eth0 -phase 2 -net 7540-7544 -addr 7544.197 \
        -zone "Outer-Limits"
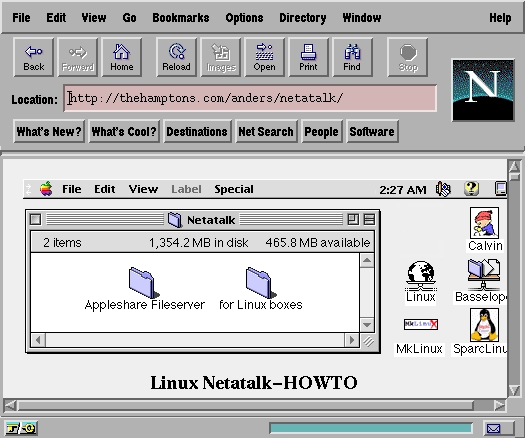
Figure 3. Your eyes aren't deceiving you—It's a web site devoted entirely to Netatalk.
The Netatalk distribution provides three sample configuration files that need to be configured:
AppleVolumes.default
atalkd.conf
papd.conf
These files are normally placed in the /usr/local/atalk/etc directory, and contain instructions in the form of comments to aid the user. You can get additional information from the man pages. We have already discussed the configuration of atalkd.conf during Appletalk configuration.
You specify which files and/or directories are made accessible to the Macintosh by editing the file /usr/local/atalk/etc/AppleVolumes.system. Here's a sample configuration is shown in Listing 1. This configuration shows that the directories /tmp and /pub are available to the network. On the Macintosh a Linux directory appears as a folder with a name you assign: in our example tmp and pub. The directory /home/user/X is also accessible from the Macintosh under the name XWindows. You specify that an exported directory will have a different name on the Mac, using a different second parameter than the Linux directory name, such as /home/user/X XWindows.
We advise caution when deciding which directories to export to the network. The Netatalk daemon afpd (Apple Filing Protocol Daemon) creates additional files for housekeeping. Specifically, in each of the exported directories, two invisible files (that is, files beginning with a period character) are created, namely, .AppleDesktop and .Appledouble. These files are created in all Linux directories and subdirectories that are exported and accessed. If you export an entire file tree using the / character, you will find your Linux system cluttered with .AppleDesktop and .Appledouble files.
Also, note that the file /usr/local/atalk/etc/AppleVolumes.system contains a list of file extensions. This list is not necessary, but the extensions provide a means for displaying the appropriate icons on the Macintosh desktop. For example, in Figure 1 you can see that the files z.mpg, z.rtf and zz.jpg are displayed with the correct Macintosh application icon.
You can make a printer connected to your Linux system available to the Appletalk network by using papd (the Appletalk Printer Access Protocol Daemon), which is started when booting Linux. The papd daemon accepts printing requests from the Macintosh and spools the job to the local line printer. To configure the printer, edit the file /etc/local/atalk/etc/papd.conf to look like this:
# Sample papd.conf file to allow
# printing on the Linux printer over
# the Appletalk network.
MyLaserW:\
        :pr=lp:op=cg:
The syntax used in this file is the same as used in the Linux printcap file that you can find on most Linux systems in /etc/printcap.
The file rc.atalk located in the directory specified by the variable ETCDIR (normally /usr/local/atalk/etc) must be executed at startup. To do this on a Linux system on which the rc files are to be kept in one place, copy /usr/local/atalk/etc/rc.atalk to the /etc/rc.d directory or make a symbolic link. Then, using a text editor, insert the following line in the rc.local file:
sh /etc/rc.d/rc.atalk
For more information about this script, consult the Netatalk man pages.
Now for the fun part—go to the Macintosh Chooser and select AppleShare as shown in Figure 4. The Linux system host name will appear on the desktop just like any other Appletalk-compatible machine on the network. There is an 8-character password limit on the Mac, so if your Linux password is more than 8 characters, change it.

Figure 4. Use the Mac Chooser to Mount the Linux File System
Technically speaking, Netatalk is an implementation of the AppleTalk Protocol Suite. It contains support for EtherTalk Phase I and II, DDP, RTMP, NBP, ZIP, AEP, ATP, PAP, ASP and AFP, as shown in Figure 5. DDP is now provided by the new Linux 2.x kernel. The atalkd daemon implements RTMP, NBP, ZIP and AEP, which is the AppleTalk equivalent of Unix routed (route daemon). ATP and ASP are implemented as libraries. The papd daemon allows Macs to spool to lpd (line printer daemon), while pap allows Unix machines to print to AppleTalk connected printers. Also provided in the suite is psf, which is a PostScript printer filter for lpd designed to use pap. A PostScript reverser, psorder, is called by psf to reverse pages printed to face-up stacking printers. Last and perhaps most important is the afpd daemon that provides Macs with an interface to the Unix file system.

Figure 5. The Netatalk Stack
There are extensive and well-written man pages that accompany Netatalk, such as aecho.1, afpd.8, atalk.4, atalkd.8, atalk_aton.3, getzones.1, hqx2bin.1, macbinary.1, megatron.1, nbp.1, nbplkup.1, nbprgstr.1, nbp_name.3, pap.1, papd.8, papstatus.1, psf.8, psorder.1, single2bin.1, unbin.1, unhex.1 and unsingle.1.
Netatalk is a stable program that makes moving files between the Mac and Linux as easy as drag-and-drop. In fact, you can install Netatalk on almost any Unix-like platform and take advantage of the power it provides. Now you really can have the “power to be your best” by using both the Mac and Linux.

