
Ubuntu 10.10 Maverick Meerkat in Amazon EC2
Last year, I wrote an article on how to run Ubuntu 9.10 in the Amazon Elastic Cloud (LJ, May 2010). But, the folks over at Canonical haven't been sitting on their laurels during the past year. They're so proud of the work they've done on their latest release, 10.10 Maverick Meerkat, they're offering a free 55-minute trial of it in Amazon's EC2 cloud. The best part is you don't need an Amazon EC2 account or a credit card. The wizards at Canonical have tied this in to their Launchpad software collaboration platform, so all you need is an account on launchpad.net to “get your cloud on”.
What you get for your 55 minutes is actually a fairly nice demo package. Your cloud instance consists of the equivalent of a 1.2GHz processor, 2GB of RAM, 160GB of disk space, full sudo-enabled root access and a fast local connection to the Ubuntu mirrors. The Ubuntu folks even provide a few preconfigured applications from which to choose, like WordPress, MoinMoin or Drupal 7. The really great part about this setup is that it renders most of my previous article obsolete—it's really easy to set up and launch your instance.
Before you log in to the “Ubuntu in the Cloud” Web site, you should generate a set of SSH keys on the client (or set of clients) you'll use to administer the cloud instance, and upload those to your account on launchpad.net. This is a prerequisite, because Amazon EC2 generally allows SSH access only via SSH keys. If you already have a launchpad.net account, it's easy to do. Just go to your account page, click on SSH Keys, then click on the green plus icon to add a new SSH key. Then, paste your key in the field. If you've never generated any SSH keys before, there's a great tutorial on the Ubuntu Wiki (see Resources). If you don't have an account on launchpad.net, you should. It's where you can file bugs and enhancements to Ubuntu and other projects, and it's easy to register for one.
Once you've uploaded an SSH key to launchpad.net, point your Web browser at the “Ubuntu in the Cloud” link (see Resources), and click the Try Ubuntu 10.10 button. You'll be prompted to enter your launchpad.net credentials if you're not already signed into Launchpad. Once your credentials are accepted, you'll see the options for your free EC2 instance. Select what you'd like to try (Base install, WordPress, MoinMoin or Drupal) and whether to use byobu (a screen-based terminal wrapper—I highly recommend it). After that, just agree to the Terms of Service, and click the big orange Launch button to start your instance. You'll see an Ubuntu logo with a little status indicator blinking away while the instance is built.
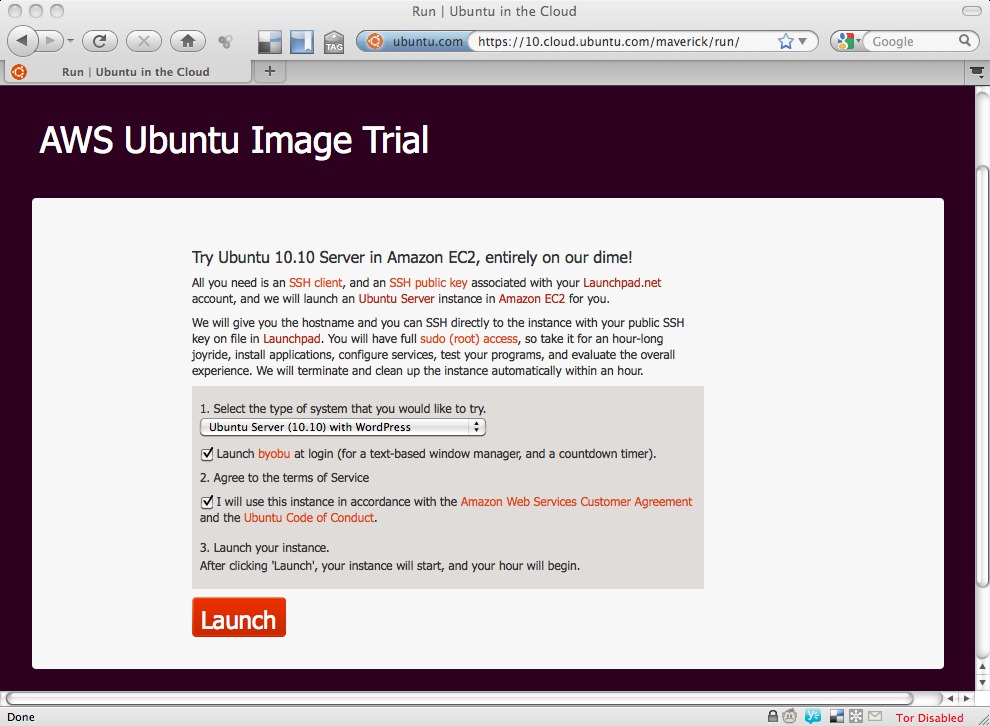
Figure 1. Launching Your EC2 Demo Instance
When the instance is ready for use, you'll see a countdown clock in your browser with the remaining time and the IP address of your instance. You can SSH in to your instance by logging in as “ubuntu@<ip address>”, or if you selected one of the preloaded software packages, like WordPress, the Web page will display a link you can use to get to the admin interface of your package.
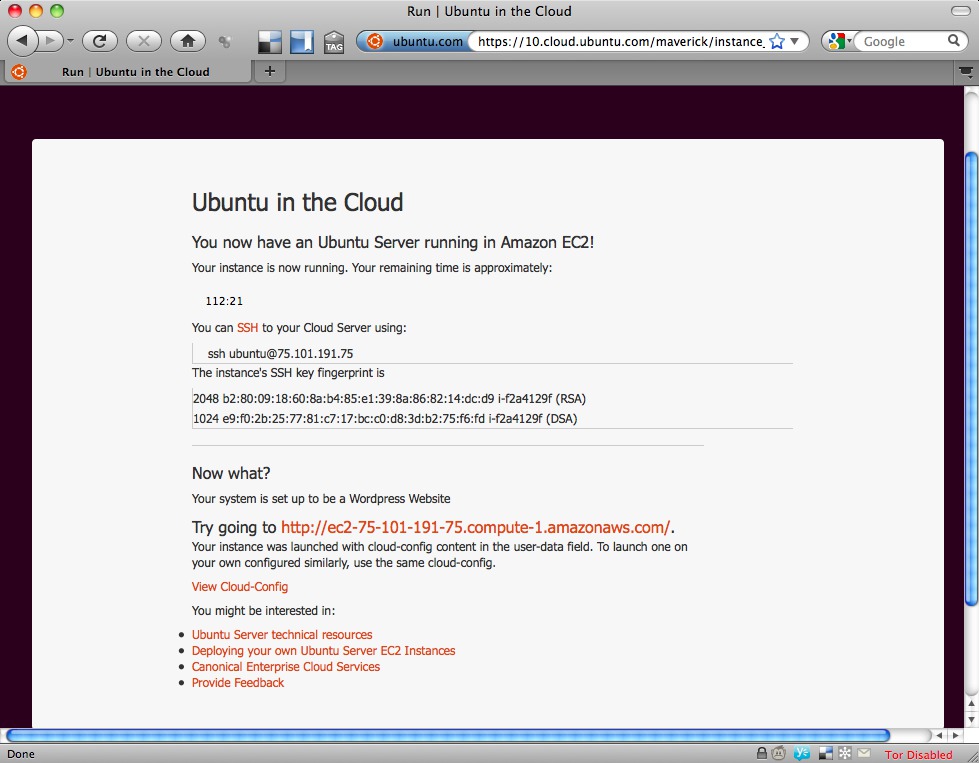
Figure 2. How to Access Your EC2 Demo Instance
Now that your instance is on its feet, you can do anything you'd do with an Internet-connected Ubuntu server—so long as you are done within an hour. You can configure it as a Web server, play around with LDAP, make it a mail server, or even fire up a honeypot (so long as you're done with it in an hour). Anything you can apt-get in Ubuntu, you can install in this server, so play with things like Apache, Squid or whatever servers you like. This is a full Ubuntu installation in Amazon's data center, so be sure to test-drive it!
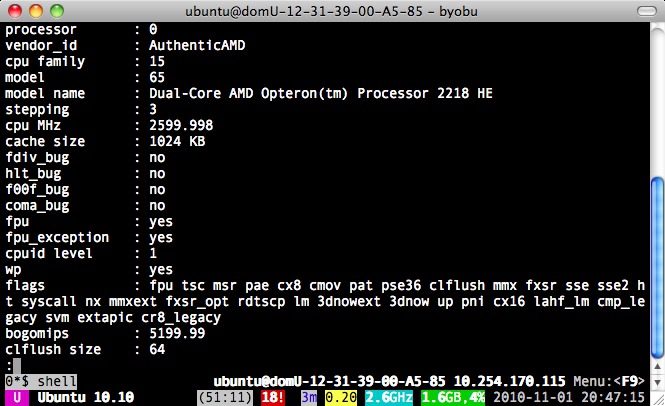
Figure 3. SSH'd to my new instance, with /proc/cpuinfo displayed. Note byobu at the top of the window.
The preconfigured software is pretty good as well. In this case, when I provisioned the instance, I selected the WordPress option, and I was pleasantly surprised to see WordPress ready to go. All I had to do was click the URL presented by the Web page once the instance was ready and answer a few WordPress-specific questions like “What do you want the site name to be?” and “What's the admin password for your WordPress site?” I literally had posted my first blog post to the instance within a couple minutes of it being live.
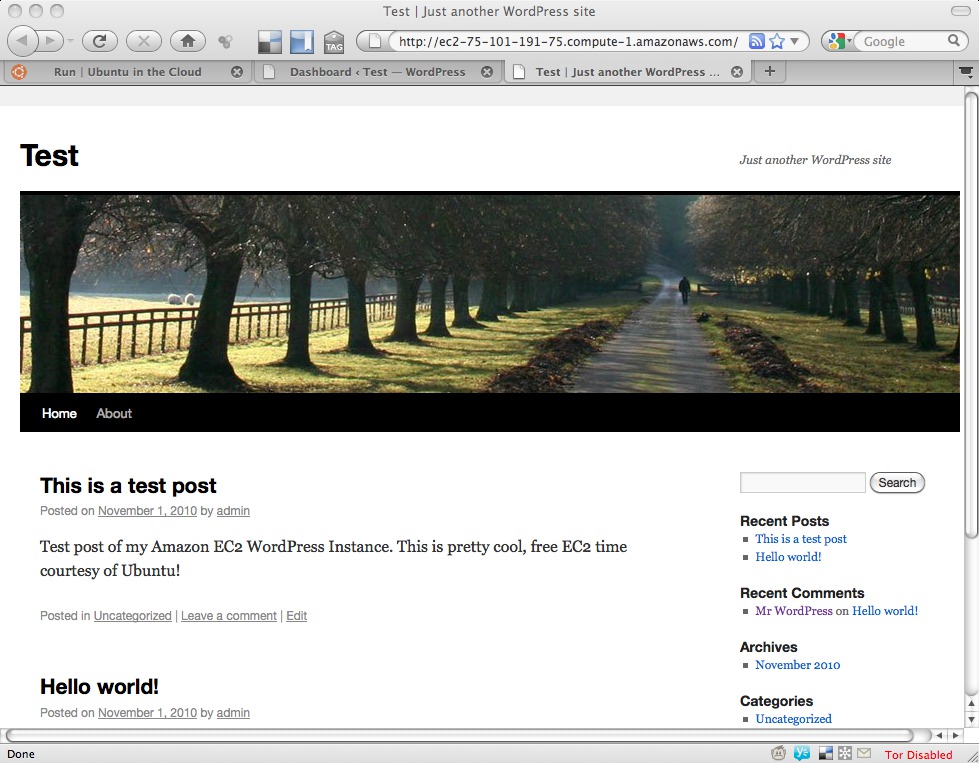
Figure 4. WordPress is live! Easiest installation I've ever done.
As your hour winds down, if you're SSH'd to the instance, you'll get a “wall” message ten minutes before your hour is up, another when there are five minutes remaining, and a final message at the one-minute mark. Once your time is up, the instance “powers off”, and the Amazon cloud automagically cleans up and deletes your instance, as well as any data you put there, so make sure you're not putting anything important there. It truly is a demo service.
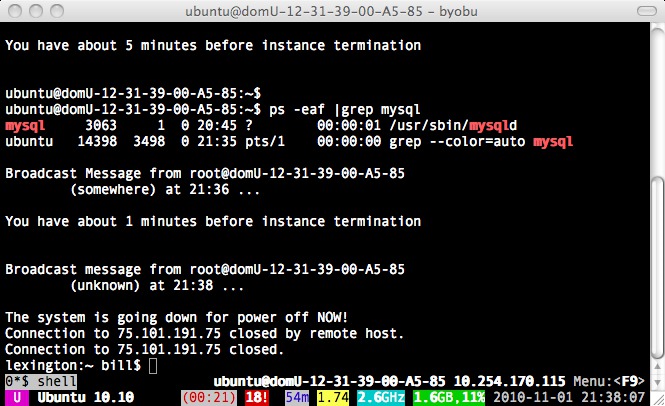
Figure 5. Oh no! I'm melting—my EC2 instance, shutting down and deleting itself.
So, you've played with your server, installed other software, and monkeyed around with the preconfigured stuff on your server. You're hooked and want your own server, but you don't want to pay the full instance price of approximately $70 a month to run a server full-time. Not to worry! Amazon has you covered. It now offers a completely free “micro” server, called the AWS Free Usage Tier, just for new users. The micro instance isn't quite as powerful as the free test-drive server, but it's absolutely serviceable for a blog, mail server or other light-duty application. Another possible (and very useful) application would be an off-site Nagios or other monitoring instance. See Table 1 for a comparison of the free test-drive instance vs. the micro server.
Table 1. Free Test-Drive Instance vs. Free Micro Instance
| Free Test Drive Instance | Free Micro Instance | |
|---|---|---|
| CPU | 1 EC2 Compute Unit (1.2GHz Xeon) | Burstable to 2 EC2 Compute Units |
| Disk | 160GB of local instance storage | 10GB of Amazon elastic block storage |
| Memory | 2GB RAM | 613MB RAM |
Unlike the free test-drive server (which is only 32-bit), the micro instance can be either 32-bit or 64-bit, though the low RAM of the system doesn't really make that distinction very useful. The Free Usage Tier includes some other useful services as well, measured on a monthly basis:
750 hours of EC2 running Linux/UNIX on a micro instance (this is the server mentioned above).
750 hours of elastic load balancing plus 15GB data processing (in other words, you can load-balance between servers, if you've spun up another instance, but you'd pay for that second instance).
10GB of elastic block storage (includes one million IOs, 1GB of snapshot storage, 10,000 snapshot get requests and 1,000 snapshot put requests).
15GB of inward bandwidth and 15GB of outward bandwidth aggregated across all AWS services.
5GB of Amazon S3 storage, 20,000 get requests and 2,000 put requests.
25 Amazon SimpleDB Machine hours and 1GB of storage.
100,000 requests of Amazon Simple Queue Service.
100,000 requests, 100,000 HTTP notifications and 1,000 e-mail notifications for Amazon Simple Notification Service.
The service does require a credit card to get started, but you're billed only if you exceed the usage outlined above. It's a great way to start learning how cloud services work and what they can do for you.
If you've never tried any cloud services before, or if you've been leery of giving your credit card to a provider, try the free Ubuntu 10.10 server. It's a great way to dip your toe in the water at no cost to you. Likewise, if you're familiar with the cloud, but you've not run Ubuntu before, give this test-drive a shot. You'll get enough time with Ubuntu to decide whether you want to pursue it further, but you won't have to take the time to spin up a machine of your own. Just let Canonical pick up the tab for the demo.
Once you've made up your mind as to whether the cloud is for you, take a look at the new AWS Free Usage Tier. For a personal server, sandbox or off-site monitor, the micro instance is up to the challenge, and the price definitely can't be beat.
Resources
Ubuntu in the Cloud (Official Ubuntu/EC2 demo site): https://10.cloud.ubuntu.com
Try Ubuntu 10.10 Server in the Cloud for Free (blog announcement): ubuntu-smoser.blogspot.com/2010/10/try-out-ubuntu-server-1010-on-ec2-for.html
Launchpad Software Collaboration Platform: launchpad.net
How to Generate SSH Keys under Ubuntu: https://help.ubuntu.com/community/SSH/OpenSSH/Keys
Running Ubuntu 9.10 under Amazon's Elastic Cloud: www.linuxjournal.com/magazine/running-ubuntu-910-under-amazons-elastic-cloud
Amazon EC2 Pricing: aws.amazon.com/ec2/#pricing
Amazon EC2 Free Usage Tier: aws.amazon.com/free
Bill Childers is an IT Manager in Silicon Valley, where he lives with his wife and two children. He enjoys Linux far too much, and probably should get more sun from time to time. In his spare time, he does work with the Gilroy Garlic Festival, but he does not smell like garlic.

